
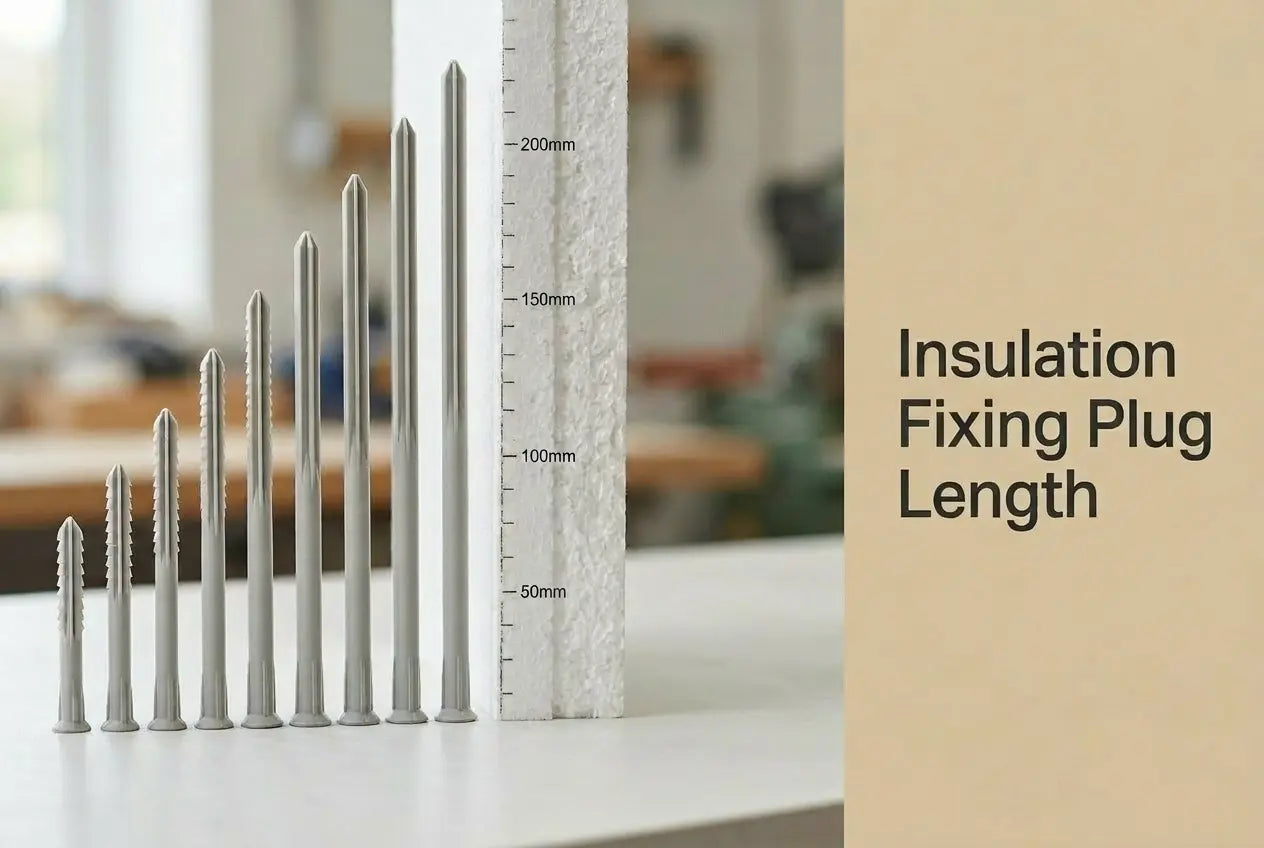
Plug length is the one mechanical-fixing decision that has a published answer. Klimas prints a selection table for the LTX-10 that maps every sleeve length to the board thickness it takes, and the nine lengths Renders World stocks in the insulation fixing accessories range each sit on their own row of it. This page works that table rather than a rule of thumb, because the mapping is a manufacturer document and no arithmetic licenses a substitute for it.
How to Calculate LTX Plug Length: Ld = tfix + ttol + heff
Any insulation fixing plug length calculator UK installers rely on resolves to one line from Klimas: Ld = tfix + ttol + heff, with a 30 mm anchorage depth under ETA-16/0509 deciding whether the expansion zone reaches sound masonry. Each term is measured rather than assumed, and the third one is where published guesswork usually goes wrong.
- tfix — insulation thickness. The nominal board depth on the specification, taken per elevation, since reveals and soffits routinely run thinner than the main wall.
- ttol — sub-crusts. The adhesive layer plus any existing plaster. Klimas builds 10 mm of adhesive into every cell of its selection table already, and treats an old plastered wall as a further 20 mm on top.
- heff — anchorage depth. 30 mm in ordinary substrates and 50 mm in aerated concrete, both stated in the LTX-10 technical data rather than derived.
The formula gives a minimum, and the selection table gives the stocked length that satisfies it. Working the formula on its own tends to land between two sleeves; reading it against the table settles which box to order and confirms the arithmetic at the same time.
What Counts as ttol on a Retrofit Wall
Existing plaster consumes plug length without contributing anything to embedment, which is why Klimas splits its whole table into new-build and old-building halves. The old-building columns assume 10 mm adhesive plus 20 mm of old plaster, and the effect is consistent across the range: every length carries a board 20 mm thinner on a plastered wall than on a clean one. Measure the skim in several places at survey, because it is rarely uniform across an elevation and the thickest reading is the one that governs the order.
Why Anchorage Depth Changes on Aerated Concrete
Autoclaved aerated concrete is substrate use category E in the assessment, and it takes a deeper grip: heff rises from 30 mm to 50 mm and the drilled hole from 40 mm to 60 mm. That 20 mm goes straight onto the length calculation, so every figure in the table drops by 20 mm on AAC — a 140 mm sleeve that takes a 100 mm board on brick takes an 80 mm board on aerated block. Drill it in rotation only, since impact mode breaks the inner structure that carries the pull-out load.
Plug Length by Board Thickness: The Klimas Selection Table
Figures below are maximum insulation thickness in millimetres, read from the LTX-10 product data sheet for standard substrates in categories A to D. Subtract 20 mm from any cell for aerated concrete.
| LTX length | New build, surface mount | New build, immersed with cutter | Over 20 mm plaster, surface | Over 20 mm plaster, with cutter |
|---|---|---|---|---|
| 70 mm, the reveal length | 30 | 50 | 10 | 30 |
| 90 mm | 50 | 70 | 30 | 50 |
| 110 mm | 70 | 90 | 50 | 70 |
| 120 mm, the 80 mm board match | 80 | 100 | 60 | 80 |
| 140 mm | 100 | 120 | 80 | 100 |
| 160 mm | 120 | 140 | 100 | 120 |
| 180 mm | 140 | 160 | 120 | 140 |
| 200 mm | 160 | 180 | 140 | 160 |
| 220 mm, the deep-retrofit length | 180 | 200 | 160 | 180 |
Two readings of that table are worth carrying to the order. An 80 mm board on clean masonry is a 120 mm sleeve, not a 110 mm one — the 110 stops at 70 mm — and a 200 mm board reaches the top of the stocked range only with a cutter, since the surface-mounted route for 200 mm is the 260 mm length Klimas publishes but this shelf does not carry. Where a specification lands on 200 mm boards surface-mounted, that is a conversation with the system holder before pallet quantities are set.
Reading the Table Against a Stocked Length
Renders World stocks nine of the ten lengths in the sheet, from 70 mm to 220 mm, and the graphite EPS insulation boards on the shelf run 10 mm to 200 mm. Line the two up and most domestic retrofit work resolves to two boxes: a main-wall length and a reveal length. The common error is ordering one SKU for both, which leaves a 140 mm sleeve driven into a 30 mm reveal board and a 70 mm sleeve nowhere near the substrate on the main wall.
How Immersed Mounting Changes the Plug Length You Need
Recessing the head into the board face is the cheapest length you will ever buy. Every cell in the table gains 20 mm of board capacity when the plug is immersed rather than surface-mounted, and the point thermal transmittance falls from 0.001 W/K to 0.000 W/K — so the same box covers a thicker board and contributes nothing to the U-value calculation.
Klimas names two parts for it: a plastic cutter that forms the recess, stocked here as the EPS hole cutter, and a polystyrene disc that closes the spot, stocked as grey EPS plug caps. Deciding this at quotation stage rather than on the scaffold is what makes it useful, because the choice changes which box is ordered, not just how it is fitted.
Key Takeaway: Ld = tfix + ttol + heff, with 30 mm anchorage on ordinary substrates and 50 mm on aerated concrete, and 10 mm of adhesive already inside every figure in the Klimas table. On a clean wall an 80 mm board takes the 120 mm sleeve and a 100 mm board takes the 140 mm; add 20 mm of old plaster and both step down one board size, or step up one sleeve.
How to Verify Plug Length on Site Before You Order
The table settles the specification and the substrate settles the table. BBA Agrément Certificate 13/5018, covering the Atlas/Aval EPS system, is explicit that characteristic pull-out values depend on substrate type, and that site-specific pull-out tests must be carried out where the age and condition of the substrate are not equivalent to the wall used to establish the values in the ETA. Victorian solid brick, lightweight block and previously rendered elevations are the usual triggers.
- Drill a pilot at each substrate type. Mixed properties — a brick shell with a later block extension — need a check in each, at the specified length, looking for firm material through the full anchorage depth.
- Clear the hole the way the sheet asks. A back-and-forth stroke at reduced speed, repeated four times, lifts the drillings that would otherwise sit under the expansion zone, and in solid materials the hole runs at least 10 mm deeper than the anchorage.
- Seat the washer against the board. The sheet asks for the body to be embedded so the washer faces the insulation, then the pin driven home in even blows; a pin already driven is never struck again.
- Record the results with the substrate description. Testing across several elevations rather than one convenient corner is what makes the figures usable when the length is signed off.
Drilling technique and hollow-substrate handling in full belong to the step-by-step fixings installation guide, which carries the method at working depth.
How Many Boxes of Each Plug Length to Order
Length decides which box; density decides how many, and the two are ordered together. The LTX-10 sheet recommends a minimum of 6 fasteners per m² in the middle of a wall and 8 per m² in corner areas below 15 m, rising to 8 and 10 per m² above 15 m, with its own note that the recommendation does not replace the thermal insulation design. Where a layout drawing exists, order to the drawing — the zone-by-zone method behind it sits in the fixing pattern and spacing guide.
- Box coverage: 200 ÷ 6 = 33.3 m² at the field minimum, 200 ÷ 8 = 25 m² at the corner minimum.
- Per 100 m² below 15 m: 100 × 6–8 = 600–800 plugs, ÷ 200 per box = 3–4 boxes before any allowance for misdrilled holes.
- Pack break: boxes hold 200 pieces up to the 200 mm length and 100 pieces at 220 mm, so compare per plug rather than per box across that step, or the price looks like it has doubled.
One scope check belongs on the purchase order. BBA 13/5018 names the Wkret-MET LTXΦ8 among its approved supplementary anchors — the 8 mm variant — while the plugs stocked here are the Ø10 LTX-10 on a 60 mm plate. The certificate permits other fixings only where they are demonstrated to have equal or higher pull-out strength, plate diameter and plate stiffness, and that demonstration is the system holder's to make, not an assumption to carry into a specification. Confirm the anchor against the certified system before ordering at scale.
Written by Mariusz Saja. Technically reviewed by Rafał Wyrzykowski. Last reviewed Aug 2026.
FAQ — Plug Length, Embedment and Substrate Limits
Which plug length fits an 80 mm board?
The 120 mm sleeve on clean masonry, reading the new-build surface-mount column of the Klimas table. On a wall carrying 20 mm of old plaster the same 80 mm board moves to the 140 mm sleeve, or stays on the 120 mm if the head is immersed with a cutter. The 110 mm length stops at a 70 mm board and does not cover 80 mm in any of the four cases.
What embedment does the LTX-10 need in UK masonry?
30 mm in substrate categories A to D, which covers concrete, solid clay and calcium silicate brick, hollow and perforated units and lightweight concrete blocks. Aerated concrete takes 50 mm. Those are the heff values in the product sheet's technical data and they are the third term of the length formula, so a change of substrate changes the box.
Do I add the adhesive bed to the calculation myself?
Not when reading the selection table, which already includes a 10 mm adhesive layer in every figure. Add it only when working the formula from scratch, and add a further 20 mm where old plaster stays on the wall. Foam adhesives compress thinner than cementitious beds, but no figure for that is published in the documents read here, so the 10 mm basis stands.
How many boxes does a typical elevation need?
Work it from area and zone rather than from property type:
- 80 m² of field-zone wall at 6 per m² = 480 plugs, or three boxes.
- The same area at the 8 per m² corner minimum = 640 plugs, or four boxes.
- Reveals and soffits take a separate, shorter SKU and are counted by linear metre rather than by wall area.
Can LTX-10 plugs fix mineral wool slabs?
The product sheet states EPS and XPS polystyrene as the materials it is recommended for, and says nothing about stone wool. A mineral wool insulation build-up therefore takes its fixing type, length and count from anchors assessed for that material, specified by the system designer against the system's own assessment.
Is a longer plug than the table says a problem?
Over-length is a cost and drilling question rather than a performance one, provided the hole can be formed cleanly and nothing is buried in the substrate at that depth. The table's step is 20 mm of board capacity per size, so reaching for a longer sleeve out of habit usually means one unnecessary size and a deeper hole on every fixing across the elevation.
Order the Matched Length for Your Board Schedule
With board thickness, adhesive, plaster and substrate settled, ordering is a single read across one row. Take the main-wall length and the reveal length from the table above, decide surface or immersed mounting before quoting, and check the anchor against the certified system if the project is running to a named build-up. The Renders World shelf carries all nine lengths in one pack format, so a mixed-thickness schedule still ships as one order — browse the plugs, cutters, caps and base tracks and build it against your board list. The source table is published in the Klimas LTX-10 product data sheet.