
Description
Mechanical fixings driven flush with the insulation face still leave two problems behind them: a small cold spot at each plug head, and a slight surface unevenness that telegraphs through any thin-grain render finish. Countersinking the fixings and capping the recesses closes both at once — and the cap is what makes that step disappear under the basecoat.
What Grey EPS Plug Caps Do Between Mechanical Fixing and Basecoat
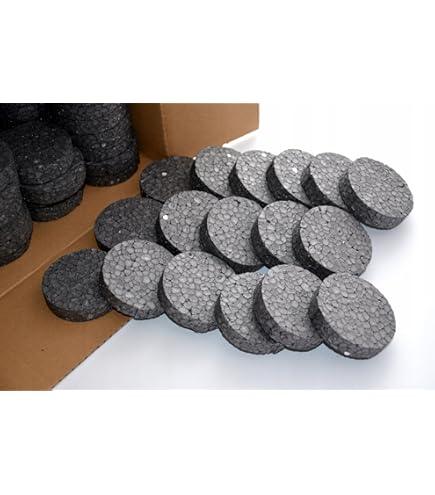
At 67 mm diameter and 17 mm thick, Grey EPS Plug Caps are graphite-enhanced polystyrene discs that seat into countersunk fixing recesses to cover mechanical plugs, eliminate the thermal bridge at every fixing point, and restore a flat insulation surface for the basecoat. Stocked within the EWI fixing accessories range at Renders World, the graphite-enhanced EPS matches the conductivity of modern insulation boards, so the cap closes the bridging path without opening a new performance gap in the insulation plane.
The cap sits at the third step of the fixing workflow: plug driven flush, recess cut around the head, cap bonded in. From that point the facade reads as a continuous insulation surface — no exposed plug heads, no surface bumps under the basecoat, and no circular marks pulling through a 1.5 mm render grain six months after handover.
- On the board — the cap restores a flat, continuous insulation face across the elevation, ready for the basecoat to trowel flat.
- On the system — graphite-enhanced material closes the conductive path at each plug, removing the localised cold spot an uncapped fixing leaves.
- On the finish — capped fixings never telegraph through thin-grain render, so dark-colour facades stay mark-free under raking light.
Why Trade Specifiers Choose Grey EPS Plug Caps for Capped Facades
- Graphite-enhanced EPS for thermal continuity — cap conductivity matches the surrounding board, eliminating the localised bridge an uncapped fixing leaves at every plug head.
- 67 mm diameter matched to the standard countersink tool — the cap seats into the recess produced by the EPS and wool hole cutter, forming a matched cap-and-cutter system rather than a generic fit.
- 17 mm cap in a 20 mm recess — the 3 mm allowance takes a PU foam or basecoat adhesive bed, holding the cap flush or fractionally below the board face.
- Flat board surface under basecoat — capping at 6–8 fixings per m² removes dozens of raised points per elevation, preventing the circular pattern that uncapped fixings leave visible through thin-grain render on dark colours.
- Visible quality-control marker — grey caps on white EPS stand out at a distance, turning the pre-basecoat walk-round into a one-glance inspection.
- 100-piece trade pack matched to one elevation — one bag covers roughly 12–17 m² at standard density, lining up with one typical wall section from the graphite EPS insulation range.
Technical Specifications — Grey EPS Plug Cap Data Sheet Highlights
| Property | Value |
|---|---|
| Cap diameter | 67 mm |
| Cap thickness | 17 mm |
| Material | Graphite-enhanced expanded polystyrene (grey EPS) |
| Colour | Grey |
| Compatible recess | 67 mm diameter × 20 mm depth (standard EPS hole cutter) |
| Compatible insulation | EPS boards — white and graphite |
| Pack quantity | 100 pcs |
| Typical fixing density | 6–8 per m² |
| Coverage per pack | Approx. 12–17 m² at standard density |
| Adhesive (separate) | PU foam adhesive or basecoat mortar |
The 67 mm × 17 mm cap is sized to the standard EWI countersink recess produced by the matched hole cutter. Confirm the recess depth on the first cut of the day so the cap seats flush, and order the adhesive separately to suit site practice.
How the Caps Install Into a Countersunk Fixing Recess
The capping step runs after the mechanical fixings are driven and the recesses cut. With every fixing head exposed inside a 67 mm × 20 mm countersink, the capping sequence takes roughly fifteen seconds per fixing — apply a thin bead of PU foam adhesive or a small dab of basecoat mortar to the rear of the cap, press it into the recess, and seat it firmly with palm pressure until it sits flush with the surrounding board face.
The 3 mm difference between the 17 mm cap and the 20 mm recess is intentional: it leaves room for the adhesive bed without forcing the cap above the board plane. A cap pushed proud of the face is the single most common installation error — the bump telegraphs through basecoat, mesh, and render, showing as a raised circle under raking sunlight after handover.
- Adhesive bed — PU foam (expands to fill, fast cure) or basecoat mortar (rigid bond, slower cure); both deliver equivalent long-term holding.
- Seating depth — flush with the board face, or 1–2 mm fractionally below, never proud.
- Cure window — caps bonded in the morning are typically ready for basecoat by the afternoon on a normal site day.
- Coverage check — walk the full elevation before basecoat; grey caps on white EPS make missed fixings obvious.
For how the recess is cut in the first place, the matched EPS hole cutter produces the 67 mm pocket the cap seats into. For the broader context of how fixings, recesses, and caps sit within the full EWI build-up, the complete EWI fixings installation guide takes the sequence end to end, and the fixing pattern and spacing calculation method sets out the per-m² counts the cap schedule then matches.
Installation Notes — Adhesive Choice, Seating Depth, Cure Timing
Adhesive choice on a capping run usually follows what is already mixed and open. PU foam expands slightly as it cures, filling minor irregularity in the recess wall and locking the cap in place within minutes. Basecoat mortar gives a rigid bond, cures more slowly, and has the practical advantage of using the same material that overlays the cap at the next stage, so there is no chemistry mismatch. Both hold for the service life of the system; the choice rarely changes the outcome.
Seating depth is the discipline that separates a clean capping run from a remedial one. Press each cap home until palm pressure no longer moves it inwards, then check the face against a straight edge laid across the surrounding board. Flush is correct, and one to two millimetres below flush is acceptable, since the basecoat fills the slight recess without showing through. Anything proud needs to come back out, get the excess adhesive trimmed off the back, and go in again — spotting a proud cap before the adhesive cures takes two minutes, whereas spotting it after the render goes on is a remedial trip.
Cure timing depends on adhesive and weather. PU foam reaches handling strength within minutes and full cure within an hour under typical UK site temperatures. Basecoat mortar bonds in two to four hours depending on humidity and air temperature. Walking the elevation an hour after the last cap goes in confirms nothing has shifted before basecoat application begins.
What UK Installers Do Differently With Plug Caps
Capping is straightforward when sequenced correctly and easy to get wrong when rushed — four habits separate a clean capped facade from one that needs filler work before render day.
- I always order one bag more than the calculation says. Caps split occasionally during seating and recesses sometimes need a second attempt; running short mid-elevation means either leaving fixings exposed overnight or stopping the programme, and the extra bag costs less than half an hour of site time.
- I always check seating with a straight edge, not just by eye. A 1 mm proud cap looks fine from arm's length but shows as a raised circle when raking sunlight hits the facade six months on; a short straight edge across the cap and two neighbouring points takes two seconds.
- I always cap a full elevation in one session. Stopping halfway means matching adhesive batches, fighting partial cure times, and walking the elevation twice; one person can typically cap a 25 m² elevation in an hour once the recesses are cut.
- I always do the QC walk before any basecoat comes off the trestle. Spotting a missed fixing before basecoat means thirty seconds with a cap; spotting it after means cutting through cured basecoat to reach the fixing.
Is the Grey EPS Plug Cap Right for Your Project?
- For any mechanically fixed EPS insulation facade — specify the caps wherever fixings are driven into white or graphite EPS and a flush, thermal-bridge-free finish is required under the basecoat and render.
- For matched countersinking and capping — pair the caps with the EPS and wool hole cutter; the 67 mm cutter and 67 mm cap form a sized system delivering a consistent recess and a flush cap on every fixing.
- For mineral wool insulation systems — the grey EPS material is sized for EPS board geometry, so slabs from the Rockwool mineral wool range typically follow the EWI system designer's own capping specification.
- For complete fixing scheduling — the full fixing accessories collection covers LTX plugs, base tracks, spiral anchors, and PVC discs that complete the mechanical fixing specification alongside the cap quantity.
- For trade-account ordering and quantity planning — pair cap quantities with the matching primary fixing count on a single PO; the Renders World specification desk can size the cap schedule against the per-m² fixing density before you commit to volume.
FAQ — Plug Cap Coverage, Compatibility, Ordering
How many bags of caps do I need for a typical semi-detached house?
A three-elevation semi with roughly 60–80 m² of insulated wall carries 360–640 fixings at the standard 6–8 per m², which works out to four to seven 100-piece bags. Ordering one extra bag per project covers any caps that split during seating or recesses that need a second attempt, avoiding a delivery delay mid-elevation.
Can I use these grey caps on white EPS boards?
Yes — the 67 mm diameter and 17 mm thickness fit the standard countersunk recess regardless of board colour. The grey caps stand out against white EPS, which is an advantage for the pre-basecoat QC walk, since any missed fixing is obvious at a glance. The thermal-bridging benefit is identical on both board types because the cap closes the conductive path at each fixing regardless of the surrounding grade.
What adhesive is best for bonding the caps?
A small dab of PU foam adhesive or a thin spread of the basecoat mortar that will overlay the caps anyway. PU foam expands slightly to fill any irregularity between cap and recess wall and cures within minutes; basecoat mortar gives a rigid bond, cures over a few hours, and avoids any chemistry mismatch with the basecoat above. Both deliver equivalent long-term holding, so site practice usually decides.
Are these caps a requirement or an optional finishing step?
Capping is required by many EWI system certifications as part of the tested assembly, subject to the specific system holder's guidance, so on certified installations the step is not optional. Beyond certification it delivers two practical wins on every project: it eliminates the thermal bridge at each fixing and produces a flat surface the basecoat and render cover without visible marks. On any thin-grain or dark-colour finish, capping is effectively mandatory for visual quality.
Should the cap sit flush or slightly below the board face?
Flush is correct, and 1–2 mm fractionally below is acceptable, since the basecoat fills a small recess without showing through. A cap proud of the face is the failure mode to avoid — even a 1 mm raised cap shows through basecoat, mesh, and render as a circular mark under raking light. Spot-check seating with a short straight edge against the surrounding board before the adhesive cures.
Will the caps fit if the recess is cut a little deeper than 20 mm?
Minor over-depth of 1–3 mm is recoverable with slightly more adhesive behind the cap to take up the space. Beyond that the cap sits too far below the face and the basecoat fill becomes excessive — the cleaner approach is to recut at the standard depth rather than building up the adhesive layer to compensate.
Do the grey caps blend visually with graphite EPS boards?
Yes — the graphite-enhanced colour is closely matched to standard graphite EPS, so the capped surface reads as one continuous insulation plane. The trade-off is that pre-basecoat QC needs a closer look on graphite boards than on white, where the grey-on-white contrast highlights any missed fixing immediately. Both work; only the inspection method changes.
What happens to the caps at end of life?
Graphite EPS recycles through standard polystyrene recovery streams when the system is eventually stripped at demolition or refurbishment. The caps separate from the underlying fixings during strip-out and go through the polystyrene stream with the bulk of the board. Embodied carbon per cap is small relative to the board and render layers it sits between.