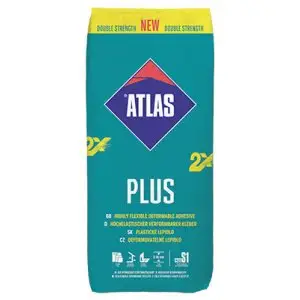
ATLAS GEOFLEX WHITE recipe contains unique siliceous gel technology. The siliceous gel offers exceptional ability of water retention.
The accumulation of part of mixing water ensures full cement hydration, regardless the cladding type in use. Owing to the appropriate water management, which is necessary for the binding process completion, gel adhesive assures perfect bonding to substrates of various absorptiveness level.
The main characteristics
• recommended for marble and natural stone
• for any type of tiles – ceramic, gres-porcelain, glass, etc.
• for difficult substrates: old tiles, terrazzo, plasterboards, damp proofing
• on terraces, balconies, floor heating
• no slip even in case of large size cladding
• well spreading beneath a tile
The main parameters• consumption: ca. 1.5 kg of dry mix / 1 m² / 1 mm adhesive layer
• adhesive thickness: 2 – 15 mm
• high bonding: ≥ 1 N/mm²
Consumption:
| Tiles size [cm] | Place of application | Recommended notches size [mm] | Consumption [kg/m3] |
|---|---|---|---|
| 2×2 | wall | 4 | 1.3 |
| floor | 4 | 1.3 | |
| 10×10 | wall | 4 | 1.3 |
| floor | 6 | 2.0 | |
| 15×60 | wall | 6 | 2.0 |
| floor | 8 | 2.5 | |
| 20×25 | wall | 6 | 2.0 |
| floor | 8 | 2.5 | |
| 25×40 | wall | 6 | 2.0 |
| floor | 8 | 2.5 | |
| 30×30 | wall | 6 | 2.0 |
| floor | 8 | 2.5 | |
| 30×60 | wall | 8 | 2.5 |
| floor | 10 | 3.0 | |
| 40×40 | wall | 8 | 2.5 |
| floor | 10 | 3.0 | |
| 50×50 | wall | 8 | 2.5 |
| floor | 10 | 3.0 | |
| tiles – slab type* e.g. 20 x 90 or 15 x 100 | wall | 8 | 2.5 |
| floor | 10 | 3.0 |
*for tiles of slab type, it is recommended to use the combined method of tiles fixing.
In case of application of tiles with so called combined method, the consumption is increased. In case of installation of a tiles on the loor with a 12 mm trowel with semicircular notches (liquefied consistency 8.25 l water / 25 kg of dry mix) – consumption 4.6 kg/m2 .
ATLAS GeoFlex technical data
| Bulk density | ca. 1.4 g/cm3 |
| Mixing (water/dry mix) | 0.26 – 0.33 l / 1 kg 6.5 – 8.25 l / 25 kg |
| Min./max. bed depth | 2 mm / 15 mm |
| Adhesive preparation temperature, substrate and ambient temperature during work | from +5°C to +35°C |
| Maturing time | 5 minutes |
| Pot life* | approx. 4 hours |
| Open time* | min. 30 minutes |
| Adjustability time* | 20 minutes |
| Walk on/grout* | after 12 hours |
| Full operation load – foot traffic* | after 3 days |
| Full operation load – vehicle traffic* | after 14 days |
| Floor heating (warm surface)* | after 14 days |
Gel Technology
The unique gel technology used in ATLAS GEOFLEX brings the following advantages:
- adhesive is suitable for any type of cladding: ceramic,porcelain,naturalstone,
- consistency of adhesive can be adjusted to individual preferences of the tiler and needs of specific job – mixing ratio is much wider than in case of traditional adhesives,
- bed depth up to 15 mm – substrate levelling and tiling at once,
- full spread under the tile with higher mixing ratio – ensured adhesion and durable bond, which is relevant for exterior use,
- safe cladding installation on surfaces exposed to direct sunlight – during fixing cladding, as well as during mortar setting (e.g. on balcony, terrace).
Properties
ATLAS GEOFLEX is a grey C2TE adhesive for tiles manufactured as a dry mix of high quality cement binder, aggregates and selected modifying agents.
Wide range of bed thickness from 2 up to 15 mm.
No slip from the wall – cladding can be installed from the top of the wall with no additional support.
Walking on and grouting just after 12 hours – owing to accelerated process of adhesive setting and drying.
Use
Cladding Type
| glazed tiles | + |
| terracotta | + |
| porcelain tiles | + |
| laminated tiles | use ATLAS ULTRA GEOFLEX |
| natural stone (granite, marble, travertine, syenite, slate) | application test required* |
| clinker | + |
| stoneware | + |
| ceramic mosaic | + |
| glass mosaic | application test required* |
| glass, coloured, printed tiles | application test required* and check recommendations of tiles manufacturer |
| concrete/cement mortar tiles | + |
| composite panels | use ATLAS ULTRA GEOFLEX |
| insulation and sound absorbing panels | use ATLAS ULTRA GEOFLEX |
*application test description shown on section Important additional information
Size of Installed Elements
| small, medium and large format tiles (≤ 0.25 m2) and greater edge length ≤ 100 cm | + |
| extra-large tiles size (> 0.25 m2) | use ATLAS ULTRA GEOFLEX |
| slim type tiles | use ATLAS ULTRA GEOFLEX |
Object Type
| residential buildings | + |
| public access, educational, office and healthcare facilities | + |
| commercial and service buildings | + |
| sacral buildings | + |
| industrial buildings and multi-storey garages | use ATLAS ULTRA GEOFLEX |
| industrial warehouses | use ATLAS ULTRA GEOFLEX |
| infrastructure buildings | use ATLAS ULTRA GEOFLEX |
| SPA objects | use ATLAS ULTRA GEOFLEX |
Installation Area
| surfaces with low traffic | + |
| surfaces with moderate traffic | + |
| surfaces with large traffic | use ATLAS ULTRA GEOFLEX |
| kitchen, bathroom, laundry, garage (in residential buildings) | + |
| terraces | + |
| balcony, loggia | + |
| external slab stairs | + |
| external post stairs (e.g. cantilever stairs) | use ATLAS ULTRA GEOFLEX |
| communication routes | + |
| facades (including external thermal insulation systems) | use ATLAS ULTRA GEOFLEX |
| cladding on a plinths | + |
| technological reservoirs, swimming pools, fountains, jacuzzi, balneotechnology (without aggresive chemical agents) | use ATLAS ULTRA GEOFLEX |
| drinking water reservoirs | use ATLAS PLUS |
| sauna | use ATLAS ULTRA GEOFLEX |
| showers, car washes, rooms washed with plenty of water | + |
Substrate Type-Standard
| cement floors and screeds | + |
| anhydrite screeds | + |
| cement, cement-lime plasters | + |
| gypsum plasters | + |
| cellular concrete | + |
| ceramic brick or hollow blocks | + |
| gypsum blocks | + |
Substrate Type-Difficult
| concrete | + |
| terrazzo | + |
| mineral, dispersive and reactive sealing coats | + |
| plasterboard drywall | + |
| screeds (cement or anhydrite) with water or electrical underfloor heating | + |
| screeds with heating mat embedded in the adhesive | + |
| plasters with wall heating | + |
| plasterboards | + |
| gypsum fibre boards | + |
| cement fibre boards | + |
| existing ceramic or stone cladding (tile on tile) | + |
| resin varnishes on concrete, bonded with substrate | + |
| dispersive, oil painting coats, bonded with substrate | + |
| timber floors (thickness > 25 mm) | + |
| OSB/3, OSB/4 and plywood boards on the floor (thickness > 25 mm) | + |
| OSB/3, OSB/4 and plywood boards on the wall (thickness > 18 mm) | + |
| metal and steel | + |
| plastics | + |
ATLAS GEOFLEX adhesive is applicable also for floating of standard and difficult substrates mentioned above
ATLAS GEOFLEX Application
Adhesive preparation
Pour the adhesive from the bag into a container with the suitable amount of water (see Technical Data for ratio) and mix, using a low speed mixer with a drill for mortars, until homogenous. The dispersed adhesive should be left to rest for 5 minutes and then remixed. So prepared adhesive should be used up within approx. 4 hours.
Adhesive application
The adhesive should be applied onto the surface with a steel trowel and then distributed evenly and shaped (possibly in one direction) using a notched trowel. It is advisable to rub a thin adhesive coat first and then apply the thicker coat and shape it with a notched trowel. It is recommended to lead a notched trowel in one direction. On walls, it’s recommended to shape the adhesive in vertical direction.
Placing the tiles
After the application, the adhesive retains its properties for ca. 30 minutes (in temperature approx. 23 °C and 55 % humidity). Within this time, the tile must be placed and pressed well (the contact surface between the adhesive and the tile should be uniform and as large as possible – min. 2/3 of tile surface). Remove the excess of the adhesive pressed into the joints immediately.
In case of floor tiles or tiling outdoors it is advisable to keep the full bonding surface (use the mixed method consisting in application of the adhesive on the substrate and tile bottom side, if needed). Keep the joint width appropriate for the tile size and operation conditions (check data in the sheets of ATLAS grouts). Tile adjustment
The position of a tile can be adjusted with delicate moves along the bonding plane. It can be done within approximately 20 minutes since the tile is pressed (in temperature approx. 23 °C and 55 % humidity).
Grouting and cladding use
Foot traffic and grouting with ATLAS grouts can start after approx. 12 hours since the tiles fixing. The mortar reaches the operational strength after 3 days (check the Technical Data). Expansion joints, joints along the wall corners, at sanitary equipment, etc. should be filled with sanitary silicone ATLAS ELASTIC SANITARY SILICONE or ATLAS SANITARY SILICONE SILTON S.
ATLAS GEOFLEX Substrate type and Recommendations
| Substrate type | Recommendations |
|---|---|
| Freshly applied cement screeds ATLAS POSTAR 80, ATLAS SMS 15 or SMS 30 | Stabilized min. 24 hours; optimum moisture content < 4% by weight. |
| Freshly applied cement screed ATLAS POSTAR 20 | Stabilized min. 2 days; optimum moisture content < 4% by weight. |
| Other cement screeds | Stabilized min. 28 days; optimum moisture content < 4% by weight. Prime with ATLAS UNI-GRUNT, ATLAS UNI-GRUNT ULTRA or ATLAS UNI-GRUNT PLUS. |
| Anhydrite screeds ATLAS SAM 100, SAM 200 or SAM 500 | Stabilized min. 2-3 weeks; optimum moisture content < 0.5% by weight. Prime with ATLAS UNI-GRUNT, ATLAS UNI-GRUNT ULTRA or ATLAS UNI-GRUNT PLUS. If, white surface tarnish forms during screed drying, it should be removed mechani- cally (grinded) and the surface dedusted. Screed grinding accelerates the process of drying. |
| Cement and anhydrite screeds on floor heating | Appropriately heated and primed with ATLAS UNI-GRUNT, ATLAS UNI-GRUNT ULTRA or ATLAS UNI-GRUNT PLUS |
| Terrazzo | De-grease the surface thoroughly, in case of waxed terrazzo remove the top layer or whole layer and execute a new one. Prime with ATLAS ULTRAGRUNT. |
| Walls made of silicate or ceramic bricks and hollow blocks, cellular concrete | Levelling coat required (plaster). Direct fixing onto rough wall is possible in case of appropriate substrate dimensional tolerance. In such case it is necessary to execute full joint wall (or re-fill the joints) and repair any gaps or irregularities with ready-to-use mortars. Prime with ATLAS UNI-GRUNT. |
| Cement and cement-lime plasters of ready-to-use ATLAS mortars | Stabilized min. 3 days* for each 10 mm of thickness; optimum moisture content < 4% by weight. |
| Other cement and cement-lime plasters | Stabilized min. 7 days*. Prime with ATLAS UNI-GRUNT. |
| Gypsum plasters | Prime with ATLAS UNI-GRUNT. If gypsum plaster is applied in a wet room it should be thoroughly protected against moisture. If dampness has form of short term action or moderate water splash, then the plaster should be coated with a preparation improving resistance against damp penetration, e.g. ATLAS GRUNTO-PLAST. |
| Substrates levelled with ATLAS ZW 330 mortar | Stabilized min. 5 h for layer thickness 5 mm. Stabilized min. 10 h for layer thick- ness 10 mm. Stabilized min. 20 h for layer thickness 20 mm. Stabilized min. 48 h for layer thickness above 20 mm. |
| Concrete | Stabilized min. 21 days; optimum moisture content < 4% by weight. Remove residues of formwork oils and other substances which would impair adhesion. Prime with ATLAS ULTRAGRUNT. Holes, cracks and other gaps should be filled with ATLAS TEN-10 or ATLAS ZW 330 mortars. |
| Oil paints and resin lacquers coatings | Coatings of poor bonding to the substrate should be mechanically removed. Stable, well bonded coatings: grind, dust; prime oil coatings with ATLAS ULTRAGRUNT. Remove any gypsum fillers used for substrate evening. |
| OSB boards and wooden floors – the layer composition should be designed and executed in the way excluding the possibility of deformation which may lead to the cladding damage | -check the boards type, on floors one may use boards OSB/3 and OSB/4 (acc. to PN-EN 300:2007), min. 25 mm thick, on walls – min. 18 mm thick, – check the superstructure stability, boards must not move under operation load; fix additional, stiffening boards layer, if needed, – matt the surface with 40-60 sand paper, – dedust the surface. |
| Existing ceramic or stone tiles | – check bonding to the substrate of the existing cladding by tapping; individual loosening tiles must be removed, – clean and de-grease the existing tiles surface, – matt glazed tiles with a diamond grinder, – dedust the surface – prime with ATLAS ULTRAGRUNT |


