
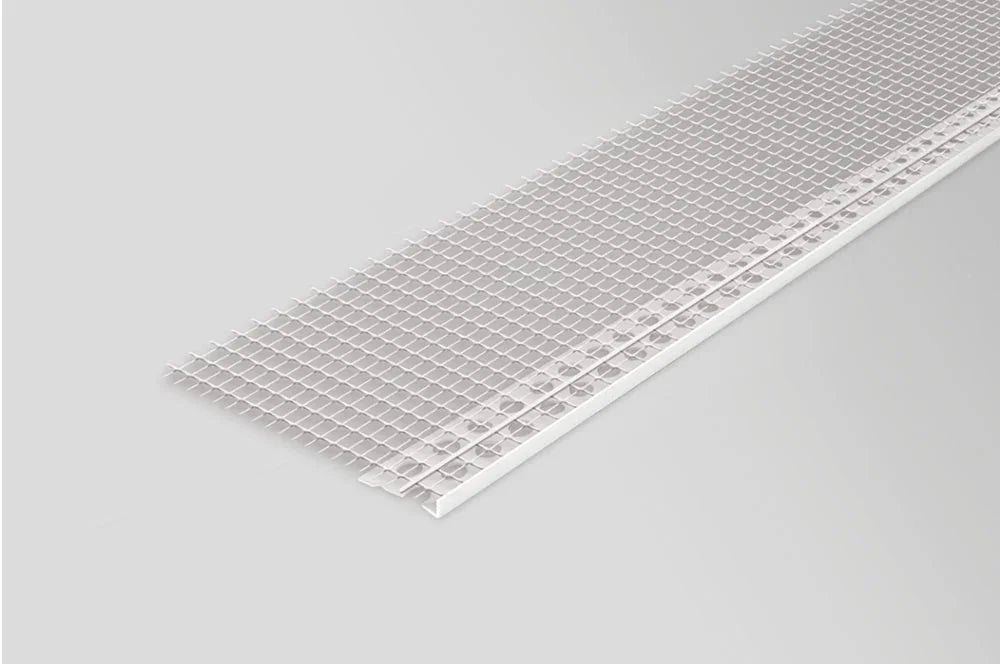

Description
This 3mm beading is a white PVC stop bead with a glass-fibre mesh wing, sold in 2.5 m lengths. It gives thin-coat render on an insulated wall a clean, straight stop — at the edge of a window, a soffit, a change of colour or grain — with the mesh bedded into the base coat so the edge stays tied into the wall.
Six Reasons to Choose This Bead
- Made for thin coats. The 3 mm edge suits a finishing render no thicker than 3 mm at the bead — the thinnest size in the range.
- Mesh already on. A 100 mm wing of glass-fibre building mesh, at least 145 g/m², bonds the bead into the reinforcing coat.
- Clean lines between finishes. Bella Plast makes these beads both for stopping render and for dividing one render from another where the colour or grain changes.
- Weather-proofed PVC. Rigid PVC with plasticisers for mechanical strength and UV stabilisers against sunlight.
- Works on EPS and mineral wool. Placed on insulation systems built on either board type.
- Easy to cut on site. Shears for plastics or a fine-tooth saw are enough.
What This 3mm Beading Is
It is the Bella Plast BP22 stop bead with mesh in the 3 mm, 2500 mm version. BP22 comes in four edge heights — 3, 6, 10 and 15 mm — and this is the shallowest. The render is ruled off against the edge of the profile, so the line of the finish follows the line of the bead.
| Property | This bead |
|---|---|
| Edge height | 3 mm |
| Length | 2.5 m (maker's tolerance ±5 %) |
| Mesh wing | Glass-fibre, min. 145 g/m², 100 mm wide |
| Body | Rigid PVC with plasticisers and UV stabilisers |
| Surface temperature in use | Up to 52 °C |
| Maker's carton | 25 pieces |
Where a 3 mm Bead Belongs
Bella Plast places BP22 wherever a thin-coat render has to stop on an external wall insulation system built on EPS or mineral wool boards, on homes and public buildings alike. Where the beads run is the façade designer's call, and they are fitted on the outside of the wall.
The size follows one rule from the fitting instructions: the render is finished at the edge of the bead, and the coat must not stand higher than the bead's render stop. So this 3mm beading suits a finishing coat no more than 3 mm thick at that edge. Measure the coat at the edge itself, not the average across the wall.
3 mm or 6 mm With Mesh
The range has two stop beads with a mesh wing, and they differ only in the height of the edge. Renders World also stocks plain stop beads without a wing:
| Bead | Edge height | Mesh wing | Length |
|---|---|---|---|
| This 3mm beading | 3 mm | Yes, 100 mm | 2.5 m |
| 6 mm stop bead with mesh | 6 mm | Yes, 100 mm | 2.5 m |
| 6 mm stop bead, no mesh | 6 mm | No | 2.5 m |
| 10 mm stop bead | 10 mm | No | 2.5 m |
| 15 mm stop bead | 15 mm | No | 2.5 m |
Pick the one whose edge matches the finishing coat. A coat up to 3 mm takes this 3mm beading; a coat thicker than 3 mm at the edge would stand proud of this bead, so a thicker finish takes the 6 mm. The whole stop bead range is compared on one page.
How the Bead Is Fitted
The bead goes on during the reinforcing stage, not after it:
- Spread an adhesive meant for glass mesh, EPS or wool evenly over the boards with a trowel, no thicker than 2.5 mm.
- Press the bead's own mesh into the adhesive.
- Straight away, cover it with the wall's reinforcing mesh, lapped 10 cm over the bead's mesh, in the same gluing step — both meshes end up in one layer of adhesive.
- Once the adhesive is dry and primed, render evenly and finish at the edge of the bead.
A continuous layer of the façade reinforcing mesh must also run beneath the bead. Do not fix it with polyurethane foam. Cut it with shears for plastics or a fine-tooth saw, and wear gloves and eye protection because of the glass mesh. For the mesh lapped over the wing, the range includes Ceresit CT 325 fibreglass mesh. The method around openings is in the stop bead fitting guide and in render detailing at windows and doors; the guide to which render bead for which detail shows where each profile goes.
Heat, Solvents and Storage
- Heat in use — up to 52 °C measured on the outer face of the bead; the profile is not made for surfaces above +60 °C.
- Chemicals — it does not react with solid building materials and resists ageing, but organic solvents such as acetone and benzene attack it.
- Storage and transport — dry, cool and flat, between 0 °C and 50 °C, stacked no more than 30 layers high.
How Many Lengths an Edge Takes
List every edge where the render stops and divide each by 2.5 m, rounding up:
- a 2.5 m edge takes one length of 3mm beading;
- a 7 m edge takes 7 ÷ 2.5 = 2.8, so three lengths;
- the head and both sides of an opening are three separate edges.
With a length tolerance of ±5 %, measure each piece on site before cutting the last one of a run.
Before You Order
- Check the coat — over 3 mm at the edge, choose the 6 mm bead with mesh.
- Check the system — where a specification names profile dimensions or UK paperwork for the bead, ring 023 8200 2442 with it before the order goes in.
- Order the mesh with it — the wall mesh has to lap 10 cm over the wing.
Ordering, Delivery and Returns
- Dispatch — Renders World processes orders the same day when the stock is there; put the beads in the same basket as the mesh and render.
- Delivery — quoted by the team after the order; parcels up to 25 kg go next day, always kerbside.
- Collection — from the counter at Unit 9A, Central Trading Estate, Southampton SO14 5JP, Monday to Friday 7am to 5pm and Saturday 7am to 12pm.
- Returns — goods bought directly from Renders World can go back within 14 days in their original condition; special orders and promotion purchases are excluded.
FAQ
Who makes this 3mm beading?
Bella Plast of Poland. It is their BP22 PVC stop bead with mesh in the 3 mm, 2500 mm version.
What render thickness is 3mm beading for?
A finishing coat no thicker than 3 mm at the bead. The render must not rise above the height of the bead's edge.
Does its mesh replace the reinforcing mesh?
No. A continuous layer of the wall's mesh runs under the bead, and the wall mesh is lapped 10 cm over the bead's own mesh in the same layer of adhesive.
Can it be fixed with expanding foam?
No. Polyurethane foam is not allowed for fixing BP22; the bead is bedded in the reinforcing adhesive.
How do I cut it?
With shears for plastics or a fine-tooth saw. Wear protective gloves and eye protection, because the wing is glass-fibre mesh.
Can I use it where two render colours meet?
Yes. The bead is made for dividing one render from another where the colour or the grain changes, as well as for stopping render at an edge.