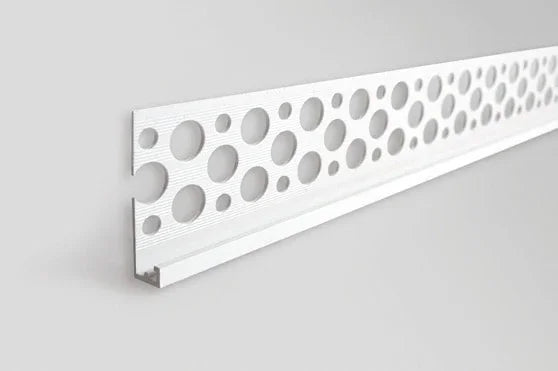

Description
The 10 mm PVC render stop bead without mesh is the deeper-nose termination profile for thick-coat render systems and heavier external wall insulation build-ups, sitting between the standard 6 mm and the heaviest 15 mm options in the render stop beads range. Where the standard 6 mm bead is undersized — typically on mineral wool EWI with deeper basecoats, machine-applied monocouche at 12–15 mm, brick-effect decorative renders, or double-mesh reinforced details — the 10 mm nose proportions the termination correctly without leaving the bead buried beneath the finished topcoat.
What the 10 mm No-Mesh Stop Bead Does in Thick-Coat and Monocouche Systems
At 10 mm nose depth, this 2.5 m white rigid PVC profile creates a flush termination edge wherever the total render build-up falls into the 8–12 mm band — covering machine-applied monocouche at 12–15 mm trowelled thickness, mineral wool EWI systems with 4–6 mm basecoats plus 2–3 mm topcoats, and decorative brick-effect or stone-effect finishes carrying additional reinforcement. The depth difference between this profile and the standard 6 mm bead is small in millimetres but decisive on site, because a 6 mm nose under an 8–10 mm finish disappears entirely, leaving a ragged terminating edge that the topcoat cannot recover.
This is the no-mesh variant — fixed mechanically through a perforated flange rather than embedded via an integrated wing. The configuration suits the retrofit junctions, plinth-band transitions, and partial-overcoat scenarios where this depth is most often specified, none of which provide the continuous wet basecoat that a mesh wing would need to bond into.
Why Trade Specifiers Choose the 10 mm Stop Bead for Mineral Wool EWI and Monocouche
- Proportioned for thick-coat systems: The 10 mm nose accommodates the deeper basecoats and decorative finishes that exceed the 6 mm thin-coat default — the right answer wherever measured finish thickness on a test patch reads 8–12 mm.
- Standard specification for monocouche: Machine-applied through-coloured monocouche at 12–15 mm trowelled thickness terminates cleanly against the 10 mm nose without needing a deeper specialist bead.
- Sized for mineral wool EWI realities: Mineral wool absorbs more basecoat into the open fibre face on the first pass than EPS, so a notional 4 mm basecoat plus 2 mm topcoat often measures 7–8 mm in service — within this bead's intended range.
- Compatible with double-mesh detailing: Plinth zones and ground-floor impact areas often carry a second layer of reinforcement, raising total thickness beyond standard thin-coat figures — the 10 mm depth absorbs that without forcing a step change to the 15 mm profile.
- Mechanical fixing flexibility: The perforated flange accepts adhesive dabs, render staples, or substrate-appropriate fasteners, which is useful at retrofit terminations and over existing finishes where a mesh wing has nothing wet to embed into.
- Non-corrosive PVC body: No rust telegraphing through coloured topcoats in damp UK exposure or coastal microclimates, and no oxide staining at the nose line.
- Cuts cleanly on site: Tin snips give square butt cuts and a fine-tooth hacksaw produces accurate 45° mitres at plinth-band external corners — no abrasive disc dust on occupied refurbishment sites.
Technical Specifications — 10 mm Stop Bead Data Sheet
| Property | Value |
|---|---|
| Profile type | Render stop bead, no mesh wing |
| Body material | Rigid PVC, white, UV-stabilised |
| Render depth (nose) | 10 mm |
| Length | 2.5 m per piece |
| Target render build-up | 8–12 mm (mineral wool EWI, monocouche, double-mesh details) |
| Fixing method | Mechanical — adhesive dabs, render staples, or substrate-appropriate fasteners |
| Recommended fixing centres | 200–250 mm along perforated flange |
| System mesh lap onto flange | 100 mm minimum where continuous reinforcement is maintained |
| Frame gap (sealant joint) | 2–3 mm |
| Application temperature | +5 °C to +25 °C (governed by render system or fixing adhesive) |
| On-site cutting | Tin snips or fine-tooth hacksaw |
| Compliance reference | Typically meets BS EN 13658-2 design principles for plastering accessories — confirm with project documentation |
How to Install the 10 mm Stop Bead — Dry-Fit, Mechanical Anchoring, Build-Up Sequencing
Dry-fit the bead against the termination line first and check the nose for line and level with a long straight edge before committing to fixings. Mark fixing points along the perforated flange at approximately 200–250 mm centres, then anchor with render staples into masonry, screws into timber or board substrates, or intermittent adhesive dabs on suitable surfaces. Keep adhesive dabs intermittent rather than running a continuous line — continuous adhesive squeezes out behind the nose during pressing and disturbs the alignment of a deeper profile more visibly than a shallow one.
Allow each layer of the heavier build-up its proper grab time before applying the next. The deeper basecoats this bead is sized for behave differently from a 3–5 mm thin-coat layer: surface skin forms later, drying is slower, and over-rapid second-layer application risks pulling the basecoat off the flange. For the complete step-by-step process — substrate testing, fixing-centre adjustment for softer substrates, mitre cuts at plinth-band corners, and sealant sequencing at frames — the full stop bead installation guide for UK projects sets out each stage in order. For coordinating the 10 mm bead with corner beads, bellcasts, and oversills around plinth bands and openings, the render detailing guide for windows and doors covers the full profile sequencing process.
Installation Notes — Conditions, Sealant Joints, Plinth-Band Junctions
Where the bead terminates against a window or door frame, leave a 2–3 mm gap between the nose and the frame face. After the render has fully cured, this gap takes a low-modulus UV-stable sealant that forms the primary waterproof joint and accommodates the larger differential thermal movement that heavier render coats produce against the frame. On thicker render systems the movement is genuinely greater than on thin-coat work, which is one of the reasons closing the gap with render rather than sealant fails noticeably earlier at this depth.
Lap the system reinforcement mesh from the wider facade onto the perforated flange by a minimum of 100 mm to maintain continuous crack control across the termination. At plinth-band external corners, mitre the bead at 45° rather than overlapping ends — stacked PVC noses create a visible step through a thicker topcoat that no amount of finishing recovers. On plinth detailing the established sequence is bellcast first to set the lower datum, then stop bead to terminate the field render against the band, then corner beads at the band's external angles — setting the bellcast first gives every bead above it a fixed reference line.
Pro Tips From UK Installers Using the 10 mm Stop Bead
For best result, always size the bead to the actual measured finish thickness on a test patch, not to the system datasheet headline. Mineral wool EWI specifications often quote thin-coat basecoat values, but in practice the basecoat absorbs more material into the open fibre face on the first pass — a notional 4 mm basecoat plus 2 mm topcoat regularly measures 7–8 mm in service. A 6 mm bead in that build-up sits buried; the 10 mm nose finishes flush. Take a calliper to the first finished test patch before opening the bead box for the wider elevations, and the bead-selection decision becomes a measurement rather than an estimate.
On monocouche projects, fix the 10 mm bead at least 24 hours before the spray crew arrives. Monocouche is machine-applied at speed, and any bead still curing into its adhesive when the spray hits will shift under the wet weight of the throw, leaving a wavy line at exactly the boundary the bead was installed to make crisp. Where programme pressure forces same-day fixing, switch to staple or screw fixing through the perforations rather than adhesive — mechanical fixings reach full hold immediately, and the bead is ready for the spray pass as soon as the line is checked.
Is the 10 mm No-Mesh Stop Bead Right for Your Project?
- Best fit: mineral wool EWI systems, machine-applied monocouche at 12–15 mm, brick-effect or stone-effect decorative renders, double-mesh reinforced plinth zones, and any build-up where measured finish thickness lands in the 8–12 mm band.
- Step down for standard thin-coat EWI: for a 5–7 mm total finish on EPS or graphite EPS, the 6 mm PVC stop bead with mesh is the proportionate selection and reinforces the termination through its embedded wing.
- Same depth band, dry junction at 6 mm: if measured thickness sits at 5–7 mm and the bead lands against an existing finish, the 6 mm no-mesh stop bead is the matched profile for that scenario.
- Step up for the heaviest systems: for traditional sand-cement two-coat work or deep mineral renders beyond 12 mm, the 15 mm option in the render stop beads range provides the proportioned nose those finishes need.
- Need substrate-specific fixing advice? Older masonry, mineral wool board faces, and timber substrates each take different fixing centres and fastener types; our technical desk can confirm the right detail against site conditions on request.
FAQ — 10 mm Stop Bead Coverage, Compatibility, Ordering
When is a 10 mm bead the right choice over the standard 6 mm?
When measured finish thickness on a test patch exceeds 6 mm — typically on mineral wool EWI, machine-applied monocouche, brick-effect or stone-effect decorative renders, and systems carrying double-mesh reinforcement at plinth zones. The decision is best made against an actual finished test patch rather than a system datasheet headline, because real-world basecoat absorption on certain substrates often raises total build-up above the quoted figure.
Why is this profile supplied without an integrated mesh wing?
The 10 mm bead is most often specified at retrofit terminations, plinth-band transitions, and partial-overcoat junctions where there is no continuous fresh basecoat behind the bead for a mesh wing to bond into. Mechanical fixing through the perforated flange, combined with system mesh lapped onto the flange from the wider facade, maintains continuous reinforcement across the detail without relying on a factory-bonded wing.
How is the 10 mm bead fixed in place?
Mechanically — typically with adhesive dabs along the perforated flange, render staples into masonry, or appropriate fasteners into timber or board substrates. Spacing of approximately 200–250 mm holds the profile securely on most facades. For same-day work ahead of monocouche spray application, switch to staple or screw fixing through the perforations because mechanical fixings reach full hold immediately, whereas adhesive needs cure time.
Will the deeper nose stay hidden under coloured topcoats?
The 10 mm nose is actually more forgiving of topcoat thickness variation than shallower profiles, because a properly applied through-coloured topcoat at the manufacturer's specified thickness fully masks the nose, and minor under-application still leaves the nose visually proportionate to the overall finish depth. On heavily textured or partially translucent decorative coats where the nose remains faintly visible, masking and over-painting with a matching silicone masonry paint after full render cure is the standard remedy.
Is there a temperature limit for installation?
The PVC profile itself is unaffected by cold weather, but the fixing adhesive or basecoat is. Install only when the chosen render or adhesive is within its application window — typically +5 °C and rising, with no rain forecast within 24 hours of fixing. On cold days, mechanical fixings such as staples and screws are not temperature-limited, so the bead can be dry-fixed in advance and over-rendered once conditions improve.
How many 10 mm stop beads does a typical thick-coat project need?
For a mineral wool EWI elevation with four to six openings plus a plinth-band detail, allow 30–50 linear metres of 10 mm stop bead — that is 12–20 lengths plus 10–15% for cuts and waste. Monocouche projects tend to use slightly less because there is no plinth band to detail in the same way; expect 20–35 linear metres on a comparable elevation. Our technical desk can confirm exact lengths against elevation drawings on request.