
Description
Traditional sand-cement at 14–18 mm, brick-slip carriers, and dual-density mineral wool plinths all measure past the point where a 10 mm nose stays flush, and the 15 mm PVC render stop bead without mesh is the profile sized for them — a specification answer for heavy systems and heritage matching, fixed mechanically at the robust plinth-band and step junctions where this depth belongs.
What the 15 mm No-Mesh Stop Bead Does on Plinth Bands and Heritage Renders
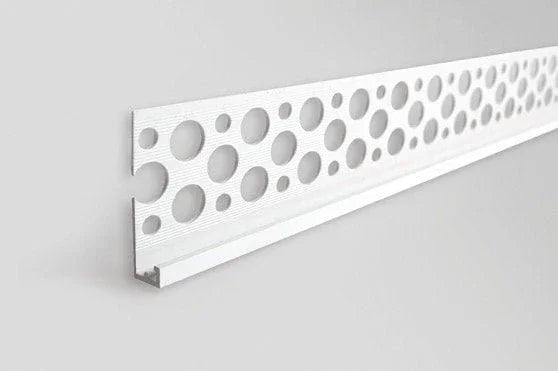
At a 15 mm nose depth, this 2.5 m white rigid PVC profile forms a flush termination edge wherever the total render build-up lands in the 11–14 mm band — plinth bands carrying double-mesh basecoats plus heavy decorative finishes, brick-slip and stone-slip systems where the carrier mortar adds depth, dual-density mineral wool EWI with impact-resistant outer layers, and traditional two-coat sand-cement at 14–18 mm on period property. It is the deepest member of the render stop beads range, and the projects that need it usually know before the box is opened.
This is the no-mesh variant, fixed mechanically through a perforated flange rather than embedded via a wing. The configuration suits the robust junctions where 15 mm belongs: plinth steps, brick-slip terminations, heritage matching lines against existing deeper coats, and step junctions at ground-floor material changes — none of which supply the continuous wet basecoat a mesh wing needs to bond into.
Why Specifiers Choose the 15 mm Stop Bead for Heavy Systems and Brick-Slip Details
- Proportioned for impact-zone systems: the 15 mm nose accommodates the thick basecoats, brick-slip carriers, and high-build finishes specified at plinth bands and ground-floor zones where impact resistance outweighs thin-coat economy.
- Standard depth for sand-cement work: two-coat sand-cement at 14–18 mm — the historical UK specification — terminates cleanly against the 15 mm nose, making it the right profile for heritage and period-property matching.
- Sized for dual-density mineral wool: a harder outer board paired with a thicker reinforced basecoat regularly exceeds 10 mm total finish, and the 15 mm depth keeps the bead flush rather than buried.
- Brick-slip and stone-slip compatible: the deeper nose absorbs the extra thickness from carrier mortars and slip-bedding adhesives that thin-coat profiles cannot take.
- Non-corrosive where it matters most: plinth bands sit close to splash and ground moisture, so a non-corrosive nose means no rust streaks below the most weather-exposed line on the facade.
Technical Specifications — 15 mm Stop Bead Data Highlights
| Property | Value |
|---|---|
| Profile type | Render stop bead, no mesh wing |
| Body material | Rigid PVC, white, UV-stabilised |
| Render depth (nose) | 15 mm |
| Length | 2.5 m per piece |
| Target render build-up | 11–14 mm (plinth bands, brick-slip, dual-density MW EWI, sand-cement at 14–18 mm) |
| Fixing method | Mechanical — adhesive dabs, render staples, or substrate-appropriate fasteners |
| Fixing centres | 150–200 mm on heavy build-ups · 200–250 mm on standard |
| System mesh lap onto flange | 100 mm minimum (both layers on double-mesh specifications) |
| Frame gap (sealant joint) | 2–3 mm |
| Application temperature | +5 °C to +25 °C (governed by render or adhesive) |
| Compliance reference | Typically meets BS EN 13658-2 design principles for plastering accessories — confirm with project documentation |
How to Install the 15 mm Stop Bead — Datum Setting, Tightened Centres, Layered Build-Up
Dry-fit the bead and check the nose for line and level with a long straight edge, because the deeper projection makes any deviation more visible on the finished elevation than a lighter profile would — a 2 mm misalignment that vanishes under thin-coat reads clearly under a heavy decorative or brick-slip coat. Tighten fixing centres to 150–200 mm on the heavier build-ups this bead is sized for, rather than the 200–250 mm suited to lighter profiles, since the pull of thicker wet material feathered onto the flange demands closer mechanical hold.
Allow each layer its grab time before applying the next, or the wet material slumps behind the deep nose and leaves a hollow no finishing recovers. For the complete step-by-step method — substrate testing, fixing-centre adjustment for plinth conditions, mitres at step junctions, and sealant sequencing — the stop bead installation guide for UK projects sets out each stage in order, so the heavy build-up sequence stays right first time.
Installation Notes — Sealant Joints and Plinth or Heritage Junctions
Where the bead meets a window or door frame, leave a 2–3 mm gap between the nose and the frame face. After full cure, that gap takes a low-modulus UV-stable sealant forming the primary waterproof joint and accommodating the larger differential movement between heavy render coats and lightweight frames. The movement at this depth is genuinely greater than on thin-coat work, and closing the gap with render rather than sealant fails noticeably earlier here.
Lap the system fibreglass reinforcement mesh from the wider facade onto the perforated flange by a minimum of 100 mm, carrying both layers across on double-mesh plinth specifications to keep reinforcement continuous at the impact zone. Mitre the bead at 45° at plinth corners and step junctions rather than overlapping ends, since stacked PVC noses at this depth read as a hard step through any topcoat. On heritage matching work the 15 mm bead often sets the new datum line itself, with bellcasts at DPC level and corner beads at external angles installed afterwards to align with this controlling edge.
Pro Tips From UK Installers Using the 15 mm Stop Bead
For the best result, treat the 15 mm bead as a specification answer, not a default. Reaching for the deepest profile when finished thickness is unclear — on the logic that bigger is safer — regularly produces a hard proud step the topcoat cannot mask, and a correctly chosen 6 mm or 10 mm bead consistently looks better than a 15 mm bead defaulted to.
- Confirm build-up on a test patch first: measure the actual finished thickness before opening the bead box, and depth selection becomes a reading rather than a guess weighted toward oversizing.
- Read the datum direction before fixing: new-build plinth work runs bellcast, then stop bead, then corners; heritage matching inverts it, since the 15 mm bead follows an existing render line and downstream profiles align to it.
- Never anchor a controlling datum out of order: once a datum is fixed in the wrong sequence on heavy-system work, the only recovery is lifting profiles and starting over — so decide the sequence first.
- Tighten centres near the splash zone: at plinth level the heavier coat plus ground moisture load justifies the closer 150 mm end of the fixing range for reliable long-term hold.
How the 15 mm No-Mesh Bead Compares to Sibling Stop Beads
Depth is driven by measured build-up, not specified thickness — oversizing shows as a proud nose. The nearest profiles for the same termination decision are set out below.
| Variant | Key Spec | When to Choose |
|---|---|---|
| 6 mm PVC stop bead no mesh | 6 mm · mechanical fix | Thin-coat finish at a dry junction |
| 10 mm PVC stop bead no mesh | 10 mm · mechanical fix | Mineral wool EWI and monocouche |
| 15 mm PVC stop bead no mesh | 15 mm · mechanical fix | Sand-cement, brick-slip, plinth bands |
Is the 15 mm No-Mesh Stop Bead Right for Your Project?
- Best fit: plinth bands with heavy decorative or brick-slip finishes, dual-density mineral wool EWI, traditional two-coat sand-cement at 14–18 mm, and heritage matching against deeper original render lines.
- Step down for standard mineral wool EWI: for 7–9 mm total finish on conventional mineral wool, the 10 mm PVC stop bead is the proportionate selection.
- Thin-coat EWI default: for 5–7 mm total finish on EPS or graphite EPS, the 6 mm PVC stop bead with mesh reinforces the edge through its embedded wing.
- Same-depth dry junction at 6 mm: where measured thickness is 5–7 mm against an existing finish, the 6 mm no-mesh stop bead handles the boundary; the full render stop beads range spans 3 mm to 15 mm.
- Need datum advice for heritage work? matching to existing render lines that pre-date thin-coat conventions is a judgement call, and the Renders World technical desk can confirm bead depth and fixing sequence against site photographs and elevation drawings on request.
FAQ — 15 mm Stop Bead Application, Fixing, Ordering
When does a project genuinely need a 15 mm stop bead?
When a measured finish-thickness test patch confirms the build-up exceeds 10 mm — typically plinth detailing with double-mesh basecoats, brick-slip or stone-slip systems with carrier mortars, dual-density mineral wool EWI with impact-resistant outer layers, sand-cement at 14–18 mm, or heritage matching against existing deeper render lines. Anything thinner is better served by the 10 mm or 6 mm profiles, which finish flusher at lighter build-ups.
Will a 15 mm bead create a visible proud edge?
Only if oversized for the build-up. Matched to a system measuring 11–14 mm finish thickness, the 15 mm nose sits flush and reads as a deliberate detail edge. Mismatched to a thinner system, the nose stands proud and the topcoat cannot recover the step — which is why sizing on this depth is driven strictly by measured thickness rather than specified thickness.
Why is this profile supplied without an integrated mesh wing?
The 15 mm bead is most often specified at robust junctions — plinth steps, brick-slip terminations, heritage matching lines, and step boundaries against existing renders — where mechanical fixing through the perforated flange combined with lapped system mesh is a more appropriate reinforcement strategy than an embedded wing. Many of these scenarios also lack the continuous wet basecoat a mesh wing would need to bond into.
How should the bead be fixed on a plinth band?
Mechanically through the perforated flange — render staples or substrate-appropriate fasteners at 150–200 mm centres on heavier build-ups, with adhesive dabs as secondary support. The closer 150–200 mm spacing resists the pull of the heavier wet material as it is feathered onto the flange, where the lighter 200–250 mm spacing suited to thin-coat work would let the bead lift slightly under the basecoat's weight.
Will the white nose stay hidden under a heavy decorative finish?
On heavily textured or float-finished coats — the typical companion for a 15 mm bead — the topcoat surface draws more visual attention than the nose line, so a correctly proportioned bead reads as a deliberate detail edge. Where the texture is unusually fine or the topcoat partially translucent, masking and over-painting the exposed edge with a matching silicone masonry paint after full cure produces a uniform appearance.
How much 15 mm stop bead does a typical plinth-band detail need?
Plinth bands run continuously around an elevation rather than terminating at openings, so quantities follow elevation perimeter rather than opening count. A typical three-bedroom semi with a 600 mm plinth band around the full ground-floor perimeter needs roughly 30–40 linear metres across the top and bottom edges, plus 10–15% for cuts and waste. Heritage projects with full-elevation deeper coats need substantially more — the technical desk can confirm exact lengths against site drawings.