Mesh embedding is the trade hour on an EWI programme where technique separates a professional from an apprentice more visibly than at any other stage. The Renders World fibreglass mesh range ships two rolls — Atlas 150 g/m² and Ceresit CT325 160 g/m² — and both give a flawless reinforcement layer or a telegraphed diamond pattern under the topcoat depending entirely on how the roll comes off the pallet and how the trowel moves against wet basecoat. This guide covers the top-to-bottom vertical strip method that the fastest, cleanest UK crews consistently favour on both new-build and retrofit facades.
The full reinforcement layer sits inside a wider EWI programme; the day-by-day EWI installation timeline covers where mesh embedding lands in the working sequence, and the basecoat and mesh reinforcement layer guide covers the full method including adhesive mixing, thickness, and curing. This blog focuses purely on the embedding technique — how the trowel moves, how the roll unwinds, and how the mesh reads while it goes on.
Why Top-to-Bottom Vertical Strips Beat Every Other Embedding Method
Three orientations are physically possible: vertical top-to-bottom, vertical bottom-to-top, and horizontal. Vertical top-to-bottom wins on every dimension that matters on a working scaffold — speed, evenness of embedment, and the way gravity helps rather than hinders the trowel. Every experienced UK installer eventually converges on this method regardless of the technique they were first taught, because the physical logic pushes them toward it once they have run the alternatives.
The vertical direction matches the way EPS adhesive and basecoat mortar is applied — top-down in horizontal passes across each scaffold lift. Working top-to-bottom means the mesh presses into basecoat that is still at its wettest and stickiest, giving the fabric the deepest, most secure embedment without needing to force the trowel. Bottom-to-top pushes against gravity, unrolls the mesh into basecoat that has skinned slightly, and produces the fine ridges that show under raking light on a finished elevation. Horizontal strips introduce a joint at every scaffold lift line — the exact height where thermal stress concentrates — and installers consistently report horizontal-joint cracks as the failure they retire the method for.
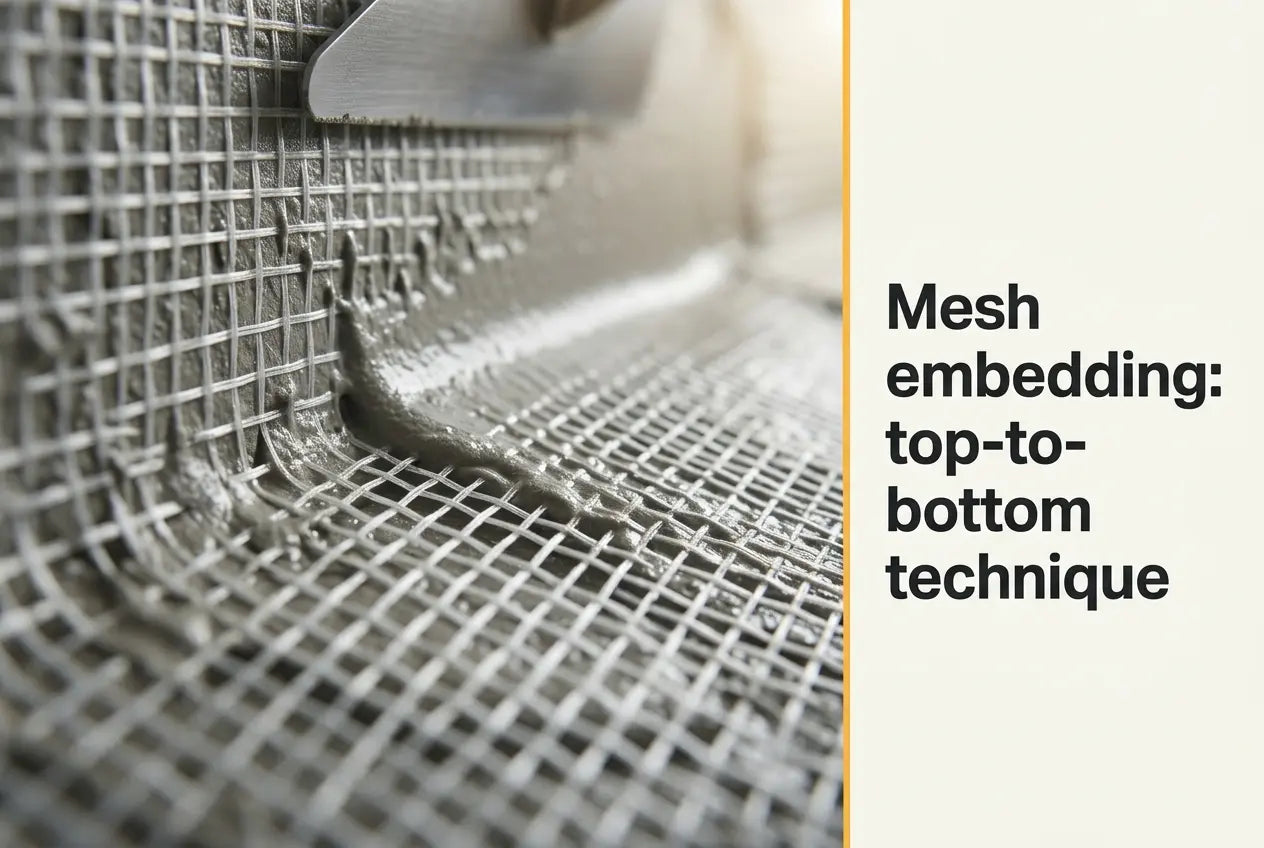
How Gravity Works With the Trowel on a Vertical Strip
The core physical insight of the top-to-bottom method is that a hanging strip of mesh stays flat against a wet wall on its own. Once the top of the strip is embedded, the weight of the un-embedded material below pulls the fabric taut and holds it against the basecoat while the installer works down. The trowel does not fight to keep the mesh in position; it only needs to press the mesh into the mortar and smooth the surface. That single force-alignment change is what makes top-to-bottom faster and less tiring than the alternatives across a full working day.
The weight of the mesh strip does two useful things at once. It preloads the joint above the trowel, so the embedded section stays flat without pinning. And it tensions the strip laterally, so the fabric lays without wrinkles across the full 1.0 m or 1.1 m roll width. Working bottom-to-top asks the trowel to hold the mesh up, embed it, and smooth the surface simultaneously — three jobs at once versus one job that gravity already handles.
The Six-Step Top-to-Bottom Embedding Sequence
The full technique breaks into six discrete steps that flow into a continuous rhythm once practiced. On a standard 2.5 m storey height, a competent crew completes one strip in three to four minutes end-to-end. The sequence assumes the first basecoat pass has been applied across the target strip width and is still wet — typically within 15 minutes of the mortar leaving the bucket at 20 °C.
- Step 1 — position the roll at the base of the strip. Stand the roll upright on the scaffold board, with the fabric edge facing outward and the roll centred beneath the strip line. The 1.0 m Atlas 150 g/m² roll or the 1.1 m Ceresit CT325 160 g/m² roll both stand cleanly on their end for this working position.
- Step 2 — unroll upward to the strip top. Pull the free edge of the fabric upward to the top of the strip in one smooth motion, keeping the roll on the board. On storey heights above 2.5 m, a second installer catches the top edge to guide it flat against the basecoat.
- Step 3 — embed the top 200 mm first. Press the top edge into the wet basecoat with a stainless steel trowel, working from the centre of the strip outward to push trapped air to the edges. The top 200 mm sets the anchor from which the rest of the strip hangs — commit this section fully before moving down.
- Step 4 — work down in vertical trowel strokes. With the top anchored, work down the strip in vertical trowel strokes approximately 300 mm long, pressing the mesh into the wet mortar until the fabric sits in the outer third of the basecoat depth. Each stroke overlaps the previous by 50 mm so no ridge forms between passes.
- Step 5 — release the roll and cut at the base. When the trowel reaches within 300 mm of the base track or scaffold-lift line, release the roll from the board and cut the strip with mesh scissors, leaving enough length to pass the joint by at least 150 mm.
- Step 6 — press the base section and check for air. Press the final section flat and run the trowel edge along the strip vertically one last time to catch any residual air pockets. The mesh should now sit invisible beneath a thin skim of mortar with no ridges or bubbles visible under raking light.
Key Takeaway: The top-to-bottom vertical strip method works because gravity holds the mesh flat while the trowel embeds. Anchor the top 200 mm first, work down in vertical strokes overlapping by 50 mm, and cut at the base with 150 mm to spare for the joint. Speed comes from the physics working with the trowel, not from the trowel working against the mesh.
How to Read the Mesh While You Embed It
Trade-level embedding is as much about reading the mesh as about pressing it. Four visual cues tell the installer whether the fabric is sitting where it should — cues that separate a professional pass from one that looks fine on the day but telegraphs through the topcoat six weeks later.
- The fabric goes from visible to invisible. Correctly embedded mesh disappears beneath a thin veneer of basecoat within seconds of the trowel stroke. Fabric still visible after the second trowel pass means insufficient basecoat depth above the mesh — apply a further skim before moving on. Fabric still visible at the surface will show as a diamond pattern under raking light on the finished facade.
- The colour of the surrounding mortar deepens slightly. Wet basecoat with correctly embedded mesh darkens fractionally where the trowel has worked, because the mortar has been pressed into the weave and reformed a continuous surface. A patch that stays lighter than its surroundings has not fully bonded to the mesh underneath.
- Air bubbles show as faint domes. Trapped air appears as small raised domes across the strip, most visible when the trowel is lifted after a stroke. Roll them out with a second vertical pass working from the top toward the bubble — never from the side, which just pushes the air across the strip.
- Overlap zones need visible pressure. Where a fresh strip overlaps the previous one by the standard 100 mm — the joint geometry covered fully in the fibreglass mesh overlap guide — the trowel needs a firmer press to embed both mesh layers into the shared basecoat. Under-pressed overlap zones are the most common source of a visible ridge on the finished facade.
These cues take two or three practice elevations to become automatic. Once they do, the installer no longer needs to think about them — the eye picks up a wrong pattern before the trowel has completed the next stroke, and the correction happens continuously rather than as a rework at the end of the strip.
Where the Top-to-Bottom Method Meets Its Limits
The top-to-bottom vertical strip method covers the majority of UK EWI and thin-coat render work — flat elevations from 2.4 m to roughly 4.5 m storey height, standard 1.0 m or 1.1 m rolls, and any adhesive from the Atlas Hoter U family through to fibre-enhanced 2-in-1 bags. Four site conditions push the method past its comfort zone and warrant a different approach on part of the elevation.
- Storey heights above 4.5 m without an intermediate scaffold lift. A single mesh strip longer than 4.5 m becomes difficult to control with two installers. Break the elevation at the scaffold lift and treat each lift as its own top-to-bottom pass, running each strip through the lift line by at least 150 mm so no joint sits at the lift boundary.
- Curved elevations and bay windows. Tight curves fight the vertical roll geometry. Horizontal strips wrapped around the curve give a cleaner embed on radii below approximately 1.5 m — the exception rather than the rule, but a legitimate one on the curve itself.
- Around openings with dense diagonal patch work. Window and door corners carry diagonal reinforcement patches applied before the field mesh, per the joint geometry set out in the overlap guide. The field mesh runs top-to-bottom past these patches, overlapping them by the standard 100 mm. This is not an exception to the method — just the point where the method meets patch detailing.
- High-wind conditions on unenclosed scaffolds. Sustained wind above Beaufort 5 makes an unrolled strip behave like a sail. Either enclose the scaffold face with sheeting or switch to shorter horizontal strips until the wind drops — a legitimate temporary tactic, not a permanent method change.
Common Embedding Errors and How to Prevent Them
Site audits across Renders World EWI programmes flag the same five embedding errors repeatedly, and every one of them shows up in the finished render before the operator has left the scaffold. Recognising the pattern early — usually within the first three strips of an elevation — is what stops a full-programme rework.
- Embedding into skinned basecoat. Basecoat that has skinned before the mesh goes in bonds to the fabric only at surface contact points rather than encapsulating the weave. Work in narrower vertical strips — no wider than the mesh roll — and keep the basecoat pass within a 15-minute window of the mesh embed at 20 °C, shorter in warm conditions. The wider weather-window planning for full-programme scheduling sits in the first-day EWI base track guide and its companion planning references.
- Pressing mesh flat against the insulation. Mesh sitting on the board surface contributes almost no tensile value — the basecoat above it carries the whole load. Aim to place the mesh in the outer third of the basecoat depth by applying the first pass at 2–3 mm, embedding, and skimming a second pass of 1–2 mm on top.
- Working across the strip rather than down. Horizontal or diagonal trowel strokes displace the lower part of the strip and create wrinkles. All embedding strokes on a vertical strip should run vertically down the strip length, with each stroke overlapping the previous by approximately 50 mm.
- Cutting strips too short for scaffold lifts. A strip cut to lift height leaves a joint at the exact line where thermal stress concentrates. Plan strip lengths to pass through every lift line by at least 150 mm, treating the overlap zone as a load-carrying detail rather than an incidental joint. This ties into the wider pattern discipline covered in the fixing pattern and spacing guide for the mechanical fixing course beneath.
- Under-pressing at overlap zones. A 100 mm overlap only works if both mesh layers are pressed into shared basecoat. Under-pressed overlaps produce a visible ridge on the finished elevation and, more seriously, a line of reduced tensile reinforcement running the height of the wall. Firm the trowel across every overlap zone before moving to the next strip.
None of these errors are complex to prevent, and none require specialist equipment beyond a stainless steel trowel and a good pair of mesh scissors. The technique compounds with practice — an installer on their third or fourth EWI facade typically embeds twice as fast as they did on their first, with cleaner joints and no telegraphed patterns on the finished render. That trajectory is what makes top-to-bottom the method professional crews return to on every subsequent job.
Written by Mariusz Saja. Technically reviewed by Renders World Team. Last reviewed Jul 2026.
FAQ — Top-to-Bottom Embedding Technique Questions
Why is top-to-bottom better than bottom-to-top when both cover the strip?
Top-to-bottom uses gravity to hold the mesh flat against the wet basecoat while the trowel embeds — a single-job task for the trowel. Bottom-to-top asks the trowel to hold the mesh up against gravity, embed it, and smooth the surface at the same time, which is three jobs concurrently. Across a full working day the physical difference translates into faster progress and less operator fatigue, and installers consistently report a cleaner finish with fewer ridges when working with gravity rather than against it. The mesh product is the same in both methods; only the physics of the pass changes.
How wide should each vertical strip be?
Match strip width to roll width — 1.0 m for the Atlas mesh or 1.1 m for the Ceresit CT325 — and apply the basecoat first pass in strips of the same width. Working in strips narrower than the roll wastes mesh at every vertical joint; working wider means the basecoat skins before the mesh reaches the far edge. The two roll widths are why the Ceresit CT325 at 1.1 m saves one vertical joint per elevation on some storey heights, marginally reducing overlap material consumption on multi-storey work.
How much basecoat should the trowel press through the mesh?
The correct target is for the mesh to sit in the outer third of the finished basecoat layer — approximately 2–3 mm depth within a 3–5 mm total layer. Pressing harder than that pushes the mesh against the insulation, where it contributes almost no tensile value. Pressing lighter leaves the mesh near the surface, where it telegraphs through the topcoat. The full method for reading depth, mixing basecoat, and controlling total layer thickness sits in the basecoat and mesh reinforcement layer guide.
What happens if the basecoat skins before I embed the mesh?
Basecoat that has skinned bonds only to the mesh surface rather than encapsulating the fabric fully, which reduces the tensile transfer between mortar and glass fibre. If a strip has visibly skinned before embedding, scrape the affected area back to fresh mortar, apply a new basecoat pass, and embed within the 10–15 minute window that the mortar remains fully wet. Continuing to embed into skinned mortar produces a bond that looks fine on the day and delaminates within two seasons of thermal cycling — always start again rather than accepting a partial embed.
Do I need two installers for the top-to-bottom method?
On storey heights up to about 3 m, a competent single installer can run the full technique — anchoring the top edge alone and working down. Above 3 m, a second installer catching the top edge and guiding it flat against the basecoat produces cleaner strips faster. On any elevation with mixed heights across openings, having a second pair of hands catches the roll during transitions and keeps the rhythm continuous. The method itself works with one or two installers; the choice depends on storey height and programme pace rather than the technique.
Does the top-to-bottom method work with fibre-enhanced 2-in-1 adhesives?
Yes — fibre-enhanced 2-in-1 adhesives such as Atlas Hoter U work in the same top-to-bottom rhythm as standard basecoat mortars, with the same 15-minute wet working window at 20 °C and the same 3–5 mm total layer target. The polypropylene and glass micro-fibres in the fibre-enhanced range add a second line of shrinkage-crack protection during the first 24–48 hours of curing, and the mesh embeds cleanly into the fibre-enhanced mortar without additional technique changes. For the trade-off between fibre-enhanced and standard basecoats on cost and shrinkage-crack tolerance, see the wider basecoat method guide linked above.
How does this technique affect long-term crack resistance on the finished facade?
Correctly embedded mesh — sitting in the outer third of the basecoat, with 100 mm overlaps at every joint pressed firmly by the trowel — transfers thermal and mechanical stress across the whole facade rather than concentrating it at weak points. This is the primary mechanism that prevents the hairline crack patterns covered in the render cracking causes and prevention guide. Poor embedding produces the diamond telegraph pattern on light-coloured renders and the diagonal cracks at opening corners on any colour, both of which appear within the first two winters of thermal cycling. The embedding hour is one of the highest-return investments of technique effort on the whole programme.