The basecoat and mesh reinforcement layer is the part of an external wall insulation system that stops cracks reaching the finished render, protects the insulation boards from impact, and gives the decorative topcoat a stable surface to bond to — and getting this stage wrong is one of the most common reasons facades develop hairline cracks within the first two heating cycles. Whether you are checking a contractor's specification for a housing scheme, planning materials for a domestic retrofit, or simply want to know what your installer should be doing on the scaffold, this guide explains how the reinforcement stage works step by step, how it should be applied, and which fibreglass mesh and adhesive choices matter most for long-term performance.
The reinforcement layer sits between two stages that get most of the attention — the insulation boards beneath it and the silicone render above it — yet it does more work than either for the crack resistance of the finished facade. Understanding it properly also makes the wider decision of how to choose the right adhesive for your EPS project easier to navigate, because basecoat selection and mesh selection are inseparable once you see how the layer behaves under thermal stress.
What the Reinforcement Layer Does and Why It Matters
The reinforcing layer prevents the finished render from cracking when the building moves with seasonal temperature changes, which is why it is one of the most important durability layers in the whole EWI system. Sitting between the insulation boards and the decorative topcoat, it consists of a basecoat mortar with fibreglass mesh embedded inside it. Together those two components form a flexible, impact-resistant shell that distributes mechanical stress across the entire wall surface rather than concentrating it at weak points. Without a properly formed reinforcement layer, even premium insulation boards and the best silicone renders develop hairline cracks within the first year of thermal cycling.
- Basecoat mortar: a polymer-modified cementitious mix — meaning it contains resins that let the dried mortar flex slightly without snapping. It bonds to the insulation surface, completely encapsulates the mesh, and provides a smooth base for the primer and topcoat that follow.
- Fibreglass mesh: an alkali-resistant reinforcement fabric. Cement-based mortars are highly alkaline and would slowly eat normal fibreglass, so this mesh carries a special acrylic coating that survives the high-pH environment indefinitely. It absorbs the pulling forces caused by thermal expansion and structural movement, stopping those forces reaching the decorative render where they would appear as visible cracks.
- Combined shell: when correctly embedded, the mortar and mesh form a single composite layer typically 3–5 mm thick. This acts as the facade's primary defence against impact damage, moisture ingress, and surface cracking over the full service life of the system.
In technical terms, the reinforcing layer must comply with the system certificate's requirements under EAD 040083-00-0404 (the current European Assessment Document that replaced ETAG 004 for ETICS systems, verified March 2026), which sets the minimum requirements for basecoat thickness, mesh strength, and overlap dimensions across the assembly. In plain English, these are the rules that make sure the system stays crack-resistant and certifiable. The INCA Best Practice Guide for External Wall Insulation recommends that the mesh sit in the outer third of the basecoat layer — that single positioning decision is the most effective predictor of long-term crack-free performance.
Choosing the Right Basecoat and Mesh Combination
Matching the basecoat adhesive to the mesh and the insulation type is essential, because an incompatible combination leads to cracking, weak bonding, or certification issues that only show up months after the scaffold has come down. For most residential EWI projects using EPS boards, a 2-in-1 cementitious adhesive such as Atlas Hoter U or Ceresit ZU covers both board bonding and mesh embedding from the same bag, which keeps the system simpler and removes one ordering stage. If your project mixes EPS with mineral wool on different elevations, Roker U is the only adhesive in the Renders World range certified for both board types, making it the safer one-product choice across mixed builds.
Mesh weight determines impact resistance and crack control. A 150 g/m² mesh provides the standard reinforcement for most domestic facades and meets the requirements of BBA-certified Atlas systems. A 160 g/m² mesh — such as the Ceresit CT325 — offers higher tensile strength and is the mandatory requirement on certified Ceresit ETICS assemblies. Both weights use alkali-resistant E-glass fibres coated with acrylic polymer to survive the high-pH environment inside a cementitious basecoat, so the mesh will not degrade the way uncoated glass fibre would. For ground-floor zones, plinths, and areas near pathways where physical impact is likely, doubling the mesh layer significantly improves dent and puncture resistance.
| Parameter | Atlas Mesh 150 g/m² | Ceresit CT325 160 g/m² |
|---|---|---|
| Grammage | 150 g/m² | 160 g/m² |
| Roll Coverage | 50 m² | 55 m² |
| Roll Width | 1.0 m | 1.1 m |
| Tensile Strength (Initial) | ≥ 2000 N/50 mm | ≥ 2000 N/50 mm |
| Mesh Aperture | 4 × 4 mm | 4 × 4 mm |
| Alkali-Resistant Coating | Acrylic polymer | Acrylic polymer |
| Compatible Basecoats | Atlas Hoter U, Roker U | Ceresit ZU, Roker U |
Step-by-Step Basecoat Application and Mesh Embedding
Getting a crack-free reinforcement layer starts with correct mixing and a disciplined two-pass application method. As a general rule, the mesh-embedding stage consumes approximately 3.0–4.0 kg of dry adhesive per square metre, so a 25 kg bag covers roughly 6–8 m² of wall at the correct 3–5 mm thickness. Mix the dry adhesive with clean water using a paddle mixer (never by hand) at the manufacturer's specified ratio — for Atlas Hoter U, 5.0–5.5 litres per 25 kg bag; for Ceresit ZU, the same range; for Roker U, 5.5–6.0 litres per 25 kg bag. Let the mixed mortar stand for five minutes, then remix briefly to activate the polymer modifiers fully. The resulting consistency should hold its shape on a trowel without slumping, which is the visual cue that the polymer chemistry has come up to working strength.
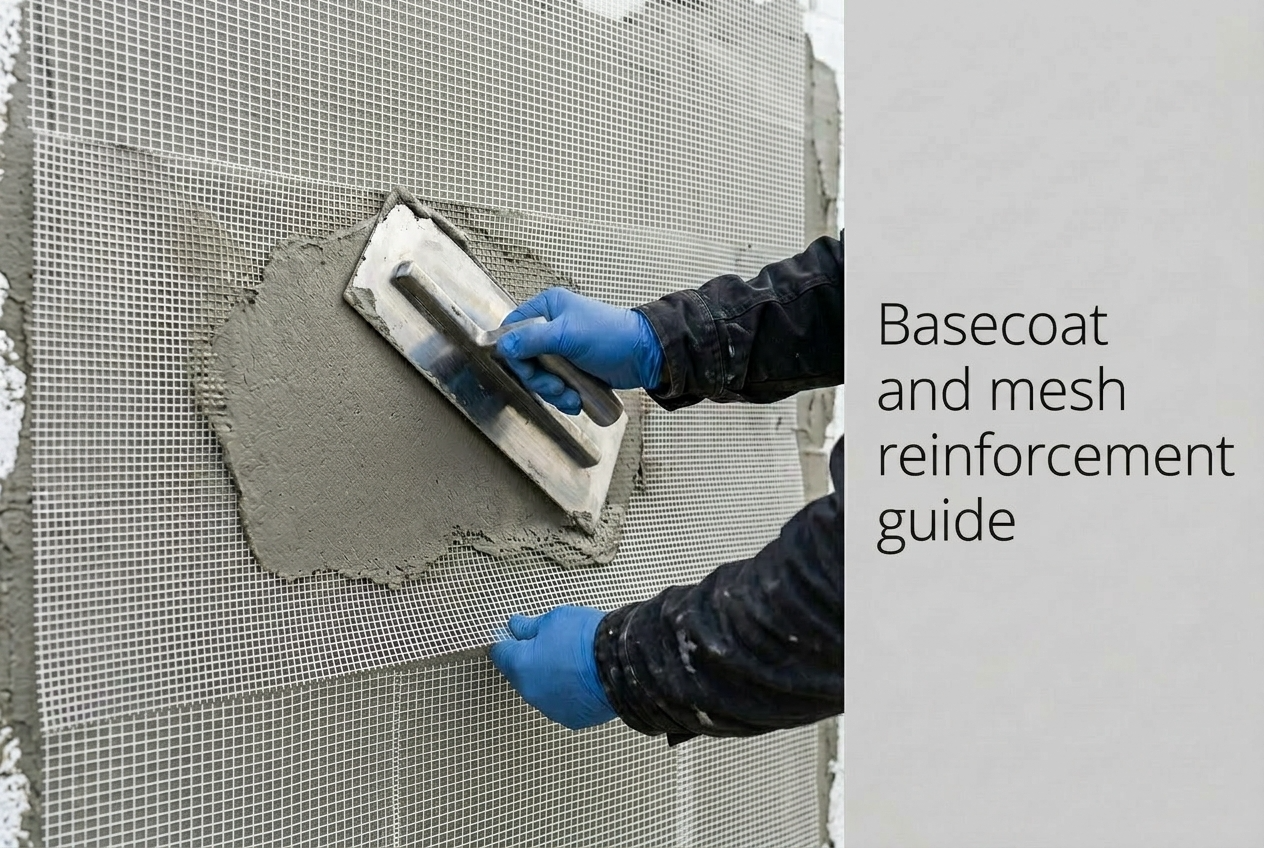
- Apply the first basecoat pass. Using a 10–12 mm notched trowel, spread an even layer of mortar approximately 2–3 mm thick directly onto the insulation boards. Work in vertical strips no wider than the mesh roll to stop the basecoat skinning over before you embed the mesh.
- Embed the mesh into the wet basecoat. Unroll the fibreglass mesh vertically from top to bottom and press it into the fresh mortar using a flat stainless-steel trowel. Work from the centre of each strip outward to push trapped air to the edges. The mesh must sit in the outer third of the finished layer — never pressed flat against the insulation board, where it offers almost no tensile reinforcement.
- Apply the second basecoat pass. While the first pass remains workable, skim a thin layer of mortar approximately 1–2 mm over the mesh until the fabric is no longer visible. The finished thickness should fall between 3 and 5 mm — thick enough to fully encapsulate the mesh, but thin enough to avoid shrinkage cracking during curing.
- Reinforce stress points separately. Before applying the main mesh sheets, embed additional mesh patches diagonally at each corner of every window and door opening (approximately 200 × 300 mm at 45°). These patches intercept the diagonal stress lines radiating from opening corners — by far the most common origin point for render cracks on otherwise sound facades.
Renders World stocks the Atlas 150 g/m² mesh in 50 m² rolls and the Ceresit CT325 160 g/m² mesh in 55 m² rolls, with stock available for next-working-day UK delivery so the reinforcement stage never holds up a wider EWI programme.
Key Takeaway: Embed the fibreglass mesh in the outer third of the basecoat — not against the insulation board — and always overlap adjacent strips by a minimum of 100 mm. Together those two rules account for the majority of crack-resistance performance on a finished EWI facade.
Overlap Rules and Critical Detailing
Every joint between mesh strips is a potential weak point, so correct overlapping is essential for long-term crack prevention. The industry-standard minimum overlap is 100 mm at all horizontal and vertical joints, and both the Atlas and Ceresit mesh rolls include printed guide markers that help maintain this dimension consistently across a working scaffold. Mesh strips must never be butt-jointed edge-to-edge — even a 5 mm gap between strips creates a line of zero reinforcement where a crack will eventually form. For overlap geometry around tricky details and the most common overlap mistakes seen on UK sites, the dedicated fibreglass mesh overlap guide covers that ground in depth.
| Detail Location | Minimum Overlap | Notes |
|---|---|---|
| Field joints (vertical and horizontal) | 100 mm | Standard overlap for all adjacent mesh strips |
| Scaffold-lift lines | 150 mm | Mesh must pass through the lift line, not terminate at it |
| Diagonal patches at opening corners | 150 mm into field mesh | Applied before field mesh, not on top |
| Reveal-to-elevation returns | 100 mm onto main wall | Mesh wraps from reveal face onto the adjacent elevation |
| Corner bead mesh wings | 100 mm onto field mesh | Field mesh overlaps bead wing, not vice versa |
Corner beads, stop beads, and window-reveal profiles all need their own mesh wings tied into the main basecoat layer. When fitting a PVC corner bead with integrated mesh, the bead's factory-attached mesh strip overlaps the adjacent flat mesh by at least 100 mm. At window and door reveals, the mesh from the reveal face wraps around the corner and overlaps the main wall mesh by the same 100 mm minimum. Failing to tie these junctions together is one of the most common causes of cracking around openings on facades that otherwise looked well-installed when the scaffold came down.
Curing Conditions and Common Mistakes to Avoid
A basecoat that dries too fast on the surface but remains uncured underneath will crack before the topcoat render is ever applied. Allow a minimum of 24–48 hours drying time before applying any subsequent layer, and up to seven days in cool or humid conditions. The ideal curing window is between +5 °C and +25 °C with moderate humidity. Below 5 °C, cement hydration stalls and the mortar will not achieve its full bond strength to the wall; above 25 °C or in direct sunlight, the surface skins over before the core has set, trapping moisture and weakening the hold.
- Do not apply basecoat onto damp or dusty insulation boards. Brush debris from board faces and ensure the surface is dry before the first trowel pass — surface contamination breaks the bond between mortar and insulation, and the defect will not become visible until the facade is finished and under thermal stress.
- Do not mix more mortar than your team can apply within the pot life. Atlas Hoter U gives approximately 4 hours of working time; Roker U allows around 2 hours. Mortar that has started to set in the bucket produces a weaker bond even if it still appears spreadable — always discard stiffening material rather than adding water to soften it.
- Do not skip the diagonal patches at window and door corners. These 200 × 300 mm reinforcement pieces cost almost nothing in material but prevent the most common and most visible type of render crack on any EWI facade.
- Do not work in direct midday sun on dark insulation. Graphite EPS in particular flash-dries thin mortar layers before the mesh embeds properly, which is why experienced UK installers schedule basecoat work for overcast conditions or shaded scaffolding wherever the programme allows.
If your project runs into colder months and you need to maintain site progress, a hybrid approach combines polyurethane foam adhesive at the board-bonding stage with a cementitious basecoat for the mesh layer, extending the working season by two to three months without heated enclosures. For projects specifying fibre-enhanced basecoats, the benefits of fibre-enhanced basecoats guide explains why polypropylene and glass micro-fibres add a second line of defence against shrinkage cracks during the critical first 24–48 hours of curing.
Summary and Where to Order
The basecoat and mesh reinforcement layer is the stage that gives an EWI system its crack resistance and impact strength. To get it right, you need a compatible adhesive and mesh combination, correct mesh placement within a 3–5 mm basecoat, proper overlaps at all joints, and enough curing time before the next layer goes on. Allow approximately 3.0–4.0 kg of adhesive per square metre for the mesh-embedding stage, and order 10–15 % more mesh than the net wall area to cover overlaps, patches, and reveal returns.
For experienced installers this is a standard site process; for homeowners managing their own project, it is usually the stage where contractor execution matters most — product compatibility and disciplined detailing outweigh almost every other choice you make about the build-up. Browse the Renders World EPS adhesives and basecoats range alongside the professional-grade fibreglass mesh collection to source the core reinforcement components in one consolidated order, with technical support available before and after dispatch.
Written by Mariusz Saja. Technically reviewed by Renders World Team. Last reviewed Jun 2026.
FAQ — Basecoat Thickness, Curing Times, and Quantities
What thickness should the basecoat reinforcement layer be?
The finished basecoat layer should measure between 3 and 5 mm in total, with the fibreglass mesh positioned in the outer third of that thickness. A layer thinner than 3 mm will not encapsulate the mesh fully, leaving it visible through the topcoat and reducing its ability to distribute stress. A layer thicker than 5 mm increases drying time and raises the risk of shrinkage cracking during curing, because the excess material retains moisture unevenly across the surface.
How long should I wait before rendering over the basecoat?
Allow a minimum of 24–48 hours in normal conditions (above +10 °C with moderate humidity) before applying the primer or topcoat render. In cooler or damper weather typical of UK autumn and spring, full curing can take up to seven days. Applying the next layer too soon traps residual moisture inside the reinforcement shell, which weakens the bond between basecoat and topcoat and can cause bubbling or delamination once the facade heats up in direct sunlight.
Do I need to double the mesh at ground-floor level?
Double meshing is strongly recommended for any zone below 2 metres from finished ground level, because this is the area most exposed to physical impact from foot traffic, garden equipment, wheelie bins, and delivery trolleys. Apply the first mesh layer into the wet basecoat, allow it to firm slightly, then apply a second thin coat of mortar and embed a second mesh layer with its joints staggered by at least half a roll width from the first. The additional layer significantly increases the facade's resistance to cracking and puncture damage in these vulnerable areas.
Can I apply the basecoat and mesh layer myself?
For experienced renderers, this is a standard part of an EWI installation. For most homeowners it is not usually the right stage to attempt unsupervised, because correct mesh positioning, overlap discipline, detailing around openings, and weather control all affect whether the facade remains crack-free long term. If you are managing your own project, the safer route is to specify the correct system components yourself and have the reinforcement layer installed by an experienced contractor who can ensure basecoat thickness, mesh depth, and overlap dimensions all meet the system certificate's requirements.
How do I work out how much basecoat adhesive and mesh I need?
Start with the net wall area in square metres, then add material for overlaps, reveals, window and door corner patches, and any double-mesh impact zones at ground-floor level. For the basecoat adhesive, allow approximately 3.0–4.0 kg per square metre for the mesh-embedding stage, which works out at roughly 6–8 m² per 25 kg bag. For mesh, order 10–15 % more than the net wall area to cover the 100 mm overlaps and detailing pieces. As a planning rule, a typical three-bedroom semi-detached house with 60–80 m² of insulated facade needs around 10–14 bags of adhesive for the mesh stage and two rolls of mesh, although the exact requirement depends on reveal count, opening detail, impact zones, and any localised levelling.