
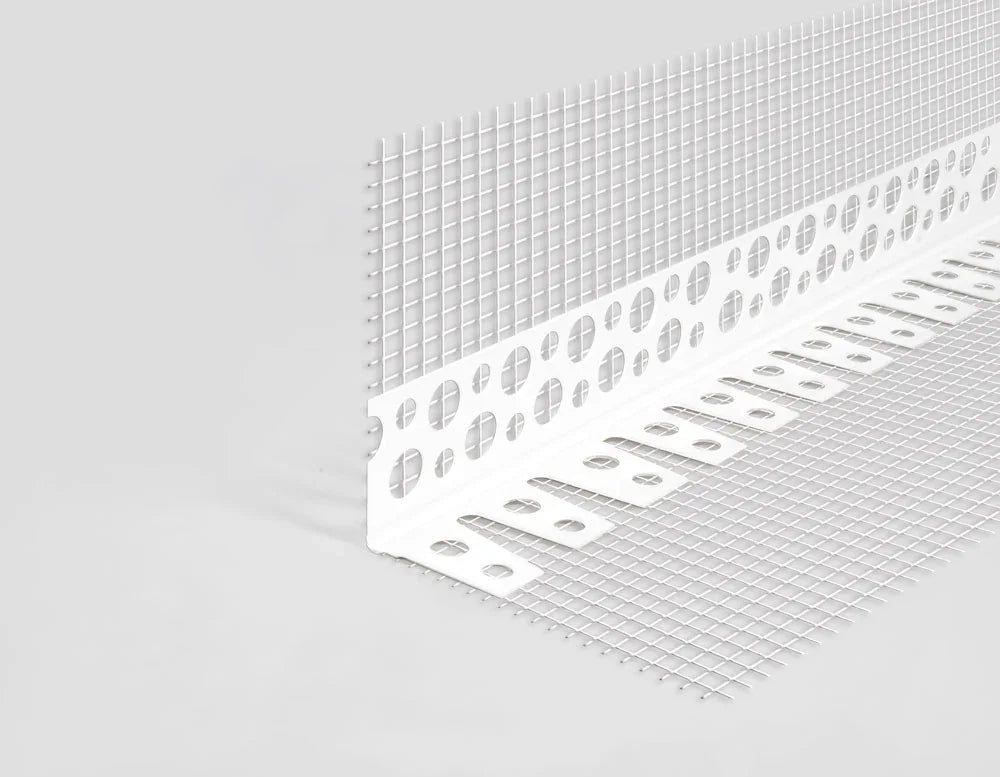

Description
An arched EWI opening poses two demands at once: the profile must follow the curve, and the corner reinforcement must tie into the field mesh so the arris is part of the composite basecoat rather than an isolated fitting — the finishing detail that a rigid or a no-mesh arch bead each leaves half-solved.
Where the Mesh-Wing Arched Corner Bead Performs Best on UK EWI Curves
The result of a properly reinforced curved corner starts with the PVC arched corner bead with mesh, the only profile in the render corner beads range combining a flexible uPVC body for curved geometry with fibreglass mesh wings that embed into the EWI basecoat. The flexible body bends to follow the arch; the mesh wings, one per face, press into the wet basecoat alongside the field reinforcement so the corner behaves as part of the continuous composite layer.
At 2,500 mm the profile covers a full arched head or curved reveal return in a small number of pieces. Unlike the rigid mesh-wing bead for straight corners, which holds its line by stiffness, this profile relies on the wet basecoat to lock its position once the curve is set: the wings, pressed fully home, hold the profile to the arc while the render cures around it. What you get is a reinforced curved arris that moves with the rest of the EWI reinforcement rather than an applied trim sitting on top of the composite.
Why UK EWI Installers Choose the Mesh-Wing Arched Profile
- Flexible body for genuine curve geometry: the PVC section bends to conform to arched heads, curved reveals, and rounded opening edges — the only mesh-wing profile in the range that follows a true curve rather than approximating it with straight segments.
- Fibreglass mesh wings for system integration: the wings embed into the reinforced basecoat and tie the curved corner into the surrounding field mesh, so the arch contributes to the composite reinforcement instead of remaining structurally isolated.
- Removes the curved-corner crack initiation zone: a curved arris changes render direction continuously and concentrates thermal movement over a longer edge than a straight corner, so extending the field reinforcement around the curve removes the unreinforced edge a no-mesh arch leaves behind.
- Compatible across EWI substrates: works on EPS, graphite EPS, mineral wool, and render carrier board wherever the basecoat is applied as a continuous reinforcement layer, with the same wing integration across all four.
- Alkali-resistant fibreglass mesh: the resin-coated woven glass fibre is formulated for long-term contact with alkaline cementitious basecoats, consistent with EAD 040083-00-0404 (formerly ETAG 004) requirements, subject to the specific system approval in use.
Technical Specifications — Arched Mesh-Wing Corner Bead Data
| Property | Value |
|---|---|
| Length | 2,500 mm |
| Profile type | Flexible uPVC body, conforms to curved geometry |
| Mesh wings | Asymmetrical fibreglass reinforcement mesh, typical 150 mm × 100 mm per face |
| Mesh specification | Alkali-resistant · UV-stable · resin-coated woven glass fibre |
| System framework | EAD 040083-00-0404 (formerly ETAG 004) compliant class, subject to system approval |
| Suitable render depth | All EWI system depths, embedded in reinforced basecoat layer |
| Material (body) | Exterior-grade flexible uPVC · alkali-resistant · lead-free · UV-stabilised |
| Fire classification | Class 1Y, self-extinguishing on removal of flame (BS 476, subject to system confirmation) |
| Standard reference | BS EN 13914-1&2:2016, subject to system confirmation |
| Application temperature | +5 °C to +30 °C, air and substrate |
| Pack size | Single 2.5 m length; trade packs available |
Mesh dimensions reflect the asymmetrical EWI mesh corner bead class specification. Confirm exact mesh weight and wing dimensions against the current manufacturer's datasheet for system-approval-governed or warranty-critical installations.
How to Apply the Mesh Arched Bead — Trimming for the Curve, Embedding the Wings
Before fitting on a concave arch, score or trim the fibreglass mesh on the arch-side face at regular intervals, the frequency set by the radius, so the PVC body follows the curve without the wings buckling or bridging across the concave surface. The cuts release section resistance in the mesh and let the wing lie flat against the board as the profile bends. Apply basecoat adhesive to the substrate first, then press the profile in so the wings embed fully, with basecoat squeezing through the weave along the whole arc, not just at the wing edges.
Work from the crown of the arch outward, pressing and smoothing the wings progressively around the curve, and watch the arris line as you go: any section where the nose bridges away from the substrate becomes a straight segment in what should be a smooth arc, and it is hard to correct once the basecoat grips. Apply the field reinforcement mesh immediately after, overlapping onto the bead wings so the two layers fuse into one continuous reinforcement across the curve and onto the flat elevation. The full corner sequence including arch and reveal work is set out in the corner bead installation step-by-step guide.
Installation Notes — Basecoat Timing and Field-Mesh Overlap
Work within the +5 °C to +30 °C window for both air and substrate, and complete bead embedding, field-mesh overlap, and the full basecoat pass across the curve in one session. The wings reinforce only when the field mesh is overlapped onto them and the whole assembly is encapsulated, so stopping after fixing and returning next day leaves a cold joint between basecoat batches exactly where the curved corner needs continuity — and that hairline is harder to disguise than on a straight run.
On EPS and graphite EPS the wet adhesive bonds readily and the wings embed with normal pressure; on mineral wool the higher suction may call for a little more basecoat on the substrate first so the wings fully encapsulate; on render carrier board, prepare the surface per the board manufacturer's guidance before fixing. Pair the curved corner with the field fibreglass reinforcement mesh so the mesh classes match across bead wings and field layer. For straight 90° corners, reveals, lintels, and sills across the same opening, the render detailing around windows and doors guide covers the full sequence.
Pro Tips From UK Installers Working Mesh Arched EWI Details
The most expensive error on curved EWI openings is reaching for the cheaper no-mesh flexible arch because it bends more easily — it looks identical until the basecoat goes on, and the problem often stays hidden until the first winter. Across curved-corner EWI specifications supplied by Renders World, the pattern is consistent: without mesh wings the reinforcement layer terminates at the edge of the arch, leaving an unreinforced arris under cyclical movement load, and the mesh bead's small material premium is recovered in the first avoided callback.
- Trim the arch-side mesh first, not later: untrimmed mesh on the concave face bridges away from the substrate and becomes a void once the basecoat cures; ten extra minutes per arch eliminates it entirely.
- Match trimming interval to radius: for a typical 0.5–1.0 m arch head, 30–50 mm intervals work cleanly; halve the interval for tighter curves.
- Embed bead and field mesh in one batch: wings and field mesh form a single composite only when pressed into the same basecoat, so overnight gaps create a cold joint at the worst location.
- Calculate developed length before ordering: arc length equals radius multiplied by angle in radians, plus 10–15% for cuts; a 1 m radius semi-circular arch develops to roughly 3.14 m and needs two 2.5 m lengths with a joint at the crown or springing line.
How the Mesh-Wing Arch Compares to the No-Mesh Arch
Both arched profiles form a clean curved corner, so the decision turns on whether the system carries a reinforced basecoat. Read across to confirm which arch matches your build-up before ordering.
| Variant | Key Spec | When to Choose |
|---|---|---|
| PVC arched corner bead with mesh | Fibreglass wings · embeds in EWI basecoat | Curved EWI corners with field mesh |
| PVC arched corner 2.5m white, no mesh | 3.3 mm arris · pin-fixed · 2–3 mm depth | Plaster arches, direct-render curves |
Is the Mesh-Wing Arched Corner Bead Right for Your Project?
- Arched or curved openings on EWI build-ups with a reinforced basecoat (EPS, graphite EPS, mineral wool, render carrier board): the primary use case, and the only profile combining a flexible curved body with fibreglass wings for reinforcement integration.
- Thin-coat silicone, silicate-silicone, or acrylic render over a curved substrate with field mesh specified: the wings tie the curved corner into the field reinforcement so the arc is part of the composite rather than an unconnected fitting.
- Curved decorative plaster arches or traditional render at 2–3 mm without an EWI reinforcement layer: the no-mesh white arched profile is the lighter, pin-fixed choice where no field reinforcement exists.
- Straight 90° external corners on EWI elevations: the rigid corner bead with mesh holds the straight arris line that a flexible body cannot maintain on a straight run.
- High-impact straight corners on ground-floor commercial zones: the 3 m aluminium corner bead is the impact-rated straight-corner specification for a different problem.
The mesh-wing arched bead is a UK-stocked profile held for next-working-day trade despatch at Renders World. Calculate the developed length of each curve, add 10–15% for cuts, and place the bead and its matching field reinforcement mesh on the same EWI order so the mesh classes align across wings and field layer.
FAQ — Mesh Arched Bead Radius, System Integration, Ordering
How does this differ from the no-mesh PVC arched corner bead?
The no-mesh white arch is a thin flexible profile for decorative plasterwork, drylining arches, and traditional render at 2–3 mm depth, pin-fixed into the plaster or render surface. This mesh-wing profile is for EWI and thin-coat render systems with a reinforced basecoat: the fibreglass wings embed into that layer and tie the curved corner into the surrounding field mesh, making the arch structurally part of the composite. The two profiles serve different systems at different depths.
Why does the mesh need trimming before fitting on an arch?
On the concave face the wing must compress inward as the profile bends, and untrimmed mesh resists that compression and bridges across the concave surface, leaving sections floating away from the board rather than lying flat in the basecoat. Trimming at regular intervals, closer for tighter radii, releases the resistance so the wing lies flat and embeds fully, eliminating voids behind the mesh.
What does EAD 040083-00-0404 compliance mean for the mesh?
EAD 040083-00-0404 is the European Assessment Document for External Thermal Insulation Composite Systems with renderings, the framework that superseded ETAG 004 in 2018 and now governs EWI/ETICS system approvals in the UK. Mesh assessed under this framework has been evaluated for alkali resistance, tensile strength, and durability within the EWI system context, and the bead wings perform consistently with the field mesh used across the system, subject to the specific system approval certificate in use.
What is the minimum curve radius this bead can follow?
With regular mesh trimming cuts on the arch-side face, the profile follows relatively tight radii, with typical guidance for this class covering curves down to approximately 0.3–0.5 m radius under normal trimming. Closer trimming intervals allow tighter bends; below approximately 150 mm radius, assess on site whether the PVC nose can follow the geometry without kinking between cuts.
How do I calculate how many beads I need for a curved opening?
Calculate the developed length using arc length equals radius multiplied by angle in radians, then add 10–15% for cuts and joints. A 1 m radius semi-circular arch develops to approximately 3.14 m, needing two 2.5 m lengths with a butt joint at the crown or springing line. For full-circle features such as round windows, multiply the diameter by π and add the same allowance.
Can this bead be used on horizontal edges such as lintels or plinths?
Corner profiles including this one are not designed for horizontal edges where water tracks across the face of the bead. Lintels, plinth bases, and sill returns need profiles that provide active water drainage, such as bellcast or drip-bead profiles. The render detailing guide covers the correct profile for each horizontal termination across the elevation.