
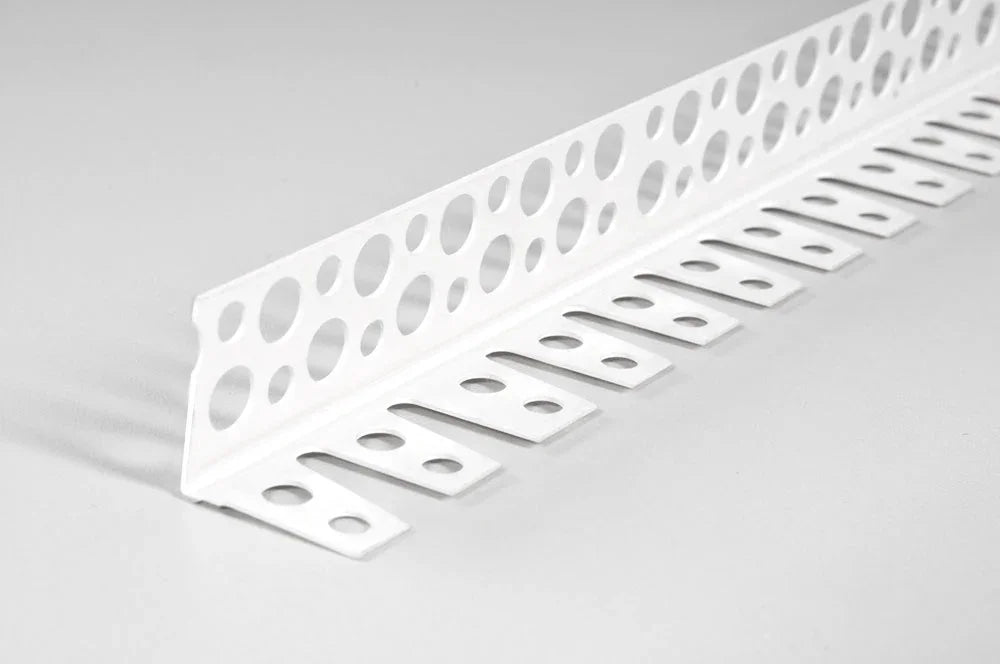

Description
A rigid straight-profile corner bead cannot follow a curve, and forcing one crimps the arris into a buckled line — the flexible arched profile exists precisely for the point in the finishing sequence where a curved reveal or arch head replaces a square 90° corner.
Where the White PVC Arched Corner Bead Performs Best on UK Curves
The PVC arched corner 2.5 m white is a flexible uPVC arch corner bead that conforms continuously to curves down to a 0.5 m minimum radius, sized for decorative internal arches, curved plaster features, rounded reveals, and rendered external arches at 2–3 mm finished depth. It is the no-mesh white variant in the render corner beads range, with a discreet 3.3 mm arris and 23 mm wings that sit inside a skim or thin render coat without standing proud.
This is not a rigid angle profile bent to shape on site — it is a lightweight section engineered for the radius, and that reduced section weight is what gives it the elastic range to follow a curve without crimping. The result is a genuinely continuous arris where a scored-and-bent rigid bead would deliver a faceted polygonal approximation. Fixed mechanically with non-corrosive pins or a mortar bed rather than embedded fibreglass wings, it delivers a clean defined edge that holds true along the whole curve.
Why UK Installers Choose the Flexible Arched Profile
- Continuous flexibility to 0.5 m minimum radius: the profile follows curved geometry without crimping or buckling, a property of the lightweight engineered section rather than anything achievable by bending a rigid bead on site.
- Discreet 3.3 mm arris with 23 mm wings: sits inside a skim or thin render coat at 2–3 mm depth without standing proud, giving a defined edge line along the curve rather than a visible trim.
- Score-and-bend extension below 0.5 m: notching the wing backs at 20–30 mm intervals releases section tension and brings the effective working radius well below the unscored minimum for tight arch heads.
- Compatible across plaster and render systems: works with gypsum skim and finish plasters, sand-and-cement, and acrylic top coats at 2–3 mm depth with no reactivity at the bead-coat interface.
- Light, fast-cutting section: at 5.4 kg per 100 m the profile handles quickly and cuts cleanly with tin snips or a fine-tooth saw without deforming the slender arris.
Technical Specifications — White Arched Corner Bead Data
| Property | Value |
|---|---|
| Length | 2,500 mm |
| Arris width | 3.3 mm |
| Wing width | 23 mm per wing |
| Suitable plaster/render depth | 2–3 mm |
| Minimum bend radius | 0.5 m continuous curve without notching |
| Material | Exterior-grade flexible uPVC · alkali-resistant · lead-free · UV-stabilised |
| Mesh | None — mechanical fixing via pins or mortar bed |
| Weight | 5.4 kg per 100 m |
| Colour | White |
| Fire classification | Class 1Y, self-extinguishing on removal of flame (BS 476, subject to system confirmation) |
| Standard reference | BS EN 13914-1&2:2016, subject to system confirmation |
| Application temperature | +5 °C to +30 °C, air and substrate |
| Pack size | Single 2.5 m length; trade packs available |
Specification data is drawn from CB2A-class technical references for flexible uPVC arch corner bead profiles. Confirm against the current manufacturer's datasheet for warranty-critical or specification-governed applications.
How to Apply the Arched Corner — Bending, Scoring, and Fixing to a Curve
On a concave curve such as the inside of an arch, bend the profile gently and continuously to the radius before fixing, since the flexible uPVC holds a smooth arc without significant spring-back once pinned. Fix with non-corrosive lost-head nails or stainless pins through the wings at 200–300 mm centres, working from the centre of the curve outward to avoid a kink at the fixing points. Apply plaster or render over the wings immediately so the profile is encapsulated before it recovers toward straight.
For radii approaching or below the 0.5 m minimum, score the wing backs at 20–30 mm intervals with a fine saw or sharp knife to release section tension and let the arris follow a tighter curve without crimping. On a convex curve, the same scoring on the outer wing lets the profile open slightly wider than its manufactured angle. Trim ends with tin snips or a fine-tooth saw. For the full installation sequence across reveal, head, and base terminations, see the corner bead installation step-by-step guide.
Installation Notes — Coat Encapsulation and System Fit
For the best result, work within the +5 °C to +30 °C window for air and substrate, and fix and over-coat in the same session so bead and surrounding coat move together through the initial cure. On gypsum skim systems indoors, lightly prime high-suction substrates before plastering the arch so the skim does not flash off at the bead before it can be ruled flat across the arris.
For external rendered arches on EWI build-ups where corner reinforcement must integrate with a fibreglass basecoat, this no-mesh profile is not the right specification: the PVC arched corner bead with mesh carries wings that embed into the basecoat alongside the field reinforcement. Straight 90° external corners on the same elevation take the rigid corner PVC render bead with mesh. Profile selection across reveals, arches, lintels, and sills is set out in the render detailing around windows and doors guide.
Pro Tips From UK Installers Working Arched and Radius Corners
The most common error on curved corner work is reaching for a rigid bead first, scoring one wing deeply, bending it to the arch, and rendering over the result. Across curved-detail specifications supplied by Renders World, that approach reliably telegraphs two defects: a polygonal line rather than a true curve, and a hairline crack at every score point as thermal cycling opens the stress concentrations. The flexible profile exists because elastic-range bending of a thin engineered section produces a continuous curve, which a rigid bead forced to the same shape simply cannot.
- Bend before fixing, not after: set the curve into the profile by hand before the first pin, because pinning a straight bead and pushing it to the arch as you nail leaves stress at every fixing point.
- Work from the apex outward: start at the crown of the arch and progress symmetrically down each side, so any final length adjustment falls at the springing line where it is easiest to dress.
- Score evenly for tight radii: keep score depth and spacing identical along the length, since uneven scoring shows through the finished arris as a wavy line under raking light.
- Calculate developed length first: arc length equals radius multiplied by angle in radians, plus 10–15% for cuts; a 1 m radius semi-circular arch develops to roughly 3.14 m, so one 2.5 m length will not span it without a joint.
How the No-Mesh White Arch Compares to the Mesh-Wing Arch
Both arched profiles do the same job of forming a clean curved corner, so the decision comes down to whether your system carries a reinforced basecoat. Read across to confirm which arch profile matches your finish before ordering.
| Variant | Key Spec | When to Choose |
|---|---|---|
| PVC arched corner white, no mesh | 3.3 mm arris · 2–3 mm depth · pin-fixed | Plaster arches, direct-render curves |
| PVC arched corner bead with mesh | Fibreglass wings · embeds in basecoat | External EWI curves with reinforced basecoat |
Is the White Arched Corner Bead Right for Your Project?
- Decorative internal arches, curved plaster features, and rounded reveals at 2–3 mm depth: the primary use case, where the flexible section and narrow 3.3 mm arris produce a smooth continuous edge that rigid profiles cannot replicate.
- Rendered external arches on EWI build-ups with a reinforced basecoat: specify the PVC arched corner bead with mesh, whose fibreglass wings integrate the curved corner into the field reinforcement layer.
- Straight traditional render corners at 6–12 mm depth: use the rigid 6 mm or 10 mm PVC corner bead no mesh sized to the finished depth on straight walls.
- Ordering for a full arched feature: calculate the developed length of the curve, add 10–15% for cuts, and order in 2.5 m lengths — the light weight makes over-ordering low-risk and flat or vertical storage preserves the geometry between site visits.
The white arched corner bead is a UK-stocked profile held for next-working-day trade despatch at Renders World. Confirm the curve radius against the 0.5 m unscored minimum before ordering, since tighter radii are achievable with the wing-scoring technique but specifying the geometry up front keeps the take-off accurate.
FAQ — Arched Corner Bead Radius, Compatibility, Ordering
What is the tightest curve this bead can follow?
The profile conforms continuously to a minimum radius of 0.5 m without notching. For tighter radii, score the wing backs at 20–30 mm intervals with a fine saw or sharp knife to release section tension, which brings the effective working radius well below 0.5 m while keeping the arris smooth between score points. Closer scores allow tighter bends, so the scoring interval sets how tight a curve is achievable.
How does this differ from the arched corner bead with mesh?
This no-mesh white arch profile is pin-fixed into plaster or a thin render coat at 2–3 mm depth, the correct choice for decorative plaster arches, internal curved features, and direct-to-substrate rendered arches with no fibreglass layer. The arched corner bead with mesh carries fibreglass wings that embed into a reinforced basecoat on EWI build-ups, tying the curved corner into the composite reinforcement. The two address different systems and finishing depths.
How do I calculate how many beads I need for an arch?
Calculate the developed length using arc length equals radius multiplied by angle in radians, then add 10–15% for cuts and joints. A 1 m radius semi-circular arch develops to approximately 3.14 m, needing two 2.5 m lengths with a butt joint at the crown or springing line. For full-circle features such as round windows, multiply the diameter by π and add the same allowance.
Can this bead be used externally on rendered arches?
The exterior-grade uPVC is suitable for external use in contact with sand-and-cement and acrylic render systems at 2–3 mm coat depth. For external arches on EWI build-ups with a reinforced basecoat, the mesh-wing arched bead is the more appropriate choice because it integrates the corner reinforcement into the field mesh. For external arches on direct-to-substrate renders, this no-mesh profile is a practical option, subject to mechanical fixing at the appropriate centres.
How do I cut the bead to length on site?
Cut with tin snips or a fine-tooth saw, since the lightweight 5.4 kg per 100 m section cuts cleanly without deforming the arris. Deburr the cut end lightly before fitting where a clean butt joint is needed at a termination. At joints on long curves, butt the cut ends tightly and ensure the plaster or render coat bridges the joint continuously so the finished line reads as a single uninterrupted curve.