
Description
Selecting a no-mesh corner profile starts with render depth, not price: at 6 mm finished thickness a 10 mm nose stands proud and a mesh-wing bead has no reinforced field to embed into. The 6 mm no-mesh profile closes that specific gap on shallow and confined UK corners.
Where the 6 mm No-Mesh Corner Bead Performs Best on UK Renders
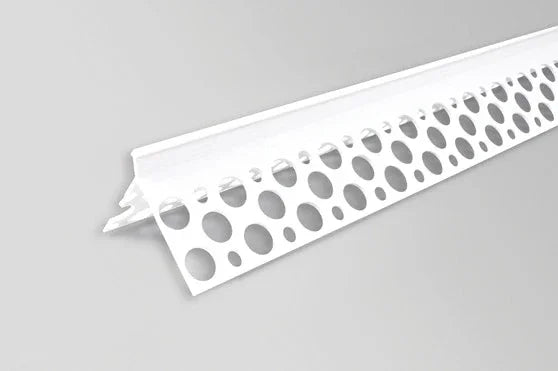
The 6 mm PVC render corner bead no mesh is a rigid uPVC L-profile with a 6 mm nose and 40 mm perforated arms, sized for shallow UK render systems at 6–8 mm total finished depth such as lime-based renders, light monocouche, and fine sand-and-cement. It belongs to the wider render corner beads range at Renders World, and it is also the correct no-mesh choice for confined detailing on deeper systems.
The narrow nose produces an arris that finishes flush with a thin coat rather than reading as a proud trim line, while the perforated arms lock the profile mechanically into the wet render without a separate fibreglass layer. That makes this a specialist profile rather than a budget one: it solves the two conditions a mesh-wing bead cannot, which are shallow depths with no basecoat thick enough to bury a deeper nose, and tight reveals where there is no room to press a 100 mm wing flat. Get the nose depth matched to the finish and the corner reads clean under the first season's raking light.
Why UK Installers Choose the 6 mm No-Mesh Profile
- 6 mm nose for shallow depths: sized for lime, light monocouche, and fine sand-and-cement at 6–8 mm total, so the arris sits flush at the minimum render thickness where a deeper nose would stand proud.
- Works where mesh wings cannot: narrow window reveals, confined internal angles, and EWI return details with insufficient space to press a 100 mm wing flat into the basecoat.
- Mechanical key through perforated arms: render squeezes through the 40 mm perforated arms and locks the bead in without relying on mesh adhesion, staying stable through thermal cycling and minor impact.
- Heritage and conservation friendly: compatible with the lime-based renders and shallow finishes typical of period property work, where deeper build-ups are undesirable for breathability and proportion.
- Alkali-resistant, lead-free uPVC: survives long-term contact with cementitious renders, lime mortars, and acrylic coatings without embrittlement or yellowing across a UK facade service life.
Technical Specifications — 6 mm PVC Corner Bead Data
| Property | Value |
|---|---|
| Length | 2,500 mm |
| Nose depth | 6 mm |
| Arm width | 40 mm per arm |
| Internal angle | 90° |
| Suitable render depth | 6–8 mm total finished depth |
| Material | Exterior-grade rigid uPVC · alkali-resistant · lead-free · UV-stabilised |
| Mesh | None — perforated arms for mechanical keying |
| Colour | White |
| Standard reference | BS EN 13914-1&2:2016 class, subject to system confirmation |
| Application temperature | +5 °C to +30 °C, air and substrate |
| Pack size | Single 2.5 m length; trade packs available |
Dimensions and render-depth range are drawn from industry specification data for 6 mm uPVC render angle beads in this class. Confirm against the current manufacturer's datasheet for warranty-critical or BBA-governed installations.
How to Apply the 6 mm Corner Bead — Bedding in Tight Spaces
Apply a thin continuous bed of render or adhesive mortar to each arm face before offering the bead up. On confined geometry such as reveals, internal returns, and soffits, back-buttering the bead and pressing it into position is cleaner than buttering the substrate and lifting the bead onto a wet face, so access from one side is never the limiting factor.
Squeeze the arris square to the corner until render extrudes through every perforation along both arms; on a 6 mm profile there is less bedding thickness to forgive an uneven press, so consistent coverage matters. Trim ends with a fine-tooth hacksaw or bead-cutting scissors rather than tin snips, which crush the narrow nose and distort the tight arris. For the full termination sequence at reveals, heads, and bases, follow the step-by-step corner bead installation guide.
Installation Notes — Shallow Render Conditions and Adhesion
For the best result, work within the +5 °C to +30 °C window for air and substrate, and fix the bead and render the corner in the same session. Shallow coats carry less thermal mass to absorb early-age movement, so keeping bead and surrounding render at a matched temperature keeps the bead-render interface tight through the first heating season.
On lime renders and heritage substrates with variable suction, control the moisture balance at the corner: dust off loose material and lightly dampen high-suction zones so the wall does not pull water from the bedding mortar too quickly. Where the corner sits on a flexible substrate or forms part of a water-management detail, the selection logic changes, and the render detailing around windows and doors guide covers location-specific corner work.
Pro Tips From UK Installers Using the 6 mm Corner Bead
Many installers reach for the 6 mm no-mesh bead as a cheaper stand-in for the mesh-wing profile on open thin-coat EWI elevations. Across corner-bead orders on Renders World facade programmes, that substitution is the pattern most linked to callbacks: on a reinforced-basecoat system the no-mesh arms have no field mesh to tie into, so the corner sits unreinforced. Reserve this profile for the jobs a mesh-wing bead physically cannot reach, and the result holds.
- Back-butter in reveals: in narrow window reveals, buttering the bead and pressing it home gives better coverage than trying to butter a confined wall face first.
- Cut with a hacksaw, never snips: the 6 mm nose is too slender to survive tin snips without crushing, so a fine-tooth hacksaw keeps the arris square at every cut.
- Store fully supported: a slimmer profile takes a set more readily, so keep lengths vertical or fully cradled to preserve a true line.
- Match nose to topcoat, not basecoat: on an 8 mm two-coat lime system the 6 mm nose sits flush with the topcoat, so specifying against basecoat thickness alone is what leaves a bead reading proud.
How the 6 mm Bead Compares to Sibling No-Mesh Depths
The no-mesh corner beads share one job across three render depths, so the choice comes down to matching the nose to your finished coat. Read across to confirm which depth finishes flush on your system before ordering.
| Variant | Key Spec | When to Choose |
|---|---|---|
| 6 mm PVC corner bead no mesh | 6 mm nose · 6–8 mm depth | Shallow lime and fine finishes |
| 10 mm PVC corner bead no mesh | 10 mm nose · 10 mm depth | Thick-coat and heavy mineral systems |
| 15 mm PVC corner bead no mesh | 15 mm nose · max depth | Maximum-depth insulated render |
Is the 6 mm No-Mesh Corner Bead Right for Your Project?
- Shallow traditional renders at 6–8 mm (lime, light monocouche, fine sand-and-cement): the primary use case, where the 6 mm nose finishes flush at minimum traditional thickness.
- Confined reveals and tight internal angles on EWI systems: where a 100 mm mesh wing cannot be pressed flat, this profile delivers the mechanical key without the spatial demand.
- Open thin-coat EWI elevations with reinforced basecoat: specify the mesh-wing corner bead instead, embedding its wings into Ceresit CT325 field mesh to tie the corner into the composite system.
- Termination edges and drip details elsewhere on the elevation: route to the render stop beads range for depth-matched edge profiles across the same set of finishes.
The 6 mm no-mesh bead is stocked for next-working-day despatch in trade quantities at Renders World. Calculate one 2.5 m length per external corner per storey plus 5–10% for cuts, and confirm nose depth against the specified render thickness before ordering to keep corner geometry consistent across the elevation.
FAQ — 6 mm Corner Bead Coverage, Compatibility, Ordering
What render thickness does the 6 mm nose suit?
Sized for a total finished depth of 6–8 mm, the nose covers lime-based renders, light monocouche one-coat systems, and fine sand-and-cement finishes in that range. At 6 mm the arris sits flush and at greater depths it is cleanly buried, whereas a 10 mm nose in the same position would stand proud on a 6 mm finish and read as a visible trim line.
Why use this instead of the mesh-wing corner bead on a thin-coat system?
On open elevations with a reinforced basecoat, the mesh-wing bead is the stronger specification because its fibreglass wings embed into the field reinforcement and tie the corner into the composite layer. The 6 mm no-mesh profile earns its place specifically where that wing cannot be embedded properly, which means confined reveals, tight internal angles, and heritage systems with no reinforced basecoat to embed into.
How many 6 mm beads do I need per corner?
One 2.5 m length per external corner per storey is the standard take-off, plus 5–10% for cuts and joints on regular elevations. Heritage work with multiple short returns or deep reveals typically needs closer to 15%, because each detail produces more offcuts, so ordering the higher allowance from the start avoids topping up part-way through the job.
Do I need separate corner mesh with a no-mesh bead?
For traditional thick-coat and lime-based renders, the perforated arms provide the mechanical key and a separate corner mesh is not normally specified. For reinforced-basecoat thin-coat systems the no-mesh bead does not replicate the reinforcement of a mesh-wing profile, so a mesh-wing bead remains the correct choice on open faces in those systems.
Will the white PVC arris hold up under long-term UV exposure?
Once over-rendered, only the narrow nose arris stays visible to daylight, and the lead-free uPVC formulation is UV-stabilised for facade service life. Any gradual colour change across the exposed arris is uniform across the elevation, consistent with industry standards for exterior uPVC profiles in UK climate conditions.