
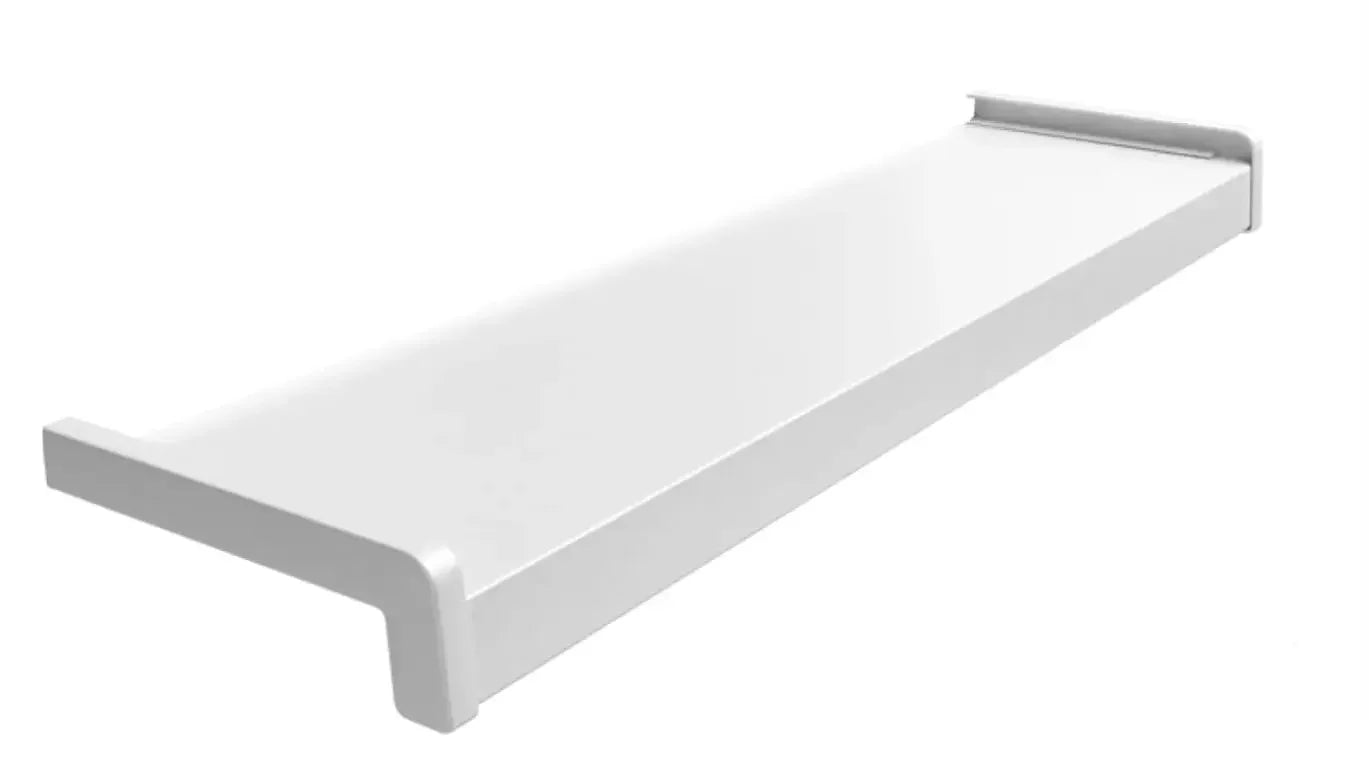
OVER SILL WHITE 2.5m 170mm DEPTH


Price:
Sale price£27.90

Shipping calculated at checkout

Stock:
In stock

Pickup available at Renders World Southampton

Usually ready in 2 hours

Description

Reliable water-shedding on a west-facing gable starts with enough drip projection, and the White Oversill 2.5 m × 170 mm is the step-up depth for standard 100–140 mm EWI builds on elevations facing prevailing weather, where a shallower trim's minimum overhang runs too fine. Brilliant white powder-coated aluminium delivering roughly 40–60 mm of projection past the render face, film-protected, stocked for trade self-collection from our Southampton warehouse.

What the 170 mm White Oversill Does on Exposed UK Elevations

Keeping wind-driven rain off a rendered facade on an exposed wall is what the 170 mm White Oversill delivers, carrying the original sill outward over EWI builds of 100–140 mm to give a 40–60 mm drip projection past the finished render face. That sits meaningfully beyond the roughly 30 mm minimum overhang good EWI detailing practice expects, and the extra margin is the whole point of the profile — it is the depth chosen when site exposure assessment shows a shallower oversill would leave the facade vulnerable. The profile sits within the wider window sill extensions and oversills range for coordinated white detailing.

UK prevailing weather pushes rain at horizontal angles exceeding 30 degrees during storms, particularly on south-west and west-facing elevations. At those angles a marginal drip from a shallower oversill increasingly lets rainwater track back onto the render face rather than fall clear, whereas the 170 mm depth lifts the overhang into a band that sheds water reliably even when wind direction works against the detail. Brilliant white powder coat keeps the trim line aligned with the standard uPVC frame colour across most UK housing stock.

Why Installers Step Up From 140 mm to the 170 mm White Oversill

  • Exposure margin where prevailing weather hits hardest: the 40–60 mm projection band lifts the drip edge clear on west-facing, south-west-facing and unshielded gable elevations where horizontal rain angles routinely exceed what a minimum-projection trim can handle.
  • Same install detailing as the rest of the range: fixing centres, end-cap fitting and sealant work are identical to the 140 mm trim, so the only on-site difference is the cut width and stepping up depth adds no programme complexity.
  • Matches standard uPVC window frames: brilliant white powder coat aligns with the dominant frame colour across UK housing stock, holding a single sill colour line across mixed-depth elevations.
  • UV-stable factory finish: the powder coat resists yellowing across the 25–30 year service life of a certified EWI system, keeping the white trim line in parity with the frames over the long term.
  • PVC film through the rendering programme: the factory film stays on through basecoat, mesh and topcoat, which matters most on exposed elevations where wind-blown render splatter hits the trim face hardest.
  • Bridges the standard-to-deep band: sitting between the 140 mm workhorse for sheltered builds and the 220 mm for deep retrofit, the 170 mm is the practical step-up when the project needs more margin without moving into deep-projection territory.

Technical Specifications — 170 mm White Oversill Data Sheet

Property Value
Profile type Window oversill extension — upper-mid projection
Material Powder-coated aluminium extrusion, exterior grade
Colour Brilliant white
Length 2.5 m (single unit)
Projection (depth) 170 mm
Insulation build accommodated 100–140 mm (with basecoat and topcoat)
Drip-edge projection past render 40–60 mm typical at correct build depth
Recommended fixing centres 300 mm along rear upstand
Surface protection Factory-applied PVC film, removed at handover
Compatible end caps White end-cap pair (sold separately)
Delivery route Self-collection only — Southampton warehouse
Storage Flat, dry, protective film retained until install

How the 170 mm White Oversill Sits in the EWI Build Sequence

The oversill goes on after insulation boards have been bonded and mechanically fixed but before the basecoat and mesh reinforcement layer, so the basecoat can be worked tight against the trim edge afterwards and lock the profile cleanly into the finished build. Bed the rear upstand into a continuous low-modulus silicone or hybrid sealant bead against the original masonry sill, then fix mechanically with countersunk screws at 300 mm centres along the upstand.

Set the trim with a 5–10 degree outward fall so rainwater drains clear of the wall rather than tracking back behind the upstand toward the substrate. On exposed elevations — which is where the 170 mm depth most often earns its specification — verify wind-uplift fixing capacity against the project exposure category, since prevailing weather loads work harder against the trim than on sheltered walls. Pair the profile with the matching white end-cap pair at each reveal, and for the full installation sequence covering measuring, cutting, sealing and end-cap integration the window sill extensions installation guide walks through the worked process across the whole trim family.

Installation Notes — Cutting, Sealing, Multi-Window Runs

For the best result, measure every opening individually. On pre-war and inter-war solid-wall properties — the housing stock where 170 mm is most commonly specified for exposure reasons — original reveals vary by 15–20 mm between openings on the same elevation, and a single measurement carried across multiple windows produces visible inconsistency. Cut each profile to width with a fine-toothed metal-cutting blade, leaving 2–3 mm clearance at each end for the end cap, then deburr the cut edge with fine-grit abrasive so the end-cap seal sits cleanly against the cut aluminium.

Use a low-modulus silicone or hybrid sealant along the rear upstand and again at the end-cap junction, since high-modulus products can crack as the aluminium cycles with temperature and open a path for water onto the insulation behind. Leave the PVC protective film intact through basecoat, mesh and topcoat, peeling it only as scaffolding is being struck. On exposed elevations the film earns its value most, because the same prevailing weather that drove the depth-up specification also pushes render splatter against the trim face during the build. Oversill detailing sits within the broader window reveal treatment that also includes stop beads at jambs and corner beads at external arris points; the render detailing around windows and doors guide covers the full junction-by-junction coordination of profiles around openings.

How the 170 mm Depth Compares to Neighbouring White Oversills

The white oversill family covers the full UK insulation depth band across four projections in a single colour. Choosing the right depth is a two-part decision: insulation build first, then site exposure as the modifier.

Variant Key Spec When to Choose
140 mm white oversill 140 mm projection Sheltered standard builds, 70–100 mm
170 mm white oversill 170 mm projection Exposed elevations, standard 100–140 mm
220 mm white oversill 220 mm projection Deep retrofit, insulation-driven, 140–200 mm


On a property with mixed elevations, specifying 140 mm for sheltered walls and 170 mm for exposed walls is a practical balance, since install detailing is identical across depths and the only on-site difference is the profile width at the cutting stage. Where the project specifies dark trim to match anthracite frames or contemporary contrast detailing, the matched 170 mm anthracite oversill covers the same insulation band in RAL 7016 powder coat.

Pro Tips From UK Renderers Fitting Mixed-Depth Oversill Runs

The 170 mm white is the exposure-margin depth rather than a default, so the discipline that gets a mixed-depth run right sits in surveying exposure before ordering and keeping the trim line consistent across depths.

  • Survey exposure before ordering depth: walk the elevations and identify which face prevailing weather and which are sheltered by neighbouring structures or topography, since that survey rather than insulation thickness alone decides whether each elevation takes 140 mm or 170 mm.
  • Mark profile depth by elevation on the order sheet: a typical detached house might split as 140 mm for north and east and 170 mm for south-west and west, so labelling profiles by destination on collection day keeps cuts off the wrong elevation.
  • Count end-cap pairs by openings, not by depth: the white end-cap pair closes one oversill run regardless of profile depth, so count caps against window openings and add the same pair count whichever depths the project specifies.
  • Hold a 5–10 degree pencil mark on the masonry sill: a consistent fall mark across every opening keeps the trim line visually parallel along the elevation, which matters more on a mixed-depth run where any inconsistency reads as installer error.
  • Plan film removal as the last task: on exposed elevations the same weather that drove the depth-up specification throws render splatter at the trim face throughout, so the film stays on through every adjacent trade interface and comes off only at scaffold strike.

Is the 170 mm White Oversill Right for Your Project?

  • Exposed elevations on 100–140 mm EWI builds: the right specification for south-west, west-facing and unshielded gable walls where the extra 40–60 mm of drip projection keeps wind-driven rain reliably clear of the render face.
  • Mixed-elevation properties: a sound choice for the exposed walls on a property where sheltered elevations take 140 mm trim, since install detailing is identical and mixed-depth specification adds no programme complexity.
  • Sheltered standard builds (70–100 mm insulation): the 140 mm white oversill covers minimum projection at a narrower profile, avoiding the architectural step an oversized trim would add unnecessarily.
  • Deep retrofit (140 mm+ insulation): the 220 mm white oversill is the correct projection where insulation depth itself drives the trim choice rather than exposure margin.
  • Anthracite or contrast-trim facades: the 170 mm anthracite oversill covers the same projection in RAL 7016, matching dark frames and contemporary facade specifications.

FAQ — 170 mm White Oversill Selection, Compatibility, Ordering

When should I choose 170 mm over 140 mm for 100 mm insulation?
Both depths accommodate 100 mm insulation, but they differ in drip-edge projection. The 140 mm oversill provides roughly 28 mm of overhang past the render face, adequate for sheltered elevations such as courtyard walls, urban-terrace rears, or facades shielded by neighbouring buildings. The 170 mm provides roughly 58 mm, the more reliable specification on west-facing and south-west-facing walls where horizontal rain angles in storms push water back toward the wall surface. If the elevation faces prevailing weather or is unshielded, step up to 170 mm.

How many profiles do I need for a typical window opening?
One 2.5 m profile covers most domestic window widths in a single length, the cleanest detail because any intermediate joint reads as a visible line along the trim face. Measure each opening width and add 30–50 mm overhang each side past the reveal. For openings wider than 2.5 m clear, two profiles join with a manufacturer-approved jointing strip, so plan the joint position to fall away from the visual centre of the opening.

Can I use different oversill depths on the same property?
Mixing depths is a practical approach on properties with both sheltered and exposed elevations. Fixing centres, sealant details and end-cap fittings are identical across all four depths, so the only on-site difference is the profile width at the cutting stage. Specifying 140 mm for sheltered walls and 170 mm for exposed walls balances cost and weather performance without adding installation complexity, and the white powder coat holds colour parity across the whole elevation.

Are end caps included with the oversill?
End caps are sold separately as a matched pair so each oversill run can be matched precisely to its measured width. Order the white end-cap pair alongside the oversill — one pair closes both ends of a single run, regardless of whether the run is 140 mm, 170 mm or 220 mm depth.

Can the 170 mm oversill be cut to length on site?
Each 2.5 m profile is designed to be cut to the measured window width on site using a fine-toothed metal-cutting blade. Leave 2–3 mm clearance at each end for the end cap to seat without forcing, then deburr the cut edge with fine-grit abrasive so the end-cap seal beds cleanly against the cut aluminium rather than catching on a rough burr.

How is the white powder-coat finish maintained over the building's life?
The white powder coat is built for long-term exterior durability and typically needs only periodic rinsing with clean water to remove airborne deposits, subject to manufacturer guidance. Avoid solvent cleaners and abrasive pads, which can dull the coating sheen over time, and keep the surface clear of cementitious runoff during the build since efflorescence-style staining on white profiles results from render residue rather than coating failure.

You may also like

Recently viewed