
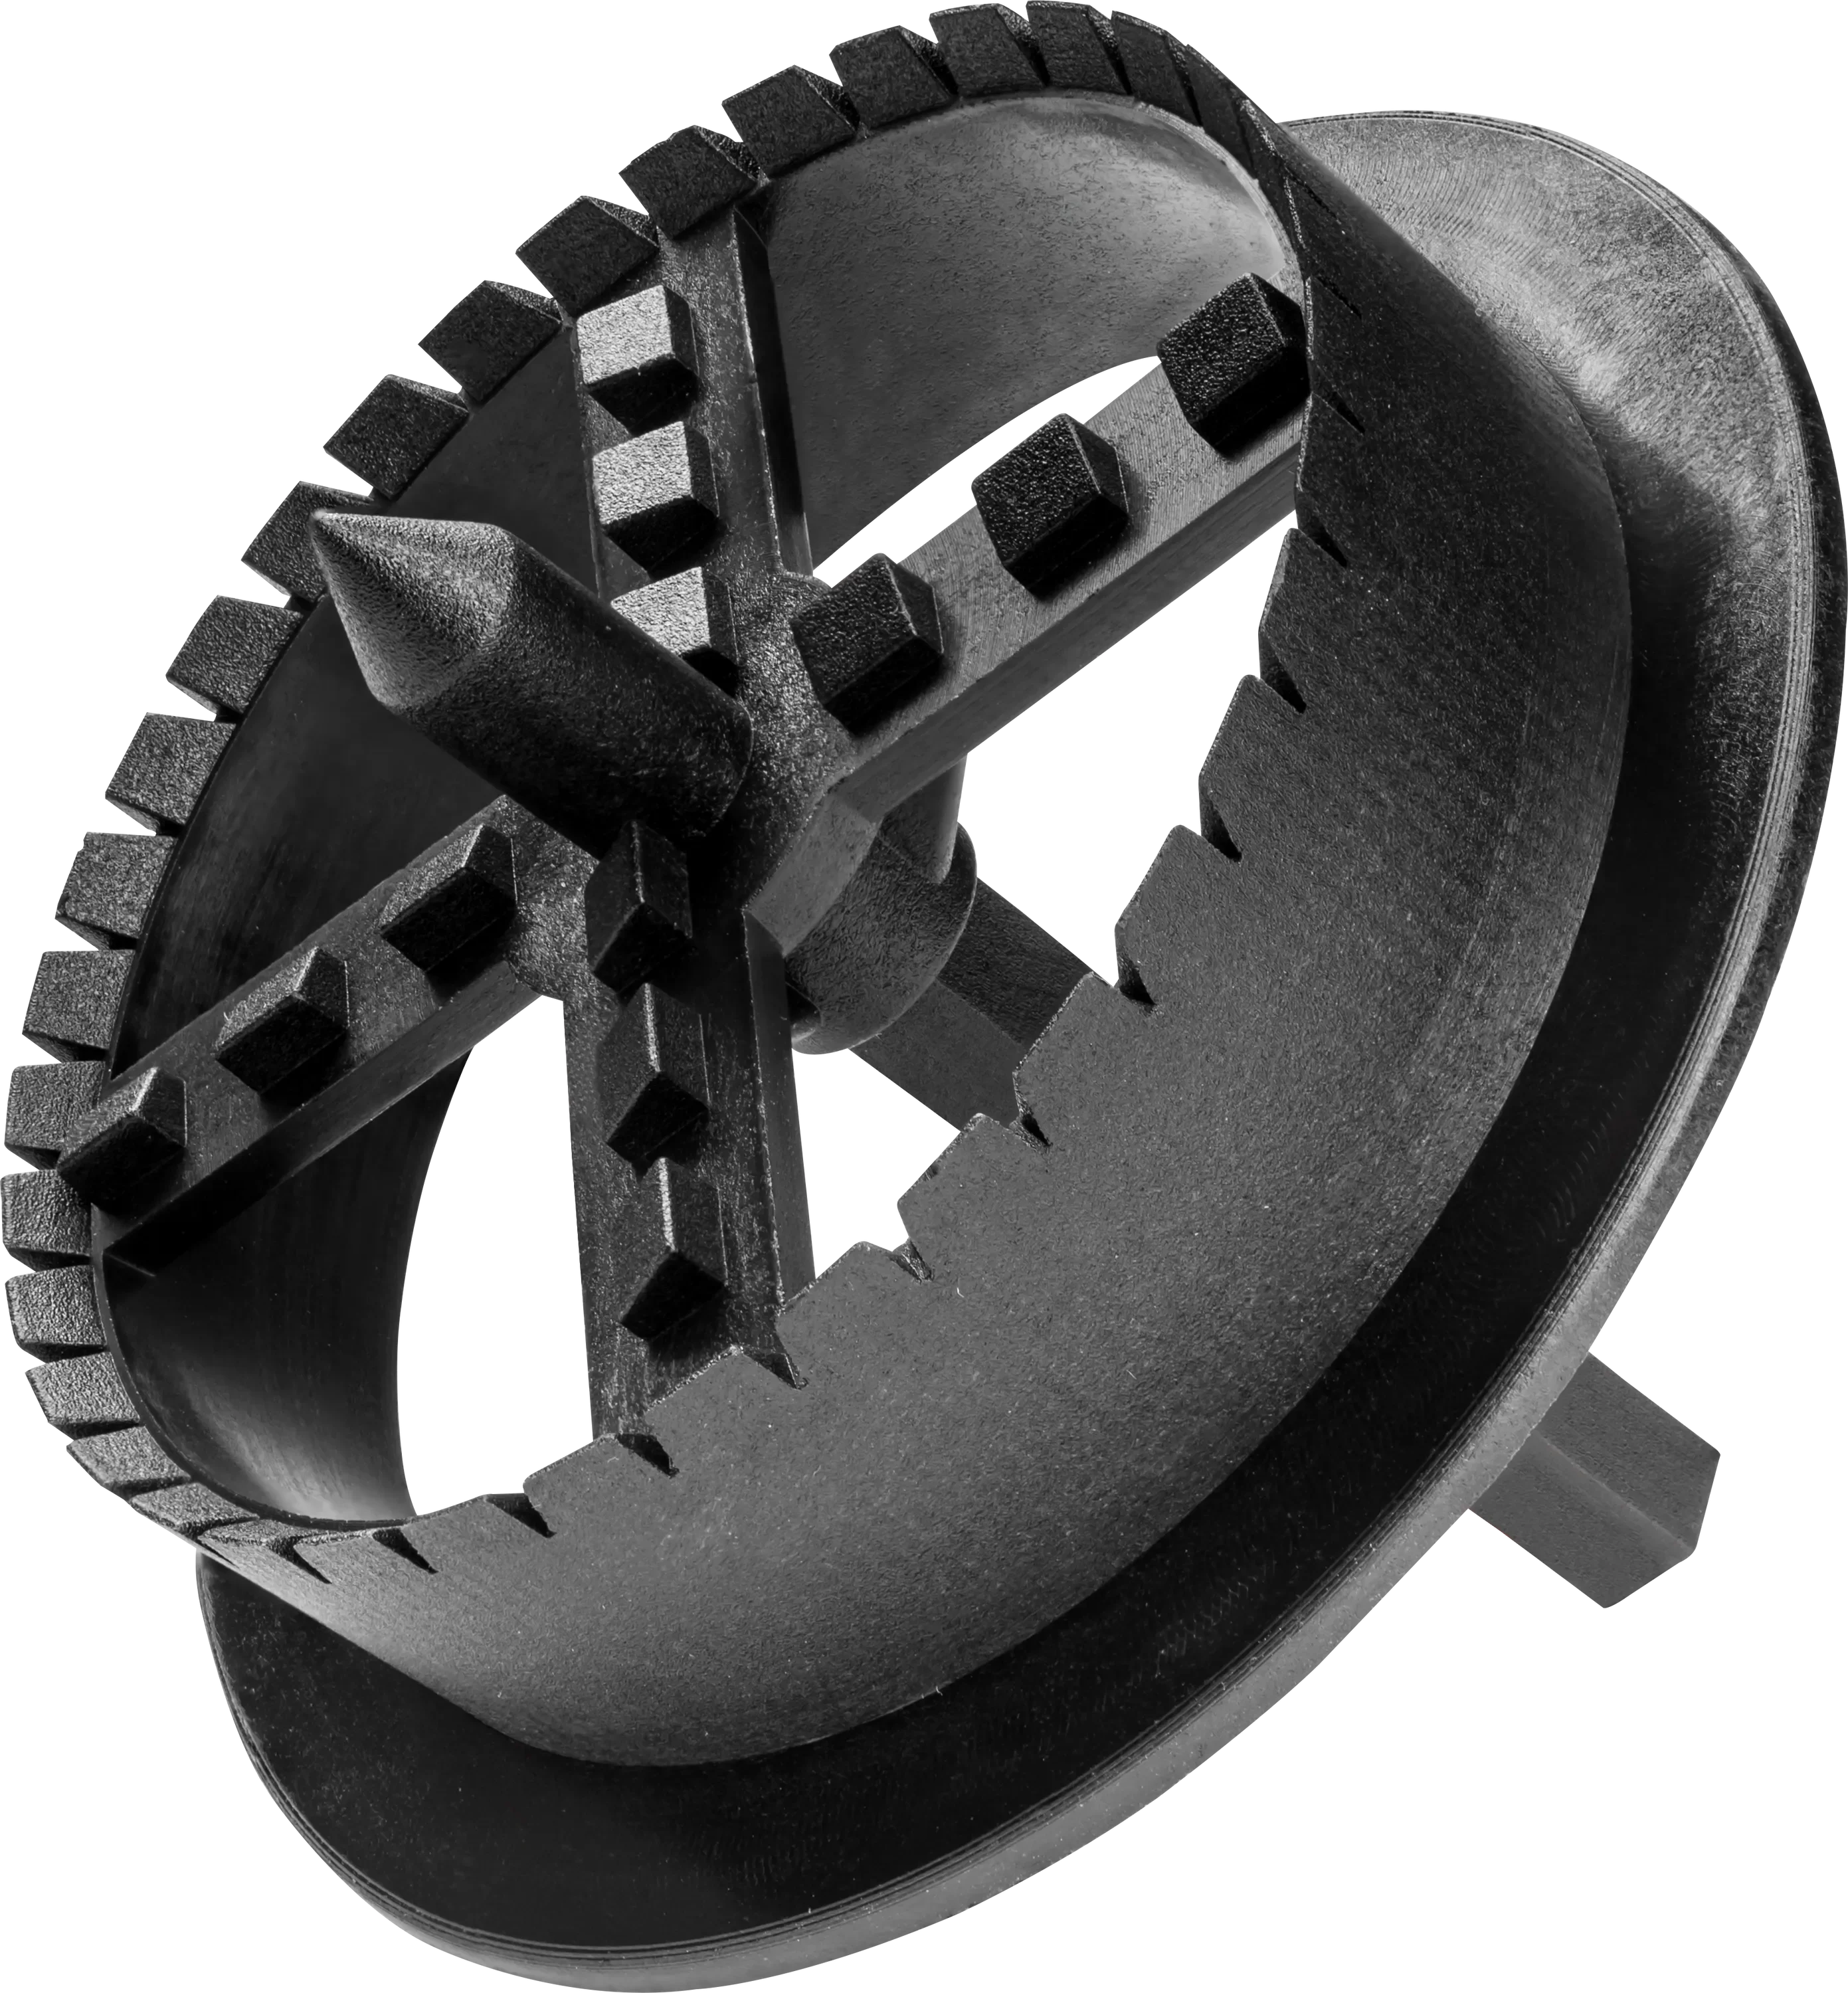

Description
Countersinking is the stage where a fixing stops being a fixing and becomes part of a flat board face. This tool sits in the insulation fixing accessories range at Renders World, on the same shelf as the plugs and discs whose heads it recesses.
Where a Hole Cutter Fits Into the Fixing Sequence
The EPS styrofoam hole cutter recesses the head of a mechanical fixing into the insulation board so the disc sits below the surface, and it was listed at £6.50 as displayed in August 2026. It is listed as an EPS and wool cutter, which is the scope its own product name sets.
That position in the programme is what makes it a small purchase with a visible result. Recessing and capping each fixing hands the renderer a continuous board face, so the reinforcing layer is trowelled flat rather than feathered over every plug head.
- On the board — the disc drops below the face instead of standing on it, and the surrounding board is left undisturbed.
- On the insulation layer — a cap glued into the recess puts insulation back over the plug head, keeping the layer continuous where the fixing interrupts it.
- On the sequence — the recess is cut in the same pass as fixing, before mesh and basecoat, and the full order of work is set out in the EWI fixings installation guide.
Why Trade Buyers Choose a Purpose-Made Countersink Cutter
A cutter is bought for a clean, repeatable pocket at every plug, which is what a cap needs to bed into properly and what a hand-cut hollow rarely gives twice in a row.
- Priced openly at £6.50, as displayed in August 2026, so it costs a materials schedule nothing to include a spare alongside the working tool.
- Listed in stock at the time of the crawl, on the same site as the plugs, discs and tracks that make up the fixing stage.
- One tool across the boards it names — expanded polystyrene and mineral wool, which covers the field boards on most retrofit elevations.
- Ordered with the boards it works on — the graphite EPS insulation boards arrive on the same delivery as the fixings and the cutter that finishes them.
- Fits the first-day rhythm — the datum and base track set the pattern the recesses follow, a sequence covered in the first-day base track setup guide.
What to Check on the Cutter Before You Order It
No manufacturer data sheet, leaflet or distributor mirror for the EPS styrofoam hole cutter could be retrieved in this session, and searches across trade and technical hosts returned only comparable tools from other suppliers. Renders World publishes what the live listing supports, and names the rest as an order-line check.
- Published here — the price and the stock state read from the product listing, each dated to the month they were read.
- Not published here — cutting diameter, cutting depth, body material, shank type, drill speed and service life, none of which any retrieved document supports for this tool.
- Checked against your discs — comparable cutters from different suppliers are not all cut to one diameter, so match the tool to the disc actually on site rather than to a figure quoted elsewhere.
- Proved on one board — cut a single recess, seat a real fixing in it and try a cap before the pass runs across an elevation.
That first test recess is the cheapest quality check on the whole fixing stage, and it settles diameter, depth and cap fit in one go.
How to Use the Cutter, Plug by Plug
The cutter comes into the work after the plug is driven and the disc is bearing on the board, not before. Read the tool's own packaging for the speed it wants, then keep the pass consistent.
- Drive and seat the fixing first — the disc must be flat against the board, since the cutter follows the head rather than finding its own centre.
- Enter square to the face — hold the drill perpendicular so the base of the recess stays flat and the cap will sit level rather than cocked.
- Cut at a moderate, steady speed — light pressure and an unhurried entry give a clean-walled pocket; forcing the tool glazes the cut face and gives the cap adhesive less to hold.
- Clear the pocket — brush or blow out dust and loose fibres so the adhesive meets clean material.
- Glue and seat the cap — a dab of foam adhesive or basecoat on the back, pressed to level or a whisker below the surrounding board.
Where the recesses land is a separate question from how they are cut, and it belongs to the system specification rather than the tool. The fixing pattern and spacing guide covers layout across the field and around openings.
Working Cleanly on Graphite EPS and Mineral Wool Slabs
The two materials named on the tool behave differently under it, and adjusting for that is what keeps a recess crisp all afternoon. Graphite board cuts firm and holds its edge well; wool cuts easily but shifts the wear onto the tool.
- Slabs from the mineral wool insulation range — cut with a sharp tool so fibres are sliced rather than dragged, and wear eye protection and a fitted mask for the airborne fibre.
- Graphite boards on a hot elevation — work the shaded face while the sun is on the other side, since a warm board scuffs more readily under any cutter.
- Replace the tool when the cut changes — the moment a pocket tears instead of slicing, a fresh cutter restores the finish, and a spare in the van keeps the elevation moving.
How the Countersink Stage Sits Beside Fixing and Capping
| Your Stage | What Handles It | Where the Detail Sits |
|---|---|---|
| Anchoring the board | Plugs, discs and anchors | Plugs, discs and base tracks |
| Recessing the plug head | This cutter | Checked against your disc on site |
| Capping and reinforcing | Caps, then mesh and basecoat | Fixings and capping sequence |
Read down that table and the cutter is one step of three, which is why it is ordered with the other two rather than on its own.
Is This Cutter Right for Your Fixing Programme?
- Choose it for mechanically fixed EPS and wool elevations — where plug heads are being recessed and capped, and a purpose-made pocket is wanted at every point.
- Confirm the diameter on arrival — one test recess with the disc in hand settles it, and it is a step worth taking before a full pass.
- Order the caps with it — the caps that finish each recess sit in the same fixings and accessories range, so countersinking and capping run as one stage.
- Bring the boards along — the graphite insulation board range and the slabs beside it are the materials this tool is named for.
Renders World shows the price and the stock state on the listing, and the specification questions left open here are the ones to put to the supplier rather than to infer from a similar tool.
FAQ: Using, Ordering and Replacing the Cutter
How many cutters does one project need?
Plan one per drill in use, plus a spare on the van. The number of recesses comes from the fixing layout the system specifies rather than from the tool, and the fixing pattern and spacing guide is where that count is worked out. No service-life figure is published on this page, because no document supporting one was available to read.
Will it match the fixing discs already on site?
Check it with a real disc before the pass begins, as cutter diameters vary between suppliers and the listing gives none for this tool. A disc that sits inside the pocket with a little clearance is right; one standing proud of the cut needs a wider cutter, and finding that out on one board costs nothing.
Which boards is it intended for?
Its own name covers expanded polystyrene and mineral wool, and that is the scope stated here. Anything else — denser plinth boards in particular — is worth a test cut first, since no document was available to confirm how the tool behaves outside the two materials it names.
When is a cutter past its best?
The cut tells you. While pockets come out clean-walled and the cap beds without packing, the tool is fine; once the wall of the recess tears or the cutter starts to wander off the disc, swapping it restores the finish immediately and protects the caps already fitted.