
Description
The render stop beads range at Renders World begins with this 3 mm profile — the thinnest member of the family and the specification answer wherever a single thin-coat decorative render terminates at a window reveal, plinth band, expansion joint, or material change-over line. The rigid PVC nose forms a precise 3 mm edge while the alkali-resistant fibreglass mesh wing embeds straight into wet basecoat or adhesive, locking the termination into the facade's reinforcement layer in a single fixing pass.
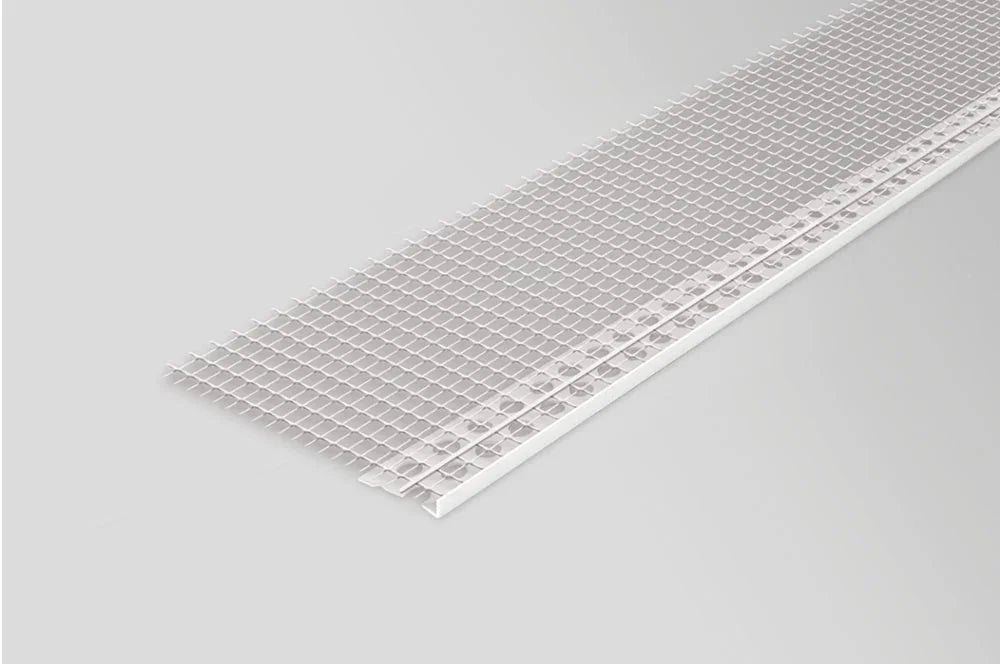
What This 3 mm PVC Stop Bead Does in a Thin-Coat Render System
The 3 mm PVC render stop bead with mesh is a 2.5 m white rigid PVC profile that creates a clean 3 mm termination edge for thin-coat decorative silicone, silicate, and acrylic renders, embedding into the basecoat through an integrated alkali-resistant fibreglass mesh wing. At 3 mm depth it is the lightest-duty profile in the stop bead family, and the difference between a flush, invisible termination and a buried, ragged edge often comes down to matching this number exactly to the finished render thickness.
Specify the 3 mm variant when the total render build-up at the termination is around 2–3 mm — typical of single-coat decorative refurbishment renders and translucent thin finishes. For full EWI systems carrying a 3–5 mm reinforced basecoat plus a 1.5–2 mm topcoat, the proportionate choice is the deeper 6 mm or 10 mm profile, where the nose sits flush with the heavier finish rather than disappearing beneath it.
Why Trade Specifiers Choose the 3 mm PVC Stop Bead with Mesh
- Thin-coat compatible 3 mm nose: Matches single-pass decorative renders without standing proud of the finish, so the float passes the edge cleanly and the termination line stays sharp.
- Integrated alkali-resistant mesh wing: Keys directly into wet basecoat or adhesive, removing the need for a separate strip of fibreglass reinforcement mesh at the termination edge.
- Crack control at the bead-to-render interface: The embedded mesh distributes shrinkage and thermal movement stress across the bond zone, holding the edge against hairline cracking through repeated wet–dry and freeze–thaw cycles.
- Non-corrosive PVC body: Unlike galvanised steel beads, the PVC profile produces no rust staining beneath light silicone or acrylic finishes in damp UK exposure conditions.
- Clean straight nose for masking: The rigid edge holds a true line for cutting in masking tape during topcoat application, useful where two adjacent render colours meet at a band detail.
- Easy on-site cutting: Tin snips or a fine-tooth hacksaw produce square ends without splintering — no abrasive disc required, which keeps the dust load low on occupied refurbishment sites.
Technical Specifications — 3 mm Stop Bead Data Sheet
| Property | Value |
|---|---|
| Profile type | Render stop bead with integrated mesh wing |
| Body material | Rigid PVC, white, UV-stabilised |
| Render depth (nose) | 3 mm |
| Length | 2.5 m per piece |
| Mesh | Alkali-resistant fibreglass, factory-bonded wing |
| Mesh overlap with main reinforcement | 100 mm minimum |
| Frame gap (sealant joint) | 2–3 mm |
| Application temperature | +5 °C to +25 °C (governed by render system, not bead) |
| On-site cutting | Tin snips or fine-tooth hacksaw |
| Compliance reference | Typically meets BS EN 13658-2 design principles for plastering accessories — confirm with project documentation |
How to Install the 3 mm PVC Stop Bead — Bedding, Alignment, Curing
Press the mesh wing into a continuous bed of basecoat or adhesive applied along the termination line, embedding the mesh fully so it disappears into the wet material with no dry pockets behind the wing. Check the nose for line and level with a long straight edge before the bedding material sets — once the basecoat skins, adjustment will stress-crack the bond. Allow full cure of the bedding layer before applying the thin-coat finish so the nose holds true under float pressure.
For the complete step-by-step process covering adhesive bed preparation, jointing on longer runs, mitre cuts at corner junctions, and the sealant sequencing at frames, the full stop bead installation guide for UK projects sets out each stage in sequence. Profile coordination across an opening — where stop beads meet corner beads, bellcasts, and oversills — is covered in the render detailing guide for windows and doors.
Installation Notes — Conditions, Sealant Joints, Junctions
Where the bead terminates against a window or door frame, leave a 2–3 mm gap between the nose and the frame face. After the render has fully cured, this gap takes a low-modulus UV-stable sealant that provides the primary waterproof joint and accommodates differential thermal movement between the render system and the adjacent material. Closing the gap with render is the most common cause of edge cracking at frames on refurbishment work.
Where stop beads meet corner beads at a window reveal, mitre the wings to avoid mesh build-up at the junction — doubled mesh creates a hard spot that telegraphs through the topcoat. Maintain a 100 mm overlap with adjacent reinforcement mesh sheets across the bond zone to preserve continuous crack control across the detail. On longer horizontal runs, butt-joint successive beads tightly and overlap the mesh wings by the same 100 mm to keep the tensile network continuous along the termination line.
Pro Tips From UK Installers Using the 3 mm Stop Bead
For best result, always confirm the finish-coat thickness before opening a box of 3 mm beads on site. A 3 mm bead under a 2 mm thin-coat topcoat sits perfectly flush; the same bead under a 5 mm reinforced basecoat plus topcoat will be buried, leaving the mesh wing exposed and the termination ragged. If the specification calls for full mesh reinforcement plus topcoat, step up to the 6 mm PVC stop bead with mesh — this single bead-depth check prevents the most common selection mistake on refurbishment jobs.
Embed the mesh wing fully on first contact rather than re-bedding after positioning. PVC has minimal grip on partially set basecoat, and a wing that has been lifted and pressed back rarely achieves the same bond strength as one set cleanly in the first pass. If the line needs adjustment after initial embedment, scrape the bedding material back to substrate and refresh the bed rather than working into a tacky layer.
Is the 3 mm PVC Stop Bead with Mesh Right for Your Project?
- Best fit: thin-coat single-layer decorative renders or refurbishment finishes around 2–3 mm total thickness, where a 3 mm nose sits flush with the finished surface.
- Step up for reinforced systems: if the specification includes a separate reinforced basecoat plus thin-coat topcoat, the 6 mm PVC stop bead with mesh is the proportionate selection for the deeper build-up.
- No-mesh alternative at the same depth: where the bead terminates against an existing finish without a continuous basecoat to embed into, the 6 mm PVC stop bead without mesh handles the boundary cleanly.
- Heavy render systems: for full EWI build-ups, monocouche, or traditional sand-cement coats, the deeper 10 mm and 15 mm profiles in the render stop beads range provide the proportioned nose and impact resistance those finishes need.
- Need quantity advice? A typical three-bedroom property with four to six openings requires 25–40 linear metres of stop bead; our technical desk can confirm exact lengths against elevation drawings on request.
FAQ — 3 mm Stop Bead Coverage, Compatibility, Ordering
How many 3 mm stop beads do I need for one window opening?
A standard 1.2 m × 1.2 m window requires stop beads along both vertical jambs and the head, totalling approximately 3.6 linear metres — that is two 2.5 m lengths per opening with offcuts retained for short runs elsewhere. For a full elevation with six openings, allow 14–16 lengths plus 10–15% waste. The 3 mm profile is supplied as single 2.5 m pieces, so order in whole units and keep cut-off pieces for short returns and mitres.
What render thickness does the 3 mm bead suit?
The 3 mm nose suits decorative thin-coat renders applied at approximately 2–3 mm total finish thickness — typically single-layer silicone or silicate refurbishment finishes over a primed substrate. For systems with a separate reinforced basecoat plus topcoat at 5–7 mm total build-up, the 6 mm or deeper profile is the correct selection.
Does the integrated mesh replace the main reinforcement layer?
No. The mesh wing reinforces the bond between the bead and the basecoat at the termination only — it does not replace the system reinforcement mesh across the wider facade. The wing should overlap the main mesh sheet by at least 100 mm to maintain continuous tensile strength across the bond zone.
Will the white PVC nose show through coloured silicone render?
Under a properly applied 2–3 mm thin-coat decorative finish the white PVC nose disappears beneath the render. On translucent or very thin decorative coats — sometimes specified on heritage refurbishment — the nose can remain faintly visible; in that case, mask the nose line and over-paint with a matching silicone masonry paint after full render cure for a consistent surface appearance.
Can this bead be used externally year-round?
Yes. The PVC body is UV-stabilised and non-corrosive for permanent facade exposure. Installation timing is governed by the render system's application window rather than the bead itself — typically +5 °C to +25 °C with no rain forecast within 24 hours of basecoat application.
How is the 3 mm stop bead cut on site?
Use sharp tin snips for clean square cuts at butt joints, or a fine-tooth hacksaw for mitres at corner junctions with adjacent stop beads or corner beads. Avoid abrasive cutting discs — they leave a rough, frayed edge on both the PVC nose and the mesh wing that catches in the wet render and produces a visible defect at the joint.