Applying thin coat render requires methodical preparation and precise timing at every layer. This Renders World guide walks through the professional workflow used by UK installers working with premium silicone render systems, covering basecoat reinforcement, primer application, and top coat technique in the sequence that delivers a crack-free, weather-resistant facade. Whether you are rendering a domestic retrofit or a new-build elevation, the method described here applies to all thin coat silicone, silicone-silicate, and acrylic render finishes applied over External Wall Insulation or directly onto primed masonry.
Preparing the Substrate for Thin Coat Render
Visual Inspection and Tap-Test Assessment
Every successful thin coat application begins with a substrate that is structurally sound, dimensionally stable, and free from contaminants that would prevent the basecoat from bonding. Before any material touches the wall, the installer should carry out a visual inspection for loose mortar, flaking paint, efflorescence, and biological growth, then tap-test the surface with a wooden handle to detect hollow or delaminated areas beneath. Any defects identified at this stage must be cut back and made good with a compatible repair mortar — addressing them now ensures the basecoat bonds to a stable surface and the render system performs reliably for its full design lifespan.
Checking Substrate Suction and Selecting the Primer
The next critical step is checking the wall's suction — in simple terms, how quickly it pulls moisture out of wet material. If the wall is too absorbent, as is common with lightweight block, aerated concrete, and older lime mortars, the basecoat can dry too quickly, leaving the reinforced layer weaker and more likely to crack later. A consolidating primer applied at the manufacturer's recommended rate seals the surface pores and creates a uniform suction profile across the entire elevation. On low-suction substrates such as dense concrete, painted masonry, or render carrier boards, a keying quartz primer provides the mechanical grip that the smooth surface cannot offer on its own. For a detailed treatment of substrate types and the correct primer pairing for each, refer to the guide on substrate preparation before rendering.
- High-suction substrates (lightweight block, aerated concrete): Apply a consolidating primer at 0.15–0.20 kg/m² and allow a minimum of 4 hours drying at +20 °C before proceeding to the basecoat stage.
- Low-suction substrates (dense concrete, painted masonry): Apply a quartz-loaded primer at 0.20–0.30 kg/m² to create a rough, mechanical key for the adhesive layer.
- Mixed substrates (part block, part concrete lintel): Treat each zone with its own appropriate primer, then apply a full-width mesh reinforcement layer to bridge the material junction and prevent differential cracking.
Applying the Basecoat and Embedding the Mesh
Mixing and Spreading the Basecoat Mortar
The basecoat reinforcement layer is the structural backbone of every thin coat render system, and its role is to distribute mechanical and thermal stresses across the full facade area rather than allowing them to concentrate at weak points. Mix the adhesive mortar to a thick, creamy paste that holds its shape on the trowel, then apply it to the primed substrate at 3–5 mm thickness using a 10 mm notched stainless-steel trowel. On EWI installations where insulation boards are already bonded and mechanically fixed, the basecoat is applied directly over the board face; on primed masonry, it goes straight onto the prepared wall — Renders World stocks system-matched basecoat adhesives compatible with both build-ups.
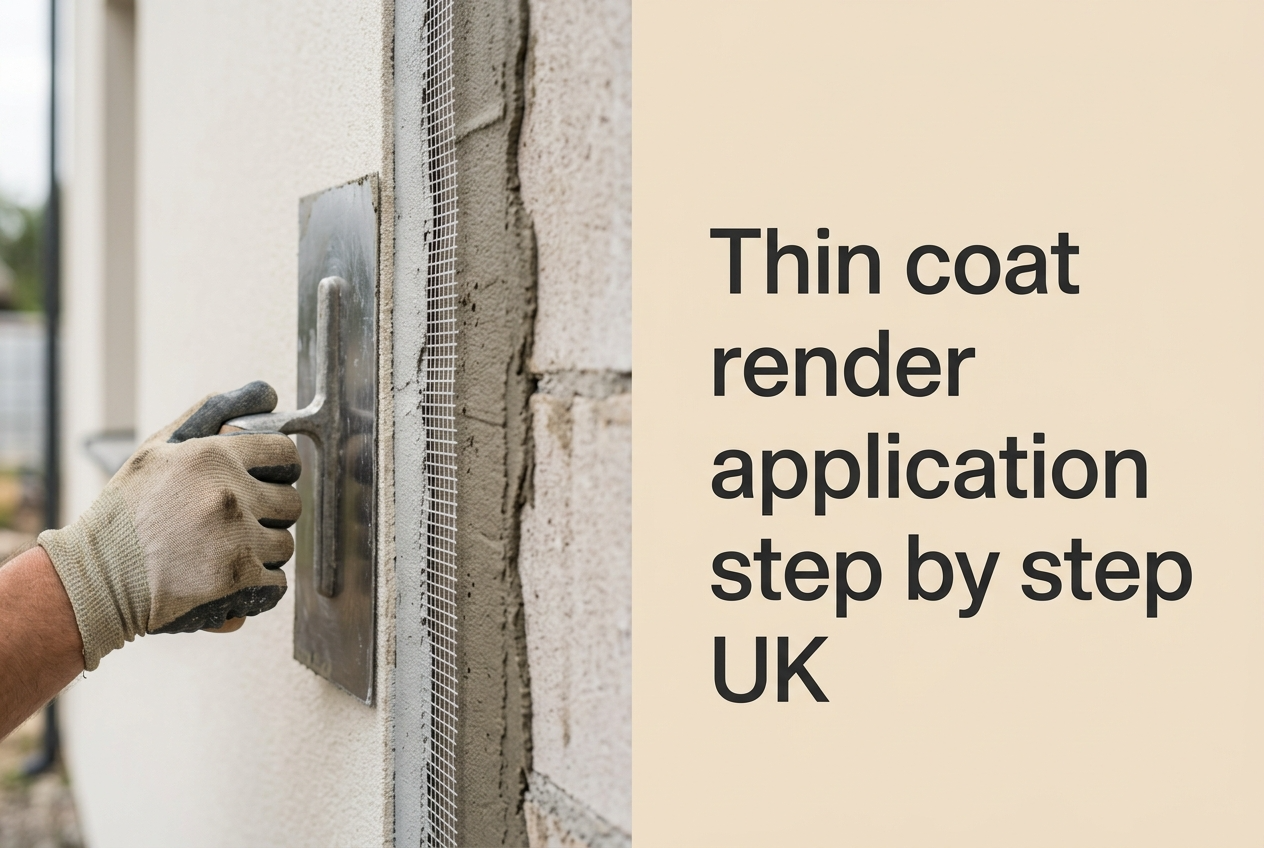
Embedding the Fibreglass Reinforcement Mesh
While the basecoat is still wet, a strip of alkali-resistant fibreglass mesh at 150 g/m² is pressed into the mortar using a wide float, working from the centre of the strip outward to eliminate air pockets. The mesh must sit in the outer third of the basecoat layer — not pressed flat against the substrate and not floating on the surface — so that it can function as a tensile membrane within the cured mortar. Adjacent mesh strips must overlap by a minimum of 100 mm on all edges, and diagonal reinforcement patches of at least 200 mm × 300 mm must be placed at every window and door corner to absorb the stress concentrations that form at these openings.
Levelling, Curing, and Pre-Primer Checks
- Surface levelling: Once the mesh is fully embedded, smooth the basecoat surface with a flat stainless-steel trowel to remove trowel ridges and create an even bed for the primer and top coat — ridges or bumps left at this stage will telegraph through the thin decorative layer and become visible in raking light.
- Curing time at +20 °C: Allow a minimum of three full days before applying any subsequent layer; in cooler spring or autumn conditions below +15 °C, extend to five to seven days.
- Moisture trap risk: Confirming the basecoat is uniformly dry before proceeding prevents blistering and premature delamination — the most common defect mode in UK thin coat facades when the top coat is rushed onto damp reinforcement.
Priming the Cured Basecoat
Once the basecoat is fully cured, cover the whole surface with a quartz-loaded render primer by brush or roller so the finish coat grips properly and dries to an even texture. This primer serves two vital purposes: it seals the basecoat so it does not dry the top coat out too quickly, and it leaves a gritty quartz texture that helps the final render grip the wall securely. Without this layer, the top coat can slide or fail to bond uniformly, producing visible patches of uneven texture once the render dries.
Key Takeaway: Apply quartz render primer to the fully cured basecoat at 0.20–0.30 kg/m² and allow at least 4 hours drying at +20 °C — or up to 18 hours below +10 °C — before applying the top coat; skipping or under-applying this layer is the most frequently cited bond-failure cause in UK thin coat defect investigations.
Primer colour matters more than many installers realise. A white-tinted primer beneath a light-coloured render ensures that the basecoat's grey tone does not bleed through and dull the finished shade. Most manufacturers offer primer in white and grey tints specifically for this reason. On large elevations, apply the primer in consistent, overlapping passes to avoid visible lap marks that could show through the 1.5 mm decorative layer. Check the surface the following morning with a palm test — the primed wall should feel uniformly dry and gritty, with no cool or damp patches indicating incomplete drying.
Applying the Silicone Render Top Coat
Single-Pass Application Across Each Elevation
Apply the top coat in one continuous pass across each full section of wall — usually one elevation between corners, reveals, or expansion joints — to avoid visible lap marks and shade variation. Two-person teams are standard on anything larger than a single-storey elevation: one person applies render with a stainless-steel trowel at the specified 1.5 mm grain thickness, while the second follows immediately behind with a plastic float to create the final texture pattern before the surface begins to skin. Where project size justifies pump equipment, the trade-off between hand and machine application is set out in the machine versus hand applied render comparison — a decision Renders World specialists help installers make based on elevation size and access.
Spreading and Floating the Render
Scoop the render onto a clean hawk and apply it to the wall in firm, overlapping arcs, keeping the layer thickness exactly equal to the grain size — a 1.5 mm render must go on at 1.5 mm thick. Pressing too hard squeezes the aggregate flat and produces a patchy, uneven texture; too little pressure leaves ridges that harden into visible lines. After the initial spread, draw the plastic float across the surface in consistent, straight strokes — horizontal, vertical, or circular depending on the specified finish pattern — to align the aggregate particles and produce the characteristic scratched or rubbed texture. This floating stage must happen within the product's open time, typically 15–20 minutes at +20 °C, after which the surface becomes too stiff to texture evenly.
Section Management and Weather Window
- Avoid stopping mid-wall: If a break is unavoidable, terminate the application at a natural feature line — a window reveal, an expansion joint, or a corner bead — rather than in the middle of a flat elevation, where the restart line will be visible.
- Scaffold lifts: Plan scaffold boards so that the applicator can reach the full height of each pass without repositioning — a visible horizontal band at scaffold-lift height is a common defect on multi-storey facades and is almost impossible to correct once cured.
- Weather window: Confirm that conditions will remain between +5 °C and +25 °C with no rain forecast for at least 24 hours before starting each elevation, and consult the detailed seasonal guidance in the article on when to apply silicone render in UK conditions.
Curing, Protection, and Common Mistakes to Avoid
Freshly applied silicone render achieves initial rain resistance within approximately 8–12 hours at +20 °C and 60 % relative humidity, reaching full cure within 24–48 hours under the same conditions. During this window, the facade must be protected from direct rainfall, frost, and prolonged direct sunlight. Scaffold netting or temporary sheeting serves a dual purpose: it shields the surface from weather damage and reduces wind-driven drying that causes one face of the coat to cure faster than the body, producing differential shrinkage and fine surface cracking.
- Batch mixing error: Using render from different production batches on the same elevation risks visible colour variation, because even factory-controlled pigments can shift fractionally between runs — always calculate total material requirement before starting, using the render coverage calculator to prevent mid-job shortfalls.
- Flash drying above +25 °C: Applying in direct sunlight causes the surface to skin over while the body remains wet, producing map cracking that cannot be repaired without stripping and re-applying the affected area.
- Cold application below +5 °C: Without a setting accelerator, the binder cannot form a continuous weather-resistant film — the surface remains soft, powdery, and vulnerable to wash-off in the first rainfall event.
For a comprehensive treatment of why cracks form and how to prevent them on future projects, the diagnostic guide on render cracking causes and prevention covers every pattern from hairline shrinkage through to structural movement faults. If you are selecting between grain sizes for the top coat — typically 1.0 mm, 1.5 mm, or 2.0 mm — the comparison in the render grain size guide explains how each option affects coverage rate, texture depth, and visual finish under UK lighting conditions.
How to Specify a Full Thin Coat Render System
Thin coat render only performs well when the full system is applied in the correct order: substrate preparation, reinforced basecoat, quartz primer, then the finish coat in a single unbroken pass. If you are a homeowner or first-time buyer, this is usually a job for an experienced installer rather than a first DIY attempt. If you already know your substrate and finish requirements, explore the Renders World silicone render systems range — or browse the full rendering materials menu when your project also needs primers, basecoats, beads, and mesh from the same supplier. If you are still deciding, start with the substrate preparation guide first, then check the coverage guide, so you can choose the correct system and order with confidence.
Written by Mariusz Saja. Technically reviewed by Rafał Wyrzykowski. Last reviewed Jun 2026.
Frequently Asked Questions
How much silicone render do I need per square metre?
How much you need depends mainly on the grain size. As a practical rule, a 25 kg tub of 1.5 mm silicone render usually covers about 9–10 m² on a flat, well-prepared wall. Finer 1.0 mm material goes further at roughly 14–15 m² per tub, while 2.0 mm render covers less at around 7–8 m² per tub. If your wall is uneven or the basecoat is rough, you will use more than the headline rate, so add 5–10 % extra when ordering to avoid running short halfway through an elevation.
Can I apply thin coat render directly onto brick or block without insulation?
Yes — but not as a direct finish coat onto bare brick or block. The masonry must be sound, clean, correctly primed, and then covered with a reinforced basecoat incorporating 150 g/m² reinforcement mesh before the finish render is applied. Because getting the mesh position, curing times, and weather windows exactly right is crucial to the final finish, we strongly recommend hiring an experienced installer rather than tackling this as a first-time DIY project.
What happens if it rains within 12 hours of applying silicone render?
Rainfall on wet silicone render breaks down the fresh binder, causing the finish to streak, wash down the wall, or dry with permanent cloudy patches. If rain arrives unexpectedly, protect the freshly rendered area with sheeting immediately. Any sections visibly damaged by water contact must be inspected once dry — heavily affected areas will need to be scraped back to the basecoat and re-applied in a fresh pass to restore a uniform finish and consistent weather resistance.
Is thin coat silicone render environmentally safe to apply?
Yes — modern silicone render is generally safer to apply around the property than solvent-based coatings because it is water-based and low in volatile organic compounds (VOC). That means lower odour during application and fewer fumes around the property, although standard site precautions and the manufacturer's handling guidance should still be followed. Unused material can typically be disposed of as standard construction waste once fully hardened, and the thin application rate of 1.5–2.5 kg/m² produces significantly less material waste per square metre than traditional sand-and-cement renders applied at 15–20 mm thickness.