A flawless silicone render finish starts the day before the topcoat goes on, with a correctly stirred and correctly rolled coat of quartz primer locking the basecoat into the system. Quartz-filled primers carry fine aggregate that creates a mechanical key for thin-coat finishes — and the difference between a primer applied at trade-standard discipline and one applied at "good enough" usually shows within the first two winter seasons. This guide walks through the application process used on UK EWI sites in 2026, the weather window the work has to live inside, and how to match the right product from the Renders World exterior render primers range to the system you are building.
What Quartz Primer Does in a UK EWI Build-Up
Quartz primer is not a thinned wall primer with sand added; it is a dedicated mid-system product that performs two distinct mechanical functions. The acrylic-modified binder locks the cured basecoat surface against dusting and powder release, and the suspended quartz aggregate creates a microscopic relief profile that the thin-coat silicone render keys into during its open time. Skip the primer and the render relies on adhesive contact with a smooth, semi-sealed basecoat that does not present the surface the topcoat expects.
For specifiers and installers working through full primer selection rather than just application, the best primer for silicone render pillar guide covers the comparison between Ceresit CT 16, Atlas Cerplast, and the deep-substrate primer alternatives. This guide stays focused on the application method once the product selection has been made.
Quartz primer sits as the penultimate layer in the standard EWI system build-up — boards, adhesive, mesh-reinforced basecoat, quartz primer, thin-coat render. Each layer prepares the next, and the primer is the layer where the render's eventual colour uniformity is locked in. Getting it right is procedural rather than complicated.
When to Apply Quartz Primer — Substrate Conditions and Timing
The basecoat needs to be fully cured, fully dry, and fully clean before primer goes on. Each condition has a definable check and a clear consequence if it fails.
- Full cure — typical UK basecoats reach the dry-to-prime state 3-7 days after the basecoat application, depending on basecoat thickness, ambient temperature, and humidity. Touch-dry is not the same as cure-ready; pressing a thumbnail into the surface should leave no impression at the priming stage.
- Surface dryness — the basecoat must read as dry to a moisture meter, typically below 6% surface moisture on a calibrated reading. A basecoat that has caught rain in the last 48 hours is unlikely to be dry enough regardless of how it looks.
- Surface cleanliness — the basecoat surface develops a light dust layer (laitance) as it cures, and any basecoat exposed for more than two weeks before priming benefits from a light brush-down to remove this. Some specifications also call for a light wash where the wall has caught wind-blown debris during the cure window.
For projects coming straight off substrate preparation rather than basecoat-and-mesh, the substrate preparation before rendering guide covers the deeper-substrate decisions that sit before the quartz primer stage — particularly on direct-to-render scenarios that bypass the basecoat layer altogether.
How to Mix Quartz Primer — Settled Solids and Stirring Discipline
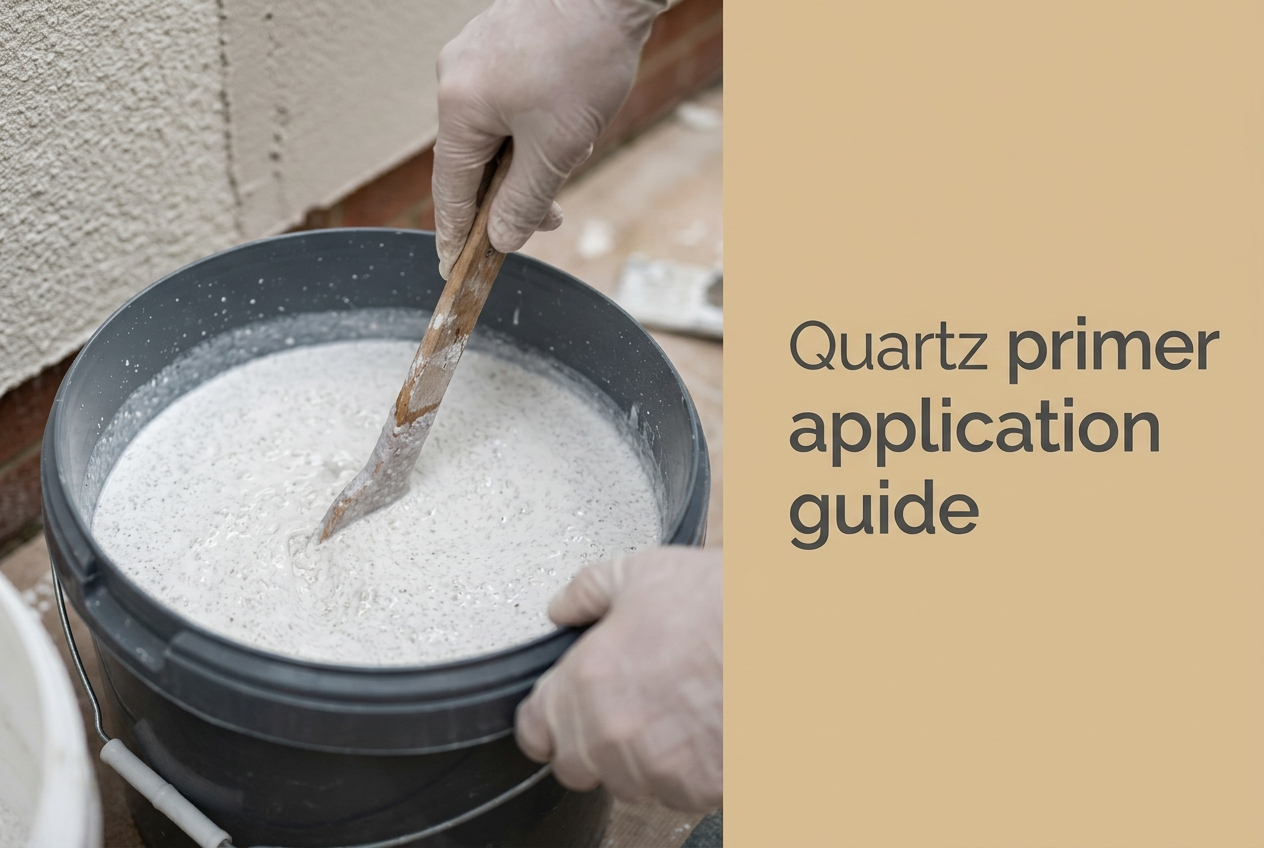
Quartz primer ships ready-to-use, which sounds simple until the first tub is opened. The quartz aggregate is denser than the binder and settles to the bottom of the tub during storage, sometimes forming a hard pack two or three centimetres thick. Mixing discipline at this stage determines whether the product applied at the top of the tub matches the product applied at the bottom — and if it does not, the wall will show the difference at finish stage.
- Stir with a low-speed drill and clean paddle — typical 600-800 rpm range, never a high-speed concrete-mixer paddle. A high-speed paddle whips air into the primer and creates micro-foam that lifts into the applied film.
- Stir for 2-3 minutes minimum — work the paddle from the bottom of the tub upwards, lifting the settled aggregate back into suspension. Stop only when the primer looks visually uniform and the paddle moves through it with consistent resistance from top to bottom.
- Do not dilute with water — most 2026-grade quartz primers are formulated for direct application. Water dilution reduces both the binder concentration and the suspended quartz density, weakening the mechanical key the layer is supposed to deliver.
- Re-stir mid-shift — quartz aggregate continues to settle during the working day. A 30-second re-stir every 45 minutes keeps the application consistent from the first roller stroke of the morning to the last.
How to Apply Quartz Primer — Roller, Brush, and Spray Techniques
Three application tools cover the great majority of UK domestic and light-commercial EWI work. Each has a use case where it outperforms the others, and each has a discipline that separates a coat that delivers the mechanical key from a coat that simply changes the colour of the wall.
| Tool | Best Use Case | Application Discipline |
|---|---|---|
| Long-pile roller | Large, flat elevations with continuous wall area | 20-25 mm pile; cross-rolled in one direction then perpendicular; loaded firmly to push quartz into basecoat texture |
| Wide masonry brush | Reveals, soffits, and intricate detailing around openings | 50-100 mm brush; cross-hatch motion; no grey basecoat visible through the wet film |
| Airless spray | Commercial elevations and access-tower programmes | Tip rated for abrasive mineral content (typically 0.021-0.025 in); back-rolled after spraying to drive quartz into the substrate |
Whichever tool the elevation calls for, three application principles hold across all of them. Work top-to-bottom in continuous bands rather than in random patches — this prevents partial overlap edges drying into visible lines under the eventual topcoat. Maintain a wet edge between bands by working at a pace that keeps the previous band still wet when the next band joins it. And inspect for missed pockets — corners, reveal returns, and the deep texture of well-grained basecoats all collect un-primed shadows that show up dramatically once the silicone topcoat goes on.
The two primers Renders World stocks for UK quartz-primer duty cover most domestic EWI specifications. Ceresit CT 16 quartz primer 10L is the long-standing default for silicone and silicate-silicone topcoats and ships pre-tinted on request to match the render colour. Cerplast quartz primer white 25kg covers around 75 m² per tub at standard consumption and suits larger elevations where the bulk format reduces tub-change frequency on site.
UK Weather Window — Temperature, Humidity, and Drying Times
Weather-related primer failures remain among the most common site issues on UK EWI work, and every one of them is avoidable. The window is defined narrowly enough to matter and broadly enough to deliver workable application days across most of the calendar year.
- Substrate and air temperature 5°C to 25°C — measured at the wall surface using a contact thermometer, not at standing air-temperature height. Walls in shade run several degrees below ambient on cool mornings and several degrees above on west-facing afternoons.
- Relative humidity below 80% — above that threshold the primer cannot form a stable film and the surface dries into a powdery rather than bonded layer. Early morning in autumn and any time after rain in summer both routinely breach the 80% line.
- No rain forecast for the next 24 hours — fresh primer is rain-vulnerable until it has formed a continuous film, which takes longer than the touch-dry time suggests. A 24-hour rain-free window is the safe minimum on most specifications.
- Direct sun avoidance during application — south and west-facing walls hit by direct sun above ambient 20°C dry the primer too fast for the roller to maintain a wet edge, producing visible band lines. Working those elevations early morning or shifting them to a shaded day prevents the issue.
- Drying time before topcoat — 24 hours minimum, 36 hours preferred — most product TDS values cite 24 hours as the manufacturer minimum at standard conditions. The longer interval is conservative trade practice and accommodates the variable UK weather pattern without compromising the bond.
Pro Tips — Tinted Primer, Coverage Calculation, and Avoiding Ghosting
Three practical tips separate experienced quartz-primer applicators from teams meeting the specification for the first time. None of them appears in the TDS, and all three save callback visits in the months after the scaffold comes down.
- Tint the primer to the render colour — Renders World specifies primer tinting at the order stage on most colour-matched topcoats. Untinted white primer shows as "ghosting" through a 1.5 mm grain silicone render finish when the wall catches low-angle winter sunlight or modern LED street lighting at night. Tinted primer eliminates the effect at no on-site cost.
- Calculate coverage at 0.20-0.30 kg/m² — quartz primer consumption sits in this band for well-cured basecoats. Open-textured or porous basecoats can push consumption toward 0.35 kg/m². Order with a 10% allowance over the calculated figure to cover cut-offs, deep texture pockets, and any small re-coat zones identified at inspection.
- Inspect against low-angle light before topcoat — walk each elevation in oblique light an hour or two before the render team starts. Missed pockets, dry edges, and skipped corners all show clearly when light strikes the wall at 30 degrees or below. Patching with a brush at this stage takes minutes; correcting after the topcoat has cured takes an entire elevation re-coat.
Key Takeaway: Quartz primer needs a cured, dry, clean basecoat underneath; thorough mechanical stirring without water dilution; the right tool matched to the elevation type; substrate and air temperature 5-25°C with relative humidity under 80%; and ideally 36 hours of drying before the topcoat. Tint to the render colour, order at 0.20-0.30 kg/m² with 10% over, and inspect under low-angle light before the topcoat starts. Get these eight points right and the topcoat looks correct from week one through to the second decade.
Next Step — Choose the Right Quartz Primer for Your System
The application discipline above works on any UK-specified quartz primer; the product choice is determined by the system specification on the BBA certificate, the elevation area, and the topcoat colour. The Renders World exterior render primers range covers both Ceresit CT 16 and Atlas Cerplast in the formats that match common UK domestic EWI programmes. For full-system context covering board, adhesive, mesh, primer, and topcoat as a single specified assembly, the external wall insulation systems range provides the system-level entry point — and the thin-coat render application guide covers the topcoat layer that goes over the primed surface once the 36-hour drying window has elapsed.
Specifiers working on unusual substrates — direct-to-masonry, mixed brick-and-block, render-over-paint scenarios — should review the rendering on different substrates guide before committing to a single primer specification across the elevation, as some substrate types benefit from a deep-substrate primer underneath the quartz primer rather than the quartz primer alone. Renders World maintains the system-compatible component family across both primer categories so the same overall system warranty holds across mixed-substrate sites.
Written by Mariusz Saja. Technically reviewed by the Renders World Team. Last reviewed Jun 2026.
FAQ — Quartz Primer Mixing, Application, Coverage, Compatibility
How long should I stir quartz primer before use?
Two to three minutes of low-speed mechanical stirring with a clean paddle is enough to bring settled quartz aggregate back into uniform suspension, provided the paddle works the bottom of the tub thoroughly. Stop when the primer looks visually uniform and the paddle moves through it with consistent resistance from top to bottom. Avoid high-speed paddles, which whip air into the primer and lift micro-foam into the applied film — visible as small craters in the wet coat and as adhesion shadows once the topcoat goes on.
Can I thin quartz primer with water if it feels too thick to apply?
Most UK-specified quartz primers are formulated for direct application and should not be water-thinned. Adding water reduces both the binder concentration and the suspended quartz density, which weakens the mechanical key the layer exists to deliver. If the primer feels too thick to roll, the underlying causes are usually inadequate stirring or below-spec storage temperature — bring the tub to ambient room temperature overnight before use and re-stir thoroughly rather than diluting.
What coverage rate should I assume when ordering quartz primer?
Plan on 0.20-0.30 kg/m² for well-cured standard basecoats and up to 0.35 kg/m² for open-textured or porous basecoat surfaces. Add a 10% allowance over the calculated figure to cover cut-offs, deep texture pockets, and any small re-coat zones identified at low-angle-light inspection. The Cerplast 25 kg format covers roughly 75 m² per tub at standard consumption; the CT 16 10L format suits smaller elevations and reveal-heavy details where the smaller pack reduces material waste.
How long must quartz primer dry before the topcoat can be applied?
Manufacturer minimum is typically 24 hours at standard conditions (around 20°C, 60% relative humidity). The conservative UK trade standard is 36 hours, which accommodates the temperature and humidity variability of British weather without compromising the bond between primer and topcoat. In cooler or more humid conditions — below 10°C ambient or above 70% RH — extending the interval further reduces risk of trapped moisture in the system at finishing stage.
Do I need to tint the primer to match the render colour?
Tinted primer is strongly recommended on any render colour darker than off-white or where the topcoat grain is 1.5 mm or finer. Untinted white primer can ghost through the render grain under low-angle winter sunlight or LED street lighting at night, producing a subtle but persistent uneven appearance that shows particularly on south and west-facing elevations. Renders World tints quartz primer at the order stage on colour-matched topcoats at no additional on-site cost.
Is quartz primer compatible with mineral wool board systems as well as EPS?
Yes — once the mineral wool boards have been adhered and the mesh-reinforced basecoat has cured to the same surface profile as on an EPS build-up, the quartz primer specification is the same. The substrate underneath the basecoat does not change the primer's job, which is to bond the cured basecoat into the topcoat. Match the primer brand and tint to the system specified on the BBA certificate covering the wool-board build-up rather than picking the primer independently of the rest of the system.