


Description
Window reveals, door reveals, soffit returns, and lintel junctions are insulated with thinner EPS boards — typically 30–50 mm — to close the thermal envelope without overrunning the openings behind. Mounting a doorbell, house number, or sensor on those zones needs an anchor sized to the thin-board depth, not the standard 80–100 mm wall fixing.
What the WK-DS050 Spiral Anchor Does on Reveals, Soffits, and Thin-Board Zones
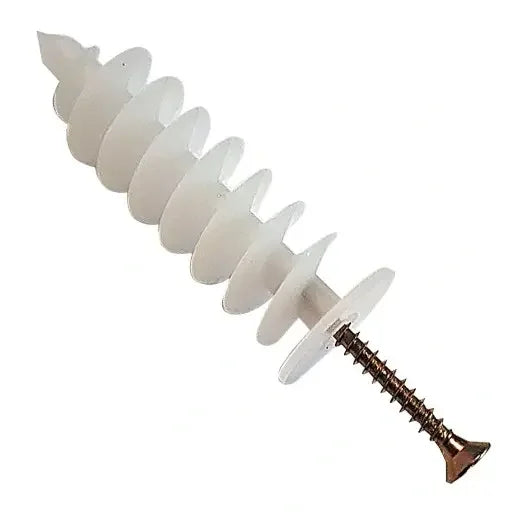
For thin-board reveal and soffit detailing, the WK-DS050 is a 50 mm polyamide helical screw-in anchor from Klimas Wkręt-met that mounts non-structural accessories up to 5 kg to 30–50 mm EPS zones on a finished EWI facade. Stocked within the EWI fixing accessories range at Renders World, its 50 mm engagement matches the shallow board depths around openings, where a longer wall anchor would punch straight through into the adhesive bed and lose all holding load.
The thread cuts through render, basecoat, and EPS in one drive, distributes the suspended load along the full 50 mm engagement, and leaves the masonry or timber substrate behind untouched. The 5 kg static rating matches the larger wall anchor, but the design intent differs: this is the fixing for accessories owners want near doors, windows, and overhead returns, not on the main rendered wall fields.
- On the reveal — the 50 mm thread sits fully within thin 30–50 mm boards without breaking through to the adhesive bed behind.
- On the system — polyamide construction keeps the insulation envelope continuous exactly where openings already invite thermal-bridging scrutiny.
- On the finish — the 28 mm head seats flush at eye-level reveal positions, ready to render or paint over where needed.
Why Trade Specifiers Choose the WK-DS050 for Thin-Board Zones
- Engagement matched to reveal-and-soffit board depth — the 50 mm thread stays fully within 30–50 mm EPS without breaking into the adhesive bed, which is the failure mode that defeats over-length anchors in these zones.
- No thermal bridge at the fixing point — polyamide construction holds the insulation envelope around openings and junctions, the zones already under closest thermal scrutiny in any U-value calculation.
- 5 kg static load per anchor — covers doorbells, house numbers, small lights, PIR sensors, cable clips, and conduit supports: the typical reveal and entrance accessory schedule.
- TORX-30 drive at the 28 mm head — slip-free at low rpm, preserving the render face at visible reveal positions next to the front door where any chip sits at eye level.
- Self-cutting helical thread — installs through render and EPS with no pilot hole and no dust step, a clean ten-second fixing with a standard cordless drill.
- Grips both white and graphite EPS — the thread profile engages the cell structure of reveal-strip boards from the graphite EPS insulation range at reveal and soffit thicknesses.
Technical Specifications — WK-DS050 Data Sheet Highlights
| Property | Value |
|---|---|
| Designation | WK-DS050 |
| Manufacturer | Klimas Wkręt-met |
| Anchor length | 50 mm |
| Head diameter | 28 mm |
| Socket type | TORX-30 |
| Compatible screw diameter | 3.5–4.5 mm |
| Material | Polyamide |
| Maximum static load per anchor | 5 kg (non-structural) |
| Compatible insulation | EPS (white and graphite) |
| Suitable insulation thickness | 30–50 mm |
| Screw included | No — 3.5–4.5 mm selected separately |
| Pack quantity | 10 pcs |
The 50 mm helical length is sized to the thin reveal, soffit, and lintel boards of 30–50 mm. Confirm the board thickness at the mounting position, and step up to the longer variant on the main wall fields of 80 mm and above.
How the WK-DS050 Installs Into a Reveal or Soffit Position
The anchor goes in after the render finish has cured. Mark the position on the rendered reveal, soffit, or lintel surface, fit a TORX-30 bit into a cordless drill at 400–800 rpm, place the helical tip against the render, and drive steadily until the 28 mm head sits flush. The thread cuts through render, basecoat, and the thin EPS board in one pass — so the accessory mounts within a minute of marking.
The discipline that matters more here than on the wall-anchor variant is depth control. With only 30–50 mm of insulation between the render face and the adhesive bed, an over-driven anchor breaks through and the holding load drops to near zero. Set the drill clutch low and step it up one notch at a time until the head just seats flush; a practice run on a board offcut of the same thickness confirms the setting in under a minute.
- Drive speed — 400–800 rpm, the same band as the wall anchor but with stricter depth discipline.
- Screw spec — 3.5–4.5 mm diameter, stainless steel for external durability, length matched to the mounted item.
- Edge distance — at least 30 mm from any reveal-board edge or return junction to keep full thread engagement.
- Practice insertion — set the clutch on a board offcut before committing to a reveal position at front-door eye level.
For the wider context of mechanical fixings within an EWI build-up — primary board plugs, base tracks, and where through-fixings to the substrate become necessary instead of spiral anchors — the complete EWI fixings installation guide sets out the full method.
Installation Notes — Torque Control, Depth Discipline, Screw Selection
Torque clutch setting is the single discipline that distinguishes a reliable WK-DS050 installation from one that pulls out on the first frosty morning. Because the engagement depth is short, every revolution past flush is a revolution into the adhesive bed behind — and the adhesive is not the substrate the thread was designed to grip. Start on the lowest clutch setting that drives steadily, and increase one click at a time until the head seats flush without continuing to rotate. The exact setting varies by drill, render hardness, and EPS density, which is why the offcut test pays back on every job.
Screw selection follows the same principle as the longer variant: 3.5–4.5 mm diameter, stainless steel for external positions, length set by the item thickness. Galvanised mild steel rusts at the head over a UK winter and stains the render within two seasons — especially visible on reveal positions at door eye-level, which is exactly where this anchor is most used.
Edge distance on a reveal is tighter than on a wall field because the board is narrower. Keep at least 30 mm from any visible reveal edge or junction line. On very narrow reveals where 30 mm clearance is not available, a through-fixing with a thermal isolating sleeve to the lintel or jamb behind is more reliable than forcing an anchor onto an inadequate insulation volume.
What UK Installers Do Differently With the 50 mm Variant
The thin-board version rewards a different set of habits from the wall anchor — the shorter engagement leaves less margin, and the mounting positions sit closer to eye level.
- I always cut a test offcut from the same reveal board. Render density and EPS grade vary between projects, so the clutch setting from the last job often needs a click either way; a two-minute offcut test beats a callback to remediate a sunken head.
- I always set the drill so the head stops flush, not below. A head driven 2–3 mm below the face on a 50 mm board has lost half its engagement to the adhesive bed — flush means flush, not a shadow line or a recess to fill.
- I always check the accessory weight against the 5 kg limit. Reveal items tend to be light, but a cast-metal house number or solid-brass plate can creep over; a spring balance on the bench takes thirty seconds and confirms the specification.
- I always order one pack per property on terrace runs. Ten anchors covers a single house's reveal accessories with margin, but a row of identical front doors adds up fast — one pack per property keeps the schedule clean and avoids stopping for sundries.
How the WK-DS050 Compares to the WK-DS085 Wall Anchor
The two spiral anchors are identical in every property but length, which is what matches each to a board depth and mounting zone. The comparison below shows which suits the position in hand.
| Variant | Key Spec | When to Choose |
|---|---|---|
| WK-DS050 (this product) | 50 mm length · 5 kg · TORX-30 | Thin 30–50 mm reveal, soffit, lintel boards |
| WK-DS085 | 85 mm length · 5 kg · TORX-30 | Standard 80 mm+ main wall fields |
Both share the 28 mm head, TORX-30 drive, polyamide body, and 5 kg static rating — so the decision comes down to matching engagement length to the insulation depth at each mounting point.
Is the WK-DS050 Spiral Anchor Right for Your Project?
- For accessories on reveals, soffits, and lintel returns — specify the WK-DS050 for doorbells, house numbers, PIR sensors, cable clips, and small lights up to 5 kg on any thin-board zone of 30–50 mm.
- For thicker main-wall insulation (80 mm and above) — the WK-DS085 85 mm spiral anchor gives the longer engagement that grips deeper into standard retrofit thicknesses at the same 5 kg rating.
- For heavier or dynamic items — shutters, awnings, dishes, and any accessory above 5 kg need a through-fixing to the substrate; the full fixing accessories collection covers heavy-duty alternatives.
- For mineral wool reveal linings — the helical thread is optimised for EPS and grips less reliably in fibrous slabs from the Rockwool mineral wool range, where through-fixings with thermal isolating sleeves are the safer route.
- For trade-account ordering and quantity planning — pair WK-DS050 packs with matching 3.5–4.5 mm stainless screws and the right wall-anchor count on a single PO; the Renders World specification desk can size the schedule against the building's accessory list before you commit to volume.
FAQ — WK-DS050 Compatibility, Load Limits, Ordering
Can I use the 50 mm anchor in an 80 mm insulation board?
It will seat, but only 50 mm of the 80 mm depth is engaged by the thread, and the remaining 30 mm behind the tip contributes nothing to pull-out resistance. The hold is reliable for very light items, but for the full 5 kg rated load in 80 mm and thicker boards the WK-DS085 engages a greater proportion of the depth and is the correct specification.
Is the mounting screw included in the pack?
No. The pack contains 10 polyamide anchor bodies only. A separate 3.5–4.5 mm screw is required per fixing, selected to suit the item thickness. Stainless steel is the right choice for external positions, particularly visible reveal locations where rust streaking would show against the render.
Can I render or paint over the anchor head?
Yes. The 28 mm polyamide head accepts basecoat and render without adhesion issues. For an invisible repair where an anchor is patched out, skim a thin coat of basecoat over the seated head, allow it to cure, and touch up with the matching render texture. Most installations leave the head visible because items mount onto it, but the patch-over works cleanly when needed.
How close to the reveal edge can I install an anchor?
Keep at least 30 mm from any visible reveal edge or junction line — tighter than the 50 mm on wall fields because reveal boards are narrower. The helix needs a continuous volume of EPS to grip; on very narrow reveals where 30 mm is not achievable, a through-fixing with a thermal isolating sleeve to the opening behind is the safer specification.
How many WK-DS050 anchors does a typical property need?
A standard domestic property uses between four and ten spiral anchors on thin-board zones — roughly two for a house number, one for a doorbell, two for a sensor bracket, and two to four for cable clips around reveals and soffits. One 10-piece pack covers most single-property requirements with margin; on terrace runs of repeated front doors, one pack per property keeps the installation moving.
Will it grip in mineral wool reveal lining?
The helical thread is optimised for the closed-cell structure of expanded polystyrene, where it shears a clean groove that grips on installation. In mineral wool the fibrous matrix compresses around the thread rather than shearing, reducing pull-out resistance. For mineral wool reveal linings the safer specification is a through-fixing with a thermal isolating sleeve to the lintel or jamb behind.
What happens to the anchors at end of life?
Polyamide is recyclable through standard engineering-plastics recovery streams when the system is eventually stripped at demolition or refurbishment. The anchor body separates cleanly from the screw — magnetic sorting recovers the stainless steel, and the polymer goes through the polyamide stream. The embodied carbon per anchor is small relative to the insulation and render layers above it.