

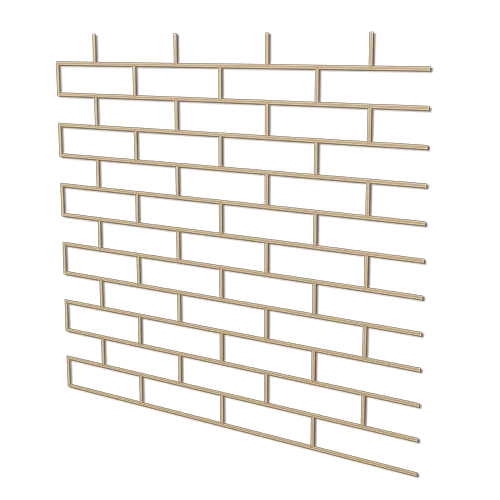


Description
With the Visage Stencil London Brick, the colour of the mortar lines is chosen before the brick colour, because it is the primer underneath that shows between the bricks. That one decision, and a steady hand when the stencil comes off, make a stencilled brick facade look right.
Visage Stencil London Brick and the Plaster It Shapes
This Ceresit brick stencil is one of two patterns in the range, alongside Boston.
- Pack: listed as 15pcs/15m2; Ceresit's documents give no stencil dimensions, sheet count or covered area.
- Plaster: Ceresit CT 60 VISAGE 0.5 mm acrylic, which carries every technical figure for this pack.
- Where to find it: Renders World holds it in its decorative facade render range.
Choosing the Mortar Colour First
Ceresit gets the joint colour from its CT 16 quartz primer. Its recommended joint shades come from Colours of Nature.
- Etna 1 and Etna 5
- Nebraska 3 and Kalahari 1
- Savanne 4, Colorado 4 and Texas 5
The brick itself is one of the 12 Visage plaster colours or a shade from the Colours of Nature palette. The VISAGE brochure's own first step is a primer colour that contrasts with the plaster, which is what makes the joints look like mortar.
Which Walls Take the Plaster
- Outside: the finished reinforced layer of a Ceresit Ceretherm system on EPS boards (CT 80, CT 85 or ZU, more than 3 days old); cement and cement-lime plaster older than 28 days; concrete older than 3 months; all at 4% moisture or less.
- Inside only: chipboard, gypsum-fibre board, plasterboard, gypsum below 1% moisture and sound paint.
Uneven walls are levelled first, weak layers and elastic, lime or glue paints come off completely, and absorbent walls take CT 17 before CT 16.
CT 60 VISAGE 0.5 mm Figures
| Property | Value |
|---|---|
| Plaster pack | 25 kg bucket |
| Consumption | about 1.5–2.0 kg/m²* |
| Base | synthetic resin dispersion |
| Absorption and vapour | W2 and V2, EN 15824 |
| Adhesion | 0.6 MPa, EN 15824 |
| Thermal conductivity | λ = 0.61 W/(m·K) |
| Working conditions | +5 °C to +25 °C, below 80% RH |
| Surface drying | about 15 minutes |
| Rain resistance | after about 24 hours |
* At a stencil thickness of about 1 mm. Fire classes belong to complete Ceresit systems only: B-s1, d0 in Ceretherm Visage and Universal EPS, A2-s1, d0 in Universal MW. The plaster keeps for up to 18 months in cool conditions, in original undamaged packs, away from frost and direct sun.
Sticking, Plastering and Lifting the London Stencil
- Stick it down hard. Once the CT 16 is completely dry, take off the protective tape, follow the recommended pattern and press the stencil down, with a rubber roller for example, so plaster cannot creep under it.
- Stick only what you will cover now. Ceresit limits the stencils to areas plastered straight away.
- Plaster in one pass. Spread CT 60 evenly with a steel float held at an angle and smooth it immediately; the smoothing gives the texture. Machine application is also possible.
- Lift at the right moment. The CT 60 data sheet says after the plaster's initial set; the English edition adds a gentle, partial pull downwards. The VISAGE brochure says while the plaster is still wet, but the data sheet is the technical instruction to follow.
A stencil that has been peeled off never goes onto another surface. Do not spray the plaster with water, and when a break is needed, stop at the edge of a stencil and start again from that line. Tools and fresh splashes wash off with water; hardened plaster is removed mechanically.
Conditions and Crew
- From priming to lifting: dry weather, +5 °C to +25 °C for air and wall, humidity below 80%.
- Protection: keep off walls in strong sun, sheet the scaffold, and shield the finish from sun, rain and strong wind until it is dry.
Use one production batch per plane, and put enough people on each scaffold level to join areas wet-on-wet. For full facades Ceresit recommends a light reflectance value (HBW) of 20 or more, and indoors the rooms are aired until the smell has gone.
London or Boston
| What stays the same | What changes |
|---|---|
| CT 60 VISAGE 0.5 mm, CT 16, the method | the brick pattern only |
No Ceresit document sets out a technical difference between the two stencils. The choice is the pattern you want to see, so look at this pack's photos and those of the Visage Stencil Boston Brick pack side by side.
Ordering
Put the CT16 quartz primer from Renders World on the same order in the joint colour you have chosen, then plan the day around the weather.
- Dispatch: Renders World processes orders the same day when the stock is there.
- Delivery: quoted by the team after the order; always kerbside.
- Collection: Unit 9A, Central Trading Estate, Southampton SO14 5JP, Monday to Friday 7am to 5pm and Saturday 7am to 12pm.
The brick and timber stencil guide shows how to set out a whole elevation.
FAQ — Visage Stencil London Brick
How do I get a light mortar line with dark bricks?
- Prime with CT 16 in the light joint shade.
- Let it dry completely.
- Stick the stencil and plaster in a darker Visage colour.
The primer stays visible where the stencil covered it.
When exactly does the stencil come off?
After the plaster's initial set, according to the CT 60 data sheet. Pull it gently and partly downwards rather than in one movement.
Can I use it indoors?
Yes. The plaster is for inside and outside; gypsum, boards and paint are inside-only substrates, and the room is aired until the smell has gone.
What about a damp wall?
Ceresit warns that moisture pushing from behind can damage the plaster, so a wall exposed to lasting damp needs proper sealing layers before the stencil goes on.
Technical Documentation