
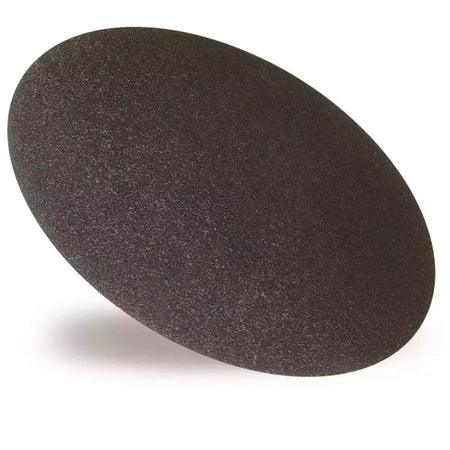

Description
The DED7767G16 abrasive disc is Dedra's grade 16 disc for the DED7767 plaster trowel: a 370 mm silicon carbide disc for taking off old paint, levelling a surface before a new layer of plaster, clearing adhesive and paint residue, and smoothing polystyrene boards during insulation work. It is the coarser of the two abrasive grades in the power float and sponge range, made for the Dedra DED7767 plaster trowel.
What the DED7767G16 Abrasive Disc Is For
Dedra's catalogue entry names four preparation jobs for this grade, and the attribute table sums them up as removal of old coatings of paint and adhesives, and lapping polystyrene foam:
- Old paint layers: removing them from the wall.
- Levelling: evening out a surface and preparing it for a new plaster layer.
- Residue: cleaning off adhesive and paint.
- Smoothing expanded polystyrene boards during building insulation.
All four happen before the new coat goes on. Finishing fresh plaster is not among them; the sponge and polystyrene discs of the same machine cover that stage.
DED7767G16 Data From the Dedra Catalogue
| Property | DED7767G16 |
|---|---|
| Code | DED7767G16 |
| Barcode (EAN) | 5902628776884 — the same number this listing carries |
| Gradation | 16 |
| Disc diameter | 370 mm |
| Abrasive | Silicon carbide |
| Type | Circular abrasive disc |
| Made for | Dedra DED7767 plaster trowel |
The English and Polish versions of the entry agree on every line of the table. The same entry also carries a field headed simply "diameter" that reads 390 mm, with no note on what it measures; 390 mm is the size Dedra gives for the machine's own disc and for the DED776701 mounting disc. Order by the code DED7767G16 or the barcode, not by a diameter.
Choosing Between Grade 16 and Grade 24
Dedra sells two abrasive grades for the DED7767 and gives them the same size, abrasive and attribute line. The descriptions differ by one word: paint residue on the 16, plaster residue on the 24.
| Disc | Gradation | Diameter and abrasive | Dedra's description |
|---|---|---|---|
| DED7767G16 (this disc) | 16 | 370 mm, silicon carbide | paint, levelling, paint residue, EPS |
| DED7767G24 abrasive disc | 24 | 370 mm, silicon carbide | paint, levelling, plaster residue, EPS |
Dedra does not say which grade to start with or which surface suits which. On the usual grit scale a lower number means a coarser grain, so the 16 is the coarser disc of the pair. Whether a job needs one grade or both in turn is a decision for the site, not an instruction from Dedra.
Where the aim is to strip old paint or wallpaper rather than grind, the DED77675 scraping disc is the other removal option for the machine, with six steel blades in place of an abrasive face. For floating lime-cement and gypsum plaster once the wall is ready, Dedra lists the DED77674 polystyrene disc.
Fitting and Running the Disc
Every working disc of the DED7767 sits on the machine's mounting disc, screwed to the spindle; Dedra describes that mounting disc as carrying four hook-and-loop fasteners for compatible accessories. The DED7767G16 entry does not describe its own fixing, and the machine manual's Velcro sentence names the sponge, plastic and peeling discs, not the abrasive grades. When the disc arrives, set its back against the mounting disc before the first job.
The manual's accessory list names DED77671, DED77674 and DED77675 only; the abrasive grades are tied to the machine by their catalogue entries. The machine rules still apply to them:
- Prepare and change discs with the machine unplugged.
- Start it held horizontal and clear of the wall, and wait for full speed before contact.
- Work in semicircular movements, with pressure matched to the job, and check the surface as you go.
- Wear hearing protection while it runs; the machine is rated S2 15 minutes, so plan the work in spells.
Wear, Cleaning and Replacement
The DED7767 manual asks for the abrasive disc to be checked for wear before each use, and its fault table names a worn abrasive disc as the cause of low grinding efficiency. A disc that has stopped cutting is due for a change, not for more pressure.
- Before each use: look at the abrasive face for wear.
- When grinding slows: fit a new disc, as the fault table directs.
- After each job: clean worked material off the machine and clear the motor air inlets, ideally with compressed air.
Dedra gives no service life or area per disc, so there is no figure for how many a wall will take; a spare on site is the practical answer. More on how the stages of a power float job fit together is in the power float techniques and tool selection guide.
Is the DED7767G16 the Right Disc?
- You run a Dedra DED7767: this is the machine it is made for.
- Old paint, adhesive or paint residue, levelling before new plaster: the jobs Dedra lists.
- Polystyrene boards on an insulation job: smoothing expanded polystyrene is on the entry.
- For another make of power float, check that machine's own documents first, since Dedra names only the DED7767 here.
Ordering, Delivery and Returns
Renders World stocks the DED7767G16 abrasive disc with the machine and the rest of its working discs. Orders are processed the same day when the disc is in stock, and delivery is not calculated at checkout: the Renders World team quotes it after the order comes in.
- Courier: small parcels up to 25 kg go on a next-day service, and every delivery is kerbside.
- Collection: Unit 9A, Central Trading Estate, Southampton SO14 5JP, Monday to Friday 7am to 5pm and Saturday 7am to 12pm.
- Returns: a change-of-mind return runs to 14 days, with the disc in its original condition.
DED7767G16 Questions Buyers Ask
Which machine does it fit?
Dedra makes the DED7767G16 abrasive disc for the DED7767 plaster trowel and names no other machine on the entry.
Is grade 16 coarser than grade 24?
Yes, on the usual grit scale, where a lower number is a coarser grain. Dedra lists the same size, abrasive and jobs for both grades.
What size is it?
370 mm in the description and the disc diameter field. A separate field reads 390 mm without explanation, so order by the code or the barcode.
Can it finish a coat of plaster?
That is not a job Dedra lists for it. The abrasive grades are for preparation; floating and smoothing plaster is the work of the sponge and polystyrene discs.
Technical Documentation
- Dedra catalogue entry DED7767G16 — description, gradation, diameters, abrasive, barcode.
- Dedra DED7767 instruction manual (PDF) — assembly, operation, wear check and fault table for the machine.