What separates a flawless rendered facade from one with visible lap marks and uneven texture? On almost every UK trade-grade EWI project above 3 m² of uninterrupted panel, the answer comes down to two things: the floating tool used and the timing window in which it is applied. Manual floating remains viable on small areas, but for the vast majority of UK facade contracts — where weather windows are narrow and wet-edge management is critical — mechanical power floats have become an essential part of the professional toolkit. This guide from Renders World covers the principles of machine-assisted render finishing, the pad-selection logic that matches each consumable to its stage of the process, and the timing and technique considerations that separate a good finish from a flawless one.
Why Mechanical Floating Has Become the UK Trade Standard
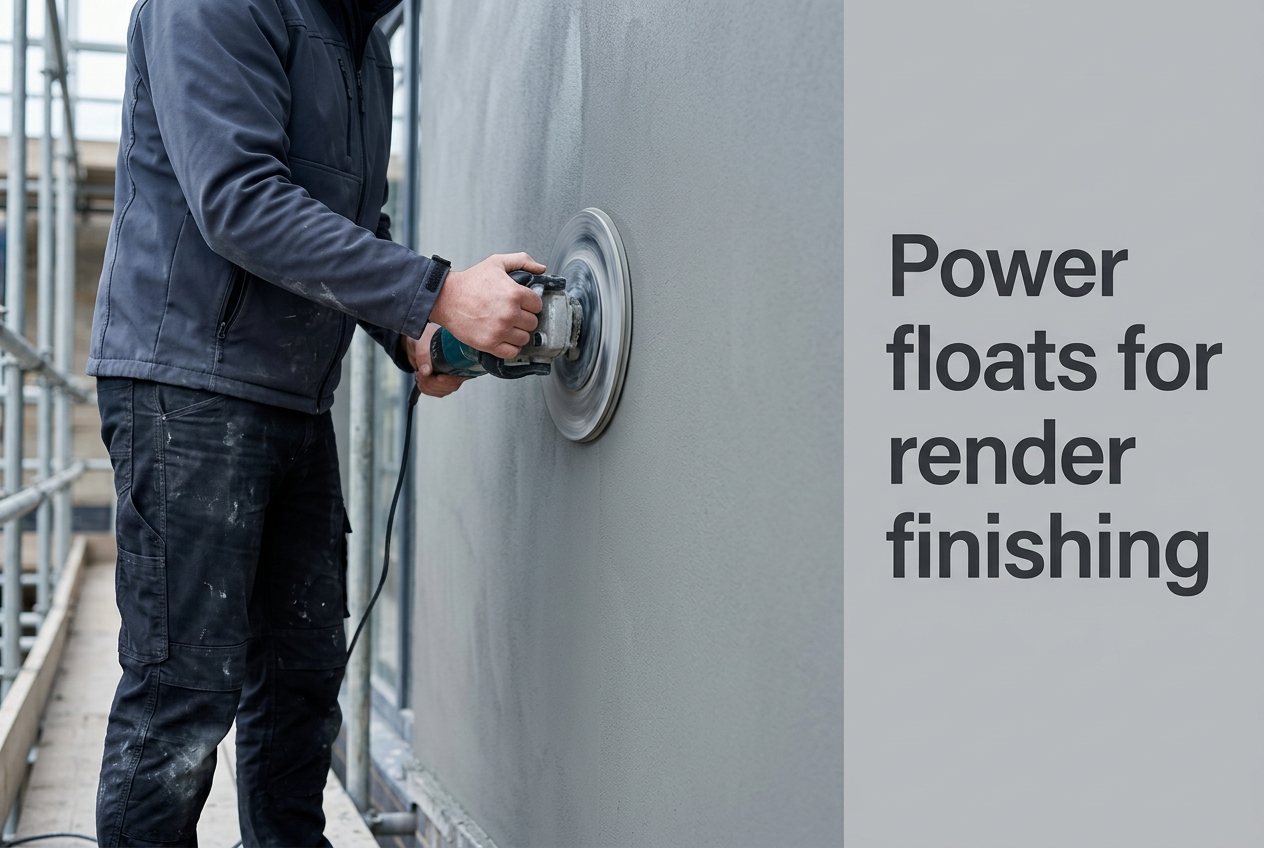
The shift from hand-floating to machine-assisted finishing on UK sites has been driven by three factors: scale, consistency, and the country's unpredictable climate. Modern EWI specifications frequently call for large, uninterrupted elevations to be finished in a single session, maintaining a wet edge from corner to corner. A professional render smoothing machine spinning a 390 mm disc at approximately 110 rpm covers surface area far more rapidly than even the most experienced hand-troweller, reducing the risk of lap marks that appear when one section begins to cure before the adjacent section is blended in. Installers consistently report that the elevations that age best visually are the ones finished in a single mechanically-floated session rather than across multiple hand-finishing sessions.
Consistency is equally important. Mechanical rotation applies even pressure across the entire disc surface, producing a more uniform texture than manual methods. This matters particularly on thin-coat silicone and silicate-silicone renders, where grain distribution must be visually homogeneous across the whole elevation. In the UK climate, where temperature and humidity can shift within a single working day, the speed advantage of a power float also provides a practical buffer against sudden weather changes that would compromise a slower manual process — a buffer that earns its keep most clearly on cool spring mornings and warm summer afternoons when the leather-hard window contracts unpredictably.
How to Choose the Right Pad or Sponge for Each Application
The versatility of a modern render smoothing machine lies not in the motor unit itself but in the interchangeable pads and sponges attached to it. Each consumable is designed for a specific stage of the finishing process, and selecting the wrong one can damage the render surface or produce an inconsistent texture. The decision framework breaks into three clear stages — substrate preparation, levelling, and final texturing — with a dedicated pad type for each.
Sponge Pads for Smoothing and Levelling
Flexible polyurethane foam discs are the primary consumable for floating freshly applied lime-cement, gypsum, or polymer-modified renders. They compress the surface, close minor voids, and create a smooth base suitable for priming or direct topcoat application. The DED77671 sponge pad, for example, uses a 400 mm diameter velcro-mount disc designed for direct compatibility with professional-grade machines. A damp sponge pad is essential — saturated pads wash binder from the surface, while dry pads drag and tear the render film. Wring the pad until it stops dripping but still feels cool to the touch before each pass.
Plastic and Polystyrene Pads for Texture Formation
For renders requiring a defined grain texture (the "baranek" or lamb's wool pattern common in UK silicone render systems), rigid plastic or expanded polystyrene pads are used after the initial sponge pass. These pads do not compress the aggregate but instead rotate and distribute it into a consistent decorative pattern. The DED77674 polystyrene pad distributes 1.5–2.0 mm aggregate evenly without over-compressing it into the binder. Timing is critical: the render must have reached its initial set — commonly described as the "leather-hard" stage — before a texturing pad is applied. Premature use pulls aggregate from the matrix; late use fails to move the grain at all.
Stripping and Grid Pads for Substrate Preparation
Before any topcoat render is applied, the basecoat layer must be level, free of high spots, and keyed for adhesion. Stripping pads and abrasive grid pads — available in P16 and P24 grits via the grit-16 disc and finer refinement variants — are designed for this preparatory stage. They remove ridges left by trowel application, flatten expanded polystyrene plug heads, and create a micro-textured surface that improves mechanical bond with the subsequent primer and render layers. This step is often overlooked on site but has a significant impact on the longevity and visual quality of the finished facade.
Timing and Technique — How to Get the Best Results on Site
The single most important variable in mechanical render finishing is timing. No amount of equipment investment compensates for floating at the wrong curing stage. As a general guide, thin-coat silicone and silicate-silicone renders should be floated when the surface resists light finger pressure without deforming but remains workable enough for the aggregate to move under disc rotation. In UK summer conditions (15–25 °C, moderate humidity), this window typically opens 15–30 minutes after application; in cooler or humid weather, it extends to 30–45 minutes — wind exposure and direct sunlight can shorten it considerably below the lower bound.
Technique also matters. Work the power float in slow, overlapping circular passes, holding the disc flat against the surface. Tilting the machine concentrates pressure on one edge and creates visible arcs in the finish that show clearly under raking morning light once cured. On vertical facades, work from bottom to top to avoid drip lines from the dampened sponge. Between elevations and at the end of each session, clean all pads thoroughly — dried render fragments embedded in a sponge become abrasive contaminants on the next pass, leaving scratches that are nearly impossible to correct once the surface cures.
- Test the set with a fingerprint: Press a clean fingertip lightly against the surface — if it leaves a faint mark without lifting material, the render is at the leather-hard stage and ready for the texturing pad pass.
- Float in the application direction: On multi-storey scaffold, work each lift from top to bottom and move across the elevation in the same direction as the render application — never reversing mid-panel, where the forward and return overlap produces a visible texture change after cure.
- Keep the disc flat: Hold the machine at 90° to the wall throughout the pass. Even a few degrees of tilt concentrates pressure on the leading edge and prints arcs that show under oblique light for the lifetime of the finish.
- Wring sponges to damp, not wet: A pad that drips during floating washes binder out of the surface and produces a pale band that contrasts with the surrounding panel after cure.
Key Takeaway: The leather-hard window — when the surface resists a light fingerprint without deforming — is the single moment at which mechanical floating produces a flawless texture. Float earlier and the binder is washed out; float later and the grain refuses to move. In typical UK summer conditions this window opens 15–30 minutes after application; verify it on a test patch at the corner of the elevation before committing the full machine pass to the field.
When Hand-Finishing With a Manual Sponge Is Still the Right Choice
Power floats excel on broad, unobstructed elevations, but professional facade work always includes areas where a hand-held sponge is the better tool. Window reveals, door surrounds, architectural detailing, and narrow returns all demand the tactile control that only a manual sponge provides. High-density hydro sponges and cellulose sponges are purpose-made for these tasks, offering excellent water absorption and consistent texture transfer without the weight or bulk of a machine.
For tiling and grouting applications, the requirements differ again. A grouting sponge needs to absorb excess grout slurry without pulling material from the joints, then release it cleanly when rinsed. Cellulose-based and high-absorbency beige tiling sponges serve this function well, and their compact dimensions make them practical for continuous use across large commercial tiling contracts. The KAEM range of professional sponges, available in multiple sizes from 15 × 10 cm up to 23 × 11.5 cm, covers the full spectrum of hand-finishing tasks encountered on UK construction sites. Stationing a wet KAEM sponge alongside the power float keeps detail-zone refinement happening in parallel with field passes rather than as a separate end-of-day task.
How to Maintain Power Float Equipment for Consistent Performance
Professional-grade power floats are robust tools, but their consumable pads require disciplined maintenance to deliver consistent results. Sponge pads should be rinsed in clean water after every elevation and stored damp between uses — allowing them to dry out completely causes the polyurethane to harden and lose its flexibility. Plastic and polystyrene pads should be scraped clean of any dried render residue before each use. The velcro mounting system on the machine head should be inspected regularly; worn hook-and-loop strips reduce pad grip and allow the disc to shift during operation, producing uneven floating pressure that telegraphs into the finished texture.
The machine itself requires minimal maintenance beyond regular cleaning and periodic replacement of the electrographite motor brushes. Most professional units, such as the DED7767 platform, ship with a spare brush set. Operators should monitor brush wear and replace both brushes simultaneously to maintain balanced motor performance — replacing only one creates an uneven contact pattern that shortens the new brush's working life and produces inconsistent rotational speed under load. Once the topcoat is floated and the facade has cured, ongoing surface care moves into a different toolkit covered in the render cleaning products range.
Written by Mariusz Saja. Technically reviewed by Renders World Team. Last reviewed Jun 2026.
FAQ — Power Float Use, Coverage, and Site Practice
Can I use a power float on silicone render topcoats?
Power floats are primarily used for smoothing and levelling basecoat layers and cementitious renders, and for distributing aggregate during the texture-setting pass on silicone topcoats. For final closing passes on a thin-coat silicone with a baranek finish, many installers switch to a manual plastic float to achieve precise aggregate distribution in the corners and against beads. The machine is best reserved for the field area where its speed and consistency advantages are greatest, with hand finishing handling the perimeter and detail zones. For the render itself, the premium silicone render range covers the grain sizes that match the available power float pads.
How many square metres can a single sponge pad finish?
A high-quality polyurethane sponge pad can typically finish several hundred square metres before requiring replacement, though actual lifespan depends on the abrasiveness of the render system and how well the pad is maintained between uses. Rinsing the pad after every elevation and storing it damp extends its working life considerably. Pads stored bone-dry between sessions harden, lose flexibility, and produce drag marks on the next use that are visible under raking light once the render cures.
What is the correct machine speed for render finishing?
Most professional render smoothing machines operate at approximately 110 rpm with a 390 mm disc. This speed provides sufficient rotational force to level and compress the render without generating excessive heat or tearing the surface. Variable-speed units allow operators to reduce rpm for delicate substrates or increase it for stubborn high spots during basecoat preparation. On thin-coat silicone topcoats, sticking to the standard rotation speed produces the most consistent grain pattern across the elevation.
Does the machine perform reliably in cool or damp UK conditions?
The mechanical performance of the machine itself is not affected by typical UK weather, but the render's response to floating is. Cooler and damper conditions extend the leather-hard window from the typical 15–30 minutes up to 30–45 minutes, and very cold or freezing conditions take render application outside its working range entirely. The floating timing window depends on the render's set state — not the machine's operating temperature — so working to the substrate's temperature and humidity guidance is what determines a clean result regardless of the season.
Can a power float completely replace manual finishing?
On large uninterrupted panels, mechanical floating produces a more consistent result than hand-trowelling and covers the area fast enough to maintain a wet edge in UK conditions. Manual sponge floats remain the better tool for reveals, narrow spandrels, and intricate architectural detailing where the 390 mm disc cannot access cleanly. Most professional teams use both methods on every project — the machine for field areas, hand sponges for the detail zones — and the result is consistently better than either approach used in isolation.
What dust and PPE considerations apply when using the abrasive discs?
Grit and stripping discs generate construction dust that requires respiratory protection and adequate ventilation under current HSE site-safety guidance. On EPS roughing the dust loading is lower; on paint stripping over older masonry it is significantly higher and may include silica or lead-paint risks on pre-1970s substrates. Confirming the substrate composition and matching PPE accordingly is the standard discipline for this stage of work — a half-mask respirator rated FFP3 with eye protection covers the routine case, with full enclosure ventilation added where the substrate analysis indicates elevated risk.