
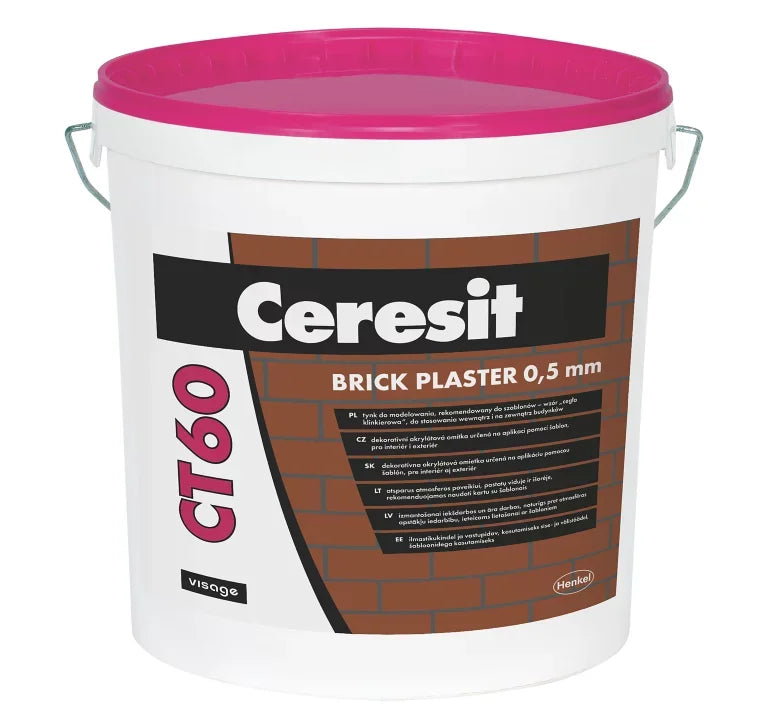

Description
Stencilled clinker brick on a rendered wall is a two-material job: the stencil sets the pattern, Ceresit CT60 Visage fills it, and the mortar line is the colour of the primer underneath. Renders World holds this grade in the stencil and stamp render range as the fine 0.5 mm acrylic made for stencil work.
Where Ceresit CT60 Visage Fits on Stencilled Brick and Stone Walls
Ceresit CT60 Visage is a ready-mixed acrylic decorative plaster with a declared consumption of 1.5–2.0 kg/m² at roughly 1 mm stencil depth, laid through clinker-brick stencils to build a brick-effect facade. The data sheet places it in three settings.
- Facades within Ceresit Ceretherm ETICS build-ups on expanded polystyrene boards, applied onto a mesh-reinforced layer of CT 80, CT 85 or ZU that is more than three days old and primed.
- Solid mineral substrates: concrete over three months old and cement or cement-lime renders over 28 days old, in both cases at moisture of 4% or less.
- Interiors only: gypsum plaster below 1% moisture, plus chipboard, gypsum-fibre and plasterboard, and sound existing paint coatings with good adhesion.
The stencil is what makes the grain choice matter. At 0.5 mm the material fills a template crisply and releases cleanly, which is why the sheet recommends Ceresit CT60 Visage for clinker-brick and natural-stone patterns and leaves the coarser textured plasters in the same family to plain elevations.
Why Specifiers Choose This Stencil-Grade Acrylic Plaster
- Texture comes from the trowel, immediately: the surface is finished by smoothing with a steel trowel straight after laying, so the pattern depends on the stencil and not on a second product or a sealer coat.
- Water absorption class W2 under EN 15824, with the sheet also declaring uptake below 0.5 kg/m² after 24 hours under ETAG 004 and rain resistance after roughly 24 hours.
- Vapour class V2 under EN 15824, the band of 0.14 ≤ Sd < 1.4 m, so moisture in the wall still moves outward through the finish instead of being sealed behind it.
- BioProtect formulation: Ceresit states protection against fungal, mould and algal colonisation, which on a mortar-jointed pattern with many shaded edges is where growth would otherwise start.
- Twelve Visage shades plus the full Colours of Nature palette, with adhesion declared at 0.6 MPa to EN 15824 and interlayer adhesion after ageing at 0.08 MPa or above under ETAG 004.
Declared Technical Data From the Ceresit Sheet
| Parameter | Declared value |
|---|---|
| Pack | 25 kg bucket |
| Grain | 0.5 mm |
| Consumption | 1.5–2.0 kg/m² at ~1 mm stencil depth |
| Base | synthetic resin dispersion, mineral fillers |
| Density | ~1.8 g/cm³ |
| Application temperature | +5 °C to +25 °C, air and substrate |
| Relative humidity | below 80% |
| Skinning time | ~15 min |
| Rain resistance | after ~24 h |
| Water absorption | class W2, 0.5 ≥ w > 0.1 kg/m²h⁰·⁵ (EN 15824) |
| Vapour permeability | class V2, 0.14 ≤ Sd < 1.4 m (EN 15824) |
| Adhesion | 0.6 MPa (EN 15824) |
| Thermal conductivity | λ = 0.61 W/(m·K) (EN 15824) |
| Shelf life | 18 months from production, frost-free |
| Declaration of performance | No. 00288, EN 15824 |
Coverage follows the consumption line, not the pack label: at the heavier rate, 25 kg ÷ 2.0 kg/m² = about 12.5 m² from one bucket of Ceresit CT60 Visage. Order against that figure, because a deeper stencil template consumes more material than the sheet's nominal 1 mm.
The λ value of 0.61 W/(m·K) belongs to the render as a finish, so it plays no part in a wall's thermal performance — that work is done by the insulation layer beneath, and any U-value is a calculation on the whole build-up, never a property of this coat.
How to Apply It Over Clinker-Brick Stencils
Stir the bucket thoroughly first, adjusting consistency to site conditions with a small quantity of clean water only, and never with other plasters, pigments, resins or binders. Rust-prone tools and containers stay off the job.
- Stencil only what will be rendered now: position the template to the agreed pattern and press it down firmly, a rubber roller being the reliable way to stop material creeping underneath.
- Lay the render with a steel trowel held at an angle, spreading evenly to the stencil edges across the taped area.
- Smooth immediately to form the texture, since the finish is created at once by trowelling and not by a later pass. Machine application is also permitted by the sheet.
- Lift the stencils once the render has taken its initial set, and discard each one after use — a template that has already been peeled is never reapplied to another area.
- Break work at the end of a stencil, resuming from that marked point, and keep adjoining working areas joined wet-on-wet.
The 15-minute skinning time is the figure that sizes each panel: it is short, so brief the crew to stencil, lay, smooth and lift in a rhythm instead of taping out a whole elevation first. Never mist the surface with water. The guide to wood and brick stencils for render covers pattern layout and template handling, and the concrete-effect render application guide carries the trowel technique shared across the range.
How to Prime the Substrate and Colour the Mortar Joints
| Substrate | Age and moisture | Priming route |
|---|---|---|
| Concrete | over 3 months, moisture ≤ 4% | CT 16 quartz primer |
| Cement and cement-lime render | over 28 days, moisture ≤ 4% | CT 16 quartz primer |
| Mesh-reinforced layer, CT 80 / CT 85 / ZU | over 3 days | CT 16 quartz primer |
| Gypsum plaster (internal) | moisture below 1% | CT 17, then CT 16 |
| Boards and sound paint (internal) | fixed per board maker's instructions | CT 17, then CT 16 |
Absorbent substrates take CT 17 first and CT 16 no sooner than two hours later. Level hollows and chipped areas first with CT 29 filler on traditional renders and concrete, and strip weak layers and elastic, lime or glue-bound paint films completely instead of priming over them.
Here is the detail that decides how the finished wall reads: the mortar joint takes its colour from the CT 16 quartz primer, because the primer is what remains visible between the stencilled bricks. Ceresit names seven joint shades from the Colours of Nature palette — Etna 1, Etna 5, Nebraska 3, Kalahari 1, Savanne 4, Colorado 4 and Texas 5. Renders World stocks the quartz-primer side of the exterior render primers range, so the joint colour is chosen at the same time as the brick colour.
Do not confuse that primer with a tone-matched base for the Atlas concrete- and wood-effect products: Atlas Base Coat Paint serves those renders, whereas Ceresit CT60 Visage names CT 16 as its own priming mass and CT 17 as the consolidating pre-primer.
Installer Notes on Batches, Sun and Scaffold Cover
- One batch number per plane: buy each elevation together and check the number printed on every bucket.
- Staff the scaffold to the wall: uniform structure depends on having enough hands on each lift to keep the wet-on-wet joins moving.
- Keep off strongly sunlit walls, with scaffold sheeting used as a matter of course during insulation work.
- Protect until fully dry from direct sun, rain and strong wind, which is what preserves both the colour and the crispness of the joint lines.
- Wash tools and fresh splashes with water; cured residue is removed mechanically.
What the Certificates Cover, and at Which Scope
Reaction to fire on Ceresit CT60 Visage is a system classification, tested on an assembled build-up, and the render alone carries no class. The sheet declares B-s1,d0 in the Ceresit Ceretherm Visage and Ceretherm Universal EPS systems, and A2-s1,d0 in Ceretherm Universal MW, the mineral-wool system. Quote the class with the system name attached, and take the stricter B-s1,d0 as the figure that applies to the Visage build-up this render belongs to.
- Product level: Declaration of Performance No. 00288 under EN 15824 for external renders on organic binders, which is where W2, V2, 0.6 MPa adhesion and λ 0.61 W/(m·K) come from.
- System level: the sheet names European Technical Assessment ETA 11/0395 for Ceretherm Visage, alongside 13/0535 Universal EPS, 13/0807 Universal XPS, 14/0127 Universal MW and 09/0026 CC Wool Classic.
- Impact resistance category II under ETAG 004 as declared on the sheet, at system scope and not product scope.
For a UK specification, ask Renders World for the current version of whichever document the project relies on before the build-up is fixed, since assessments are reissued and the certified scope is the assembly, not the bucket.
Specifying It, and the One Limit to Check First
Specify Ceresit CT60 Visage where the design wants masonry pattern and the wall needs a low-absorption, vapour-open finish. Three things settle at quotation stage, before a colour is agreed with the client.
- Light reflectance: the sheet asks for HBW 20 or above on full facades and sends anything below that to Ceresit's technical department.
- Dark shades: intense colours belong on architectural details, not on whole elevations.
- Stencil set: London brick and Boston brick are the two templates stocked alongside it, and the pattern is built from them.
Where the elevation calls for fair-faced concrete or a timber grain instead of masonry pattern, those are different products with their own sheets — the decorative render range sets the three routes side by side, and the guide to sealers for concrete-effect renders covers the tinted sealer stage the timber route needs.
FAQ — Primer, Conditions, Interiors and Renovation
- Primer and joint colour · site conditions · interior use · refreshing the finish years later.
Which primer does it need, and why does the colour matter?
CT 16 quartz primer, applied to every substrate in the sheet, with CT 17 first on absorbent or gypsum backgrounds. Its colour is not cosmetic: the primer forms the visible mortar joint between the stencilled bricks, which is why seven Colours of Nature shades are recommended for that role.
What conditions does application need?
Dry weather with air and substrate between +5 °C and +25 °C and relative humidity below 80%, and a wall out of strong sun. Surface skinning begins in about 15 minutes and rain resistance arrives after roughly 24 hours, so panel sizes stay small and the work is sheltered until it has dried.
Can it be used inside?
Yes, on gypsum plaster below 1% moisture, on chipboard, gypsum-fibre and plasterboard, and on sound, well-adhered paint coatings, each primed with CT 17 followed by CT 16. Ventilate the room until the odour has gone before handing it back into use, and make sure any area subject to lasting damp has its sealing layers in place first.
How is the finish refreshed years later?
By overpainting, which the sheet gives as the renovation route for Ceresit CT60 Visage: Ceresit CT 42 acrylic, CT 48 silicone or CT 49 nanosilicone paint. That keeps the stencilled pattern and its joint lines intact while restoring colour, so a tired elevation is a repaint and not a strip-back.
Technical Documentation