
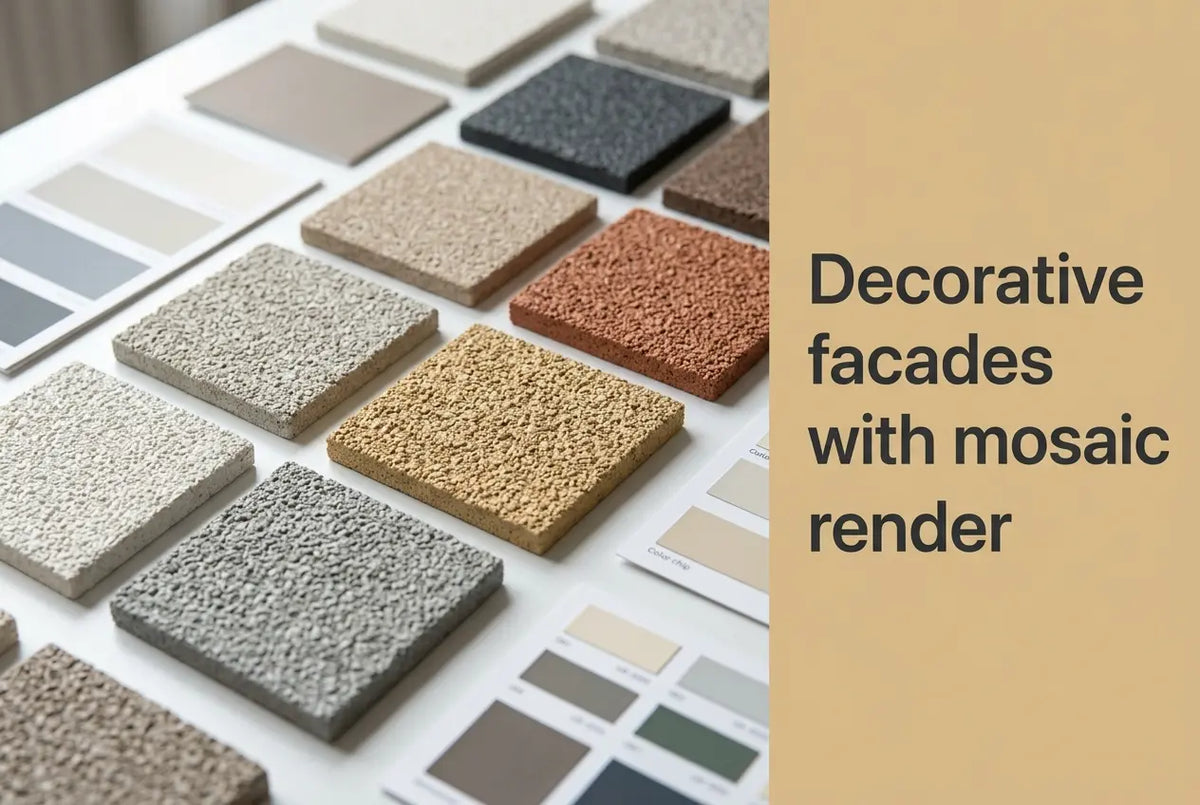
A mosaic feature panel is one of the few facade decisions that is an aesthetic choice and a scoped technical one at the same time, because the manufacturer names the places the material belongs. Everything below comes from the Ceresit CT 177 data sheet and the Ceresit CT 16 primer sheet, both fetched this session, alongside the two packs held in the Renders World mosaic render collection.
What this page owns is the design decision — where a mosaic zone belongs on an elevation, how light or dark it can go, and what to settle before the order is placed. The trowel work, the DPC junction and the full plinth sequence belong to the application guidance held on the collection page itself.
What Is Driving Mosaic Render Into Feature Zones on UK Homes
Decorative facades with mosaic render UK designers are specifying in 2026 rest on a single document: the Ceresit CT 177 data sheet, which scopes this 1.0–1.6 mm coloured quartz finish to plinths, balustrades and window and door jambs outdoors. That list is broader than the plinth alone, and it is the reason feature panels have a defensible basis rather than a stylistic one.
The material behaves unlike a painted surface, and the sheet is specific about why. The binders are described as transparent resins and the fillers as coloured quartz grits, so what the eye reads is the stone itself seen through a clear matrix rather than a pigment layer sitting on top. The sheet characterises the result as low-absorbing, resistant to atmospheric conditions and to scrubbing, with high impact strength, and able to bridge hair-like cracks already present in the substrate.
Two consequences follow for anyone planning a mixed-texture elevation. The surface holds up in the zones people actually touch, which is why mosaic render design ideas tend to cluster around entrances and openings. And because the aggregate is graded between 1.0 and 1.6 mm, the panel carries genuine texture at close range — the quality that gives a feature zone visual weight against a smooth neighbouring finish.
Where the CT 177 Sheet Allows a Mosaic Feature to Go
Design freedom on this product is real but bounded, and the boundaries are printed rather than inferred. The table sets out every location the sheet names, indoors and out, so a scheme can be drawn against the document instead of against a mood board.
| Where the feature sits | Inside or outside | What the CT 177 sheet states |
|---|---|---|
| Plinths and base-of-wall bands | Outside | Recommended for surfaces which become quickly dirty |
| Balustrades | Outside | Named in the same outdoor recommendation |
| Window and door jambs | Outside | Named outdoors — reveals and entrance returns sit here |
| Entrances, corridors and staircases | Inside | Recommended for walls exposed to abrasion and dirt |
| Intense dark colours on a Ceretherm insulated facade | Outside | Limited to small areas, e.g. plinths or architectural details |
The interior row is the one most UK design writing overlooks. A hallway, stair core or lobby wall that takes daily contact is a documented CT 177 location, which makes an internal feature panel a straightforward extension of an external scheme rather than an experiment.
Outdoors, the practical reading is that mosaic works best as punctuation. A band at plinth height, a run of reveals, a return beside a front door — these are the zones the sheet supports directly, and a smooth silicone render across the main elevations is the natural partner above them. Contrast between the two textures is what makes each one read as intentional.
Which Substrates Take a Mosaic Panel, and Which Stay Indoors
Substrate is where an attractive scheme becomes a buildable one, and the sheet is unusually precise. Every listed substrate is primed with CT 16 quartz primer before the mosaic goes on — absorbent or not — and several are permitted indoors only.
- Cement and cement-lime plasters: over 28 days old, primed with CT 16. The mainstream outdoor route.
- Concrete: over three months old with moisture content at or below 4%, primed with CT 16.
- Mesh-reinforced basecoat layers: made with Ceresit ZU, CT 85, CT 190 or CT 100 mortar and over three days old — the standard insulated build-up. CT 87 mortars are allowed from two days.
- Gypsum substrates, chipboards over 19 mm, plasterboard and fibre gypsum board: inside buildings only, primed first with CT 17 and then CT 16.
- Existing paint coatings: inside buildings only, and only where the coating is strong and well adhered.
That last line settles a question that comes up on almost every renovation enquiry. An existing painted external wall is not a listed CT 177 substrate, so a painted elevation is brought back to a sound mineral surface — or given a fresh reinforced basecoat — before a feature panel is planned onto it. Knowing that at design stage is what keeps the idea and the programme aligned.
The primer step repays attention for a purely visual reason. The CT 16 sheet recommends using it in a colour corresponding to the render, applied in one even layer at 0.3–0.5 kg/m² with a drying time of around three hours, between +5 °C and +25 °C at humidity below 80%. Because the mosaic binder is transparent, a tinted key coat is what stops a grey basecoat reading faintly through the finished panel.
Choosing Light or Dark: How the HBW ≥ 20 Recommendation Shapes a Scheme
Colour depth on this product is a documented parameter rather than a free choice, and working with it produces better-composed facades anyway. For the durability of the facade and to prevent excessive heating of its surface, Ceresit recommends using CT 177 with a light reflection coefficient HBW of 20 or above.
Below that figure the sheet asks for an individual consultation with the Ceresit technical department, so that the appropriate thermal insulation system can be selected. Separately, where intense dark colours are used as the facade layer of a Ceresit Ceretherm insulation system, their use is limited to small areas such as plinths or architectural details.
Read together, those two lines point at exactly the design approach that looks best. Deep charcoals and near-blacks earn their place on a door surround, a reveal set or a plinth band, framed by a lighter smooth render across the broad elevations — a composition that satisfies the document and the eye at once. The published CT 177 shade range sits with the manufacturer, and Ceresit publishes the current palette; the Renders World trade desk confirms which shades are available before a panel is committed to.
One application condition belongs beside the colour decision. The sheet advises against applying the material on walls exposed to strong sunlight and asks that the completed rendering be protected from drying too quickly, so a south-facing feature panel is best programmed for a shaded part of the day.
Plan the Panel and the Batch Before Ordering
Three habits separate a feature panel that looks composed from one that looks placed, and only the third comes from the data sheet.
- Mock the zone up in tape first. Low-tack masking tape on the existing wall shows how the proportion reads from the kerb, the path and the neighbouring elevation. Adjustments at the tape stage cost nothing.
- View a sample in three lights. Graded quartz behaves differently in morning, midday and evening light, and a physical sample held against the actual wall tells you more than any screen image. Fixed materials already on the building — brick, stone cills, slate, timber — are the reference points worth harmonising with.
- Order a single plane in one batch. The sheet is explicit that material used on one plane should carry the same production batch number, so the whole panel is measured and ordered together rather than topped up later.
Two more sheet instructions are worth knowing before the scaffold comes down, because both look like defects and are not. Fresh CT 177 has a milky colour that disappears as it dries, and after prolonged contact with water the milkiness can temporarily return until the surface dries again. The finished rendering is protected with nets or tarpaulins until it has completely hardened, and resistance to rain arrives after approximately three days, with application carried out in dry conditions between +10 °C and +25 °C at relative humidity below 80%.
The sheet also asks that the plaster not be used in areas exposed to long-lasting moisture, and that it not be mixed with other resins, plasters, dyes or binders. A feature panel sited clear of standing water and specified as supplied is one that performs the way the document describes.
Key Takeaway: The CT 177 sheet names the zones — plinths, balustrades, window and door jambs outdoors, and abrasion-prone walls indoors — and asks for HBW ≥ 20 with intense dark shades kept to small areas on insulated facades. Design inside those lines and the panel is both striking and specified.
Order Mosaic Render for a Feature Zone
Both packs are the same 1.0–1.6 mm coloured quartz material, and the sheet covers the 25 kg and 10 kg buckets together, so pack choice is about the size of the zone and nothing else. Renders World lists the Ceresit CT 177 mosaic render 25 kg at £75.00 per bucket and the 10 kg bucket at £37.50, both read in GBP from the product pages in August 2026, with no VAT figure displayed alongside them. Coverage per bucket is confirmed on the product pages, where the yield is published against the pack.
Measure the panel, add for edges and corners, and place the whole plane as one order so the batch number carries across it. A tinted CT 16 key coat goes on the list at the same time, since the mosaic cannot be applied until the primer has completely dried. The full render build-up at Renders World holds the primer and the smooth render for the elevations above, and the beads that terminate the two finishes cleanly against each other go on the same order.
That sequence — zone, colour depth, substrate, batch — is what separates decorative facades with mosaic render UK homeowners genuinely admire from panels that were simply placed. Renders World can confirm shade availability and lead times against a specific scheme before anything is committed.
Written by Mariusz Saja. Technically reviewed by Renders World Team. Last reviewed Aug 2026.
FAQ — Design Choices, Substrates and Upkeep for Mosaic Feature Panels
Can mosaic render be used across a whole elevation, or only on feature zones?
The sheet recommends CT 177 outdoors for plinths, balustrades and window and door jambs, and where intense dark colours are used as the facade layer of a Ceretherm system it limits them to small areas such as plinths or architectural details. Lighter shades at HBW 20 or above are not restricted in that sentence, but the recommendations point clearly towards selective placement — which is also where the material looks strongest, framed by a smooth finish above.
Can a mosaic panel go onto an existing painted wall?
Paint coatings appear on the substrate list for interiors only, and only where the coating is strong and well adhered. For an external feature panel, the route is a sound mineral substrate — cement or cement-lime plaster over 28 days, concrete over three months at 4% moisture or less, or a mesh-reinforced basecoat over three days — primed with CT 16. Establishing that at design stage keeps the scheme deliverable.
Is an indoor mosaic feature wall a legitimate use?
Yes, and it is one the sheet supports directly, recommending CT 177 for walls exposed to abrasion and dirt inside buildings such as entrances, corridors and staircases. Interior gypsum, plasterboard and chipboard over 19 mm are all listed, primed first with CT 17 and then with CT 16. A hallway or stair core is a good place to continue an external palette indoors.
Are dark aggregate shades a safe choice for a south-facing panel?
Ceresit recommends a light reflection coefficient of HBW 20 or above for the durability of the facade, and advises consulting its technical department where a shade falls below that so the right insulation system is selected. Keeping deep shades to small features such as reveals, surrounds and plinth bands is both the documented approach and the one that produces the most composed elevation.
How is a mosaic feature panel kept looking well?
The sheet describes the surface as low-absorbing, easy to keep clean and resistant to scrubbing, so routine care is a gentle wash rather than a refinish. No sheet read for this page states a service life, a repainting cycle or a cleaning interval, so none is quoted here. Shaded panels that eventually pick up biological growth are handled with a product intended for renders, applied to a surface that tolerates cleaning well.