

Description
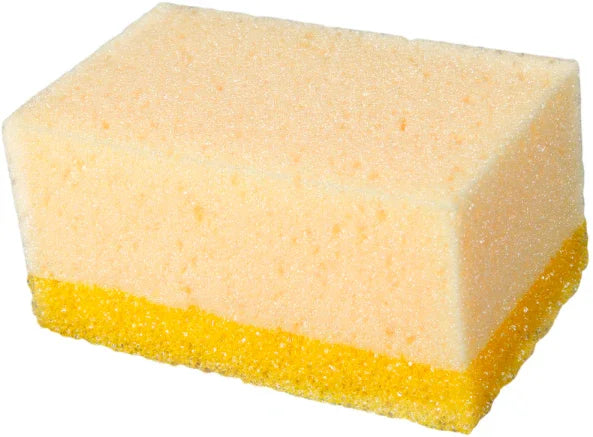
The INSTAR double tile sponge, code 195-2560, is a two-sided block made for cleaning tiles after grouting: one side is small-pore sponge, the other large-pore sponge. Renders World stocks it in the range of finishing sponges, pads and power floats.
Double Tile Sponge: What INSTAR States
| Property | Value |
|---|---|
| Maker and code | INSTAR 195-2560 |
| Size in the product table and on the product card | 165 × 100 × 85 mm |
| Size in the product description | 165 × 100 × 80 mm |
| Construction | Small-pore side and large-pore side, glued |
| Weight | 0.050 kg |
| Barcode (EAN) | 5902846401285 |
| Trade carton | 18 sponges |
| Made for | Washing and cleaning tiles after grouting |
The barcode on the shop listing is the same 5902846401285, so the sponge in the box is the one INSTAR describes. The maker publishes no pore size, density or absorbency figure, so the table stops at what the maker prints.
Two Sides, Two Jobs After Grouting
INSTAR gives each side of this double tile sponge its own task.
- Large-pore side: carries water away and removes the heavier dirt, excess grout and mortar residue from ceramic, porcelain stoneware and glazed tiles.
- Small-pore side: absorbs water well and is the side the maker names for the final wash, collecting fine residue without leaving streaks or water marks and keeping splashing down.
The maker states that neither side scratches the tile face. When washing can start is set by the grout, not by the sponge, so the instructions on the grout bag decide when the sponge goes on. Grouts, sealants and tile silicones for the same job are in the grout and silicone range.
85 mm or 80 mm: Ordering by Code
INSTAR prints two depths for this sponge. The product table and the product card give 165 × 100 × 85 mm; the description on the same product page, like the Renders World title, gives 165 × 100 × 80 mm. The maker does not say which figure is nominal.
- What this means for an order: treat the depth as approximate and do not choose between this sponge and another on a few millimetres.
- What identifies it exactly: code 195-2560 and barcode 5902846401285. Quote either one when ordering or comparing a quote.
How It Differs From the Single-Sided INSTAR Sponge
The same collection also carries the INSTAR tiling sponge 170 x 110 x 60 mm, code 10-0322, from the same maker.
- This sponge, 195-2560: two sides, small pores and large pores, 165 × 100 × 85 mm by the product table.
- 10-0322: one large-pore sponge, 170 × 110 × 60 mm.
Both are made for cleaning tiles after grouting. The difference on paper is the second, small-pore side, which INSTAR assigns to the final wash; the maker gives no figure that ranks one sponge above the other.
Made for Tiles, Not for Render
Every line INSTAR publishes for the double tile sponge is about tiles and grout. No use on render, plaster or a textured facade is named.
- Buy it for: tiling work and washing tiled faces after grouting, on site or in a home renovation.
- Look elsewhere for: machine floating of render, where the same collection carries the power float with its discs and pads.
Handling and Safety
The product card for this sponge lists one hazard and three kinds of protection.
- Hazard: the sponge can ignite in an open flame.
- Protection: protective clothing, hand protection and eye protection.
- Instructions: the card states that the tool needs no operating instructions.
Ordering, Delivery and Returns
Renders World processes orders the same day when the stock is there.
- Ordering by code: code 195-2560 with barcode 5902846401285 identifies this double tile sponge exactly.
- Delivery: quoted by the team after the order, always kerbside. Small parcels up to 25 kg go next day.
- Collection: from the counter at Unit 9A, Central Trading Estate, Southampton SO14 5JP, Monday to Friday 7am to 5pm and Saturday 7am to 12pm.
Goods bought directly from Renders World can go back within 14 days in their original condition; special orders and promotion purchases are excluded.
FAQ
What size is the INSTAR 195-2560 sponge?
The product table and the product card give 165 × 100 × 85 mm; the product description gives 165 × 100 × 80 mm. Order it by code or barcode rather than by the millimetres.
Which side is for the final wash?
The small-pore side. INSTAR describes it as highly absorbent and names it for the final wash of the tiles; the large-pore side takes the heavier grout and mortar residue.
Is it made for render?
No. The maker describes it for tiles after grouting only and names no use on render or plaster.
How is it different from the INSTAR 10-0322 sponge?
10-0322 is a single large-pore sponge of 170 × 110 × 60 mm. This one adds a small-pore side for the final wash.
What is it made of?
The product card lists two sponge layers joined with adhesive. It does not name the sponge material or publish a pore or density figure.
Technical Documentation