On any rendered UK wall, rainwater runs down to the lowest edge — and if that edge is not finished with a proper drip detail, water can track back under the render and lead to damp, staining, and algae growth within the first few wet seasons. A bellcast bead solves this problem by forming a projecting PVC drip profile at the base of the render, typically at damp-proof course (DPC) level, breaking the capillary path and directing moisture cleanly away from the wall. This guide walks through the full installer process: selecting the correct profile depth, positioning the bead at DPC level, embedding it into the basecoat, and sequencing it with adjacent profiles — start at the bellcast bead range at Renders World to identify the right depth for your render build-up.
Bellcast detailing is one element of a broader window, door, and termination strategy — the full profile sequencing across openings is covered in the render detailing around windows and doors guide. This article focuses specifically on the bellcast bead itself and the water-protection function that earns it a place at every horizontal termination.
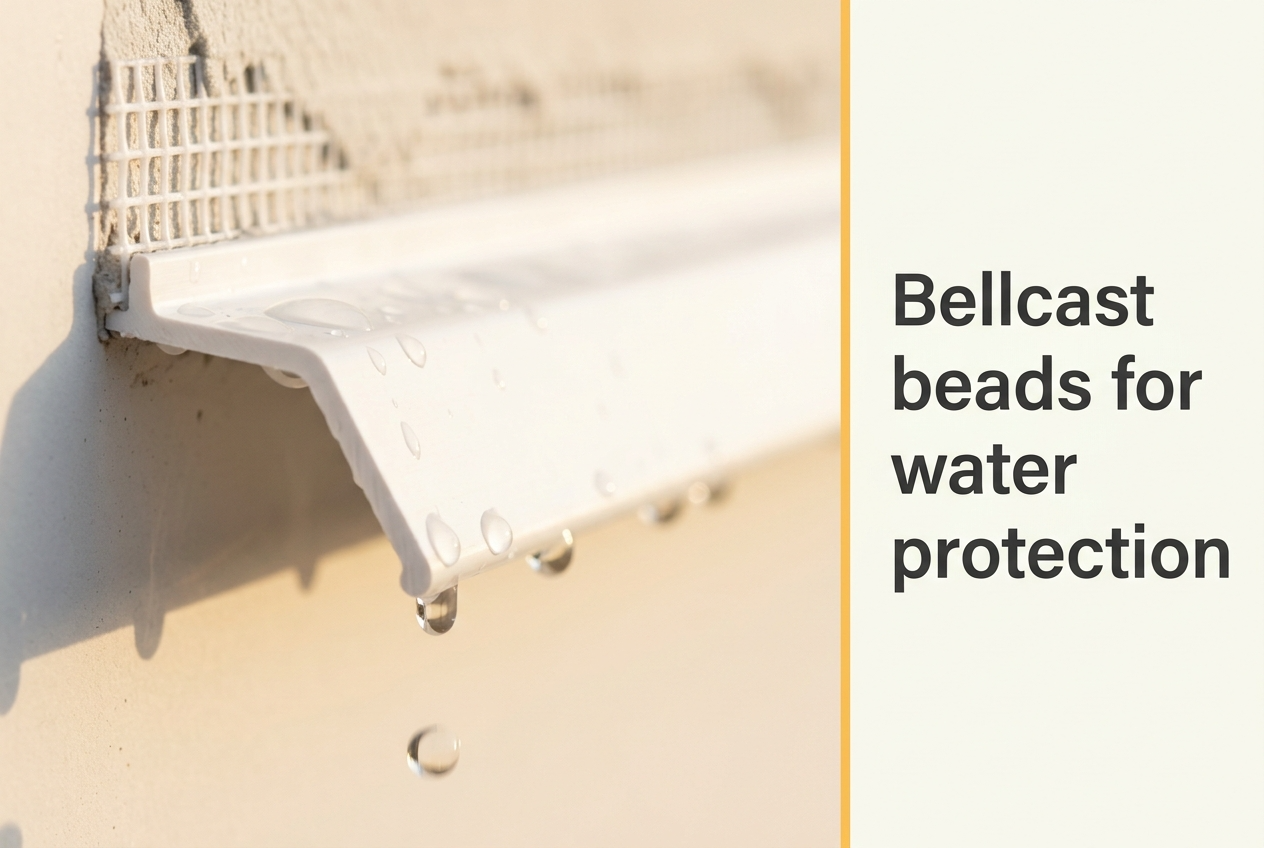
Why Bellcast Beads Are Essential for UK Facades
The UK receives between 800 mm and 1,400 mm of annual rainfall depending on region, and many exposed elevations face sustained wind-driven rain classified as "severe" or "very severe" under BS EN 13914-1. If a render finish terminates at DPC level without a proper drip detail, rainwater can curl back under the bottom edge and repeatedly wet the wall below — over time, this produces damp, staining, efflorescence, and algae growth in the exact zone least visible to the householder until the damage is well established.
A bellcast bead creates a physical interruption in that water path. The bell-shaped profile angles outward at approximately 115°, so water hitting the bead runs along the curved drip lip and falls vertically away from the substrate rather than tracking back underneath. In EWI (External Wall Insulation) systems the detail is equally critical above plinth insulation boards, where the bead forms a moisture break between the rendered facade zone and the below-DPC zone that is most exposed to ground-contact moisture and splash-back.
- Compliance pathway: Under BS EN 13914-1 and NHBC Standards Chapter 6.11, a proper drip detail is expected at horizontal render terminations. In practice this normally means specifying a bellcast bead or another approved drip profile, subject to current guidance and the project's warranty arrangements.
- Mechanical reinforcement: Ground-level impacts from foot traffic, lawnmowers, and hard landscaping concentrate at the base of the wall — the rigid PVC profile absorbs shock and distributes stress along its length, preventing the chipping that would otherwise expose raw substrate to further water ingress.
- Cost efficiency: At approximately £1.20–£1.40 per linear metre at trade pricing, the bellcast bead is one of the lowest-cost components in any render system, yet it prevents some of the most persistent and expensive moisture-related facade failures in the UK climate.
How to Choose the Right Profile Depth for Your Render System
Bellcast beads are available in two standard depths — 10 mm and 15 mm — and the choice depends on the total render build-up at the termination edge. Selecting the wrong profile means either an insufficient drip nose that allows water to curl back along the underside (too shallow) or a proud, exposed edge that attracts mechanical damage from ladders and garden equipment (too deep). BS EN 13914-1 specifies non-corrosive profile materials for external rendering, which in practice means PVC or stainless steel — galvanised steel is generally avoided because oxide staining can bleed through pale render finishes after a few wet seasons.
| Render System | Typical Build-Up | Recommended Bead | Standard Length |
|---|---|---|---|
| Thin-coat silicone / silicate-silicone | 4–10 mm | 10 mm PVC | 3.0 m |
| Machine-applied monocouche | 12–15 mm | 15 mm PVC | 2.5 m |
| Traditional sand-and-cement (2-coat) | 14–18 mm | 15 mm PVC | 2.5 m |
| EWI system above plinth zone | 4–10 mm (render only) | 10 mm PVC | 3.0 m |
| Mixed retrofit (plinth + upper facade) | varies by zone | 10 mm + 15 mm split | both lengths |
To calculate your requirement, measure the total linear run of all horizontal terminations — DPC level, window heads, door heads, and any horizontal material transitions — in metres, divide by the bead length (3.0 m for 10 mm or 2.5 m for 15 mm), and add 10% for cuts, joints, and waste. On a typical three-bedroom semi-detached house, this usually works out to 15–20 linear metres across all elevations.
Step-by-Step Bellcast Bead Installation Technique
Get the height right first: a bellcast bead only works properly if it sits high enough to throw rain clear of paving splash-back, but low enough to protect the bottom edge of the render. In practice that means fixing the bead at DPC level or at least 150 mm above finished ground level, whichever is higher. Set too low, paving splash-back repeatedly wets and dirties the drip edge; set too high, an exposed band of masonry below the render remains vulnerable to moisture and weathering. Installers consistently report that the elevations that age best are the ones where this datum was struck before the scaffold went up.
- Strike a level datum line. Use a laser level or chalk line to mark the bellcast position across the full elevation. Confirm the line sits at least 150 mm above the final planned patio or driveway level — not simply the current ground level, which may later be raised by paving, topsoil, or landscaping works. Cross-check against the DPC height marked on architectural drawings.
- Prepare the substrate. Remove loose mortar, dust, and efflorescence from the fixing zone using a stiff brush. On painted or sealed substrates, key the surface with coarse sandpaper to improve adhesive bond. The substrate must be dry and free of frost.
- Apply adhesive mortar. Trowel a continuous bed of basecoat adhesive along the marked line using a 10 mm notched trowel. A continuous bed is preferable to spot dabs because it prevents the bead from rocking during render application and eliminates voids where moisture could collect behind the profile. The EPS adhesive and basecoat layer products in the Renders World range are the standard specification for this bedding.
- Embed the bead. Align the upper wing with the chalk line, ensuring the drip lip projects outward and downward. Press firmly into the adhesive bed. On blockwork substrates without EWI, non-corrosive mechanical fixings may be added at 300–700 mm centres for additional security — but avoid mechanical fixings through insulation boards on EWI systems, as these create thermal bridge points.
- Join consecutive lengths. Butt-join bead lengths tightly with no gap wider than 1 mm. Overlap any mesh wings by a minimum of 100 mm, bedding the overlap into fresh mortar — the full mesh discipline is covered in the fibreglass mesh overlap guide. Stagger joints at least 300 mm away from window and door openings. At external corners, mitre-cut both beads at 45° for a clean intersection.
- Allow the adhesive to set. Do not apply render over the bead until the adhesive has achieved initial set — typically 24 hours depending on temperature and humidity. Premature rendering can dislodge the bead or compress the adhesive bed unevenly, telegraphing the error through to the finished surface.
Once the bead is secure, render is applied down to the upper wing of the bellcast. The render should finish flush with the top of the bead, not overshooting the drip lip, which would bridge the drip detail and negate its water-deflection function. After the final coat has firmed up but before it fully cures, run a sharp blade along the underside of the drip lip to remove any render that has crept past the edge — this 30-second step per linear metre prevents the most common bellcast failure on UK sites.
Key Takeaway: Always clean the underside of the bellcast drip lip before the render cures — a render bridge as narrow as 2 mm is enough to defeat the capillary break and channel water back onto the substrate, causing the same damp and staining problems the bead was installed to prevent.
Pro Tips for Avoiding Common Bellcast Failures
The most frequent bellcast failure is not a product defect — it is render overshooting the drip lip. When the float coat or topcoat extends even 2–3 mm beyond the bell-shaped edge, water follows that bridge back to the substrate, and the entire drip detail becomes non-functional. Cleaning the underside of the drip lip after the final coat is the single most impactful quality-control step in the whole bellcast installation sequence, and it takes less time than reading this paragraph.
A second common error is installing bellcast beads after corner beads and stop beads have already been embedded. Bellcasts must be fixed first to establish the lower datum line, because the basecoat layers at the junction between horizontal and vertical profiles need to be tied together wet-on-wet. If the bellcast is fitted after adjacent profiles are set, the cold joint between them cracks within the first thermal cycle and opens a direct water path into the substrate. The correct sequence on any UK facade is bellcast first, then stop beads, then corner beads — the specific corner-bead installation method is detailed in the corner bead installation guide.
- Avoid mechanical fixings through EWI: On insulated facades, nails and screws through the insulation board create thermal bridges and moisture paths — use adhesive mortar only, priming the substrate and mixing the mortar slightly stiffer if the bead will not hold in cold weather.
- Detail movement joints correctly: At designed movement joints, leave an 8–14 mm gap between bead noses and bridge the gap with a cover bead fixed on render dabs — mastic-only joints degrade rapidly under UK UV and moisture exposure and are not an acceptable substitute.
- Account for temperature: PVC bellcast beads become more brittle below 5 °C and more flexible above 25 °C, so store indoors overnight during winter installations and avoid overtightening any mechanical fixings in summer that could deform the profile.
Coordinating Bellcast Beads With Other Render Profiles
A bellcast bead does not work on its own — it needs to be coordinated with the other render profiles on the elevation so the full facade has clean terminations, reinforced edges, and continuous water protection. At DPC level the bellcast terminates the render above the plinth zone; above window and door openings an identical profile deflects water away from frame seals; at vertical abutments and soffit lines, stop beads create clean, straight terminations without a drip feature; and at external wall corners, PVC or aluminium corner beads reinforce the vertical arris. Each profile type serves a distinct function, but all must be coordinated in a planned installation sequence to prevent cold joints and ensure continuous moisture protection around every opening and transition.
| Profile Type | Primary Function | Installation Sequence |
|---|---|---|
| Bellcast bead | Horizontal drip edge — water deflection at DPC and above openings | First (establishes lower datum) |
| Stop bead | Clean vertical / soffit termination — no drip feature | Second (aligns to bellcast datum) |
| Corner bead | Vertical arris reinforcement — impact protection at corners | Third (terminates above bellcast line) |
| Reveal bead | Waterproof seal at window/door jambs — gasket-integrated | Concurrent with corner beads |
The standard detail for corner-to-bellcast junctions is to cut the corner bead to finish 5 mm above the bellcast nose, allowing the render to close the gap without creating a mechanical stress point where two rigid profiles intersect. On EWI systems, the mesh wing of the bellcast should overlap the field reinforcement layer by at least 100 mm, tying the horizontal and vertical mesh zones together to distribute thermal and mechanical stresses across the entire lower elevation. Compliance with current NHBC and BS EN 13914-1 guidance depends on the complete profile system — not just individual components — being specified, sequenced, and installed as an integrated assembly.
Written by Mariusz Saja. Technically reviewed by Rafał Wyrzykowski. Last reviewed Jun 2026.
FAQ — Bellcast Position, Cost, and Specification
Where exactly should bellcast beads be installed on a rendered wall?
Bellcast beads are installed at every horizontal point where the render coat terminates and rainwater must be deflected away from the substrate. The most common position is at DPC level — typically a minimum of 150 mm above finished ground level — where the rendered facade meets the plinth zone. They are also specified above window heads and door frames to prevent water running into frame seals, and at horizontal transitions between rendered surfaces and adjacent cladding materials such as timber boarding, brick, or exposed stone.
How much do bellcast beads cost per linear metre?
PVC bellcast beads typically cost between £1.20 and £1.40 per linear metre at trade pricing, making them one of the lowest-cost components in the entire render system. A 10 mm profile at 3.0 m length retails at approximately £3.50, while a 15 mm profile at 2.5 m length costs around £3.10. For a typical three-bedroom semi-detached house requiring 15–20 linear metres of bellcast across all elevations, total material cost usually sits between £20 and £35. Approximate figures shown are working trade ranges subject to current pricing.
Does omitting a bellcast bead affect render-system warranties?
Usually yes — which is why bellcast beads should be treated as a standard part of the build-up rather than an optional extra. Current NHBC guidance, BS EN 13914-1, and most render-system manufacturers expect a bellcast or equivalent drip detail at horizontal terminations above the DPC and above openings. If this detail is omitted, manufacturers can reject moisture-related warranty claims. The safest approach is to specify and install the correct profile from the start: the bead itself costs under £35 for a typical house, while the disruption and repair costs that follow moisture failure at the base of the render are significantly higher. The full warranty position is always subject to the individual manufacturer's current scheme rules.
Can bellcast beads be painted to match a coloured render finish?
Yes. The high-impact PVC used in modern bellcast beads readily accepts exterior silicone masonry paint. Ensure the surface is completely clean and a suitable plastic primer has been applied first to prevent the paint from flaking. On projects using factory-tinted silicone render, the bellcast nose is typically concealed beneath the topcoat during normal application, so a separate painting step is only necessary where a deliberately exposed drip edge forms part of the architectural detail.
How do bellcast beads differ from stop beads?
Both profiles terminate the render coat at a defined edge, but they serve different functions. A bellcast bead features a curved, bell-shaped nose that projects away from the wall to create a drip edge — its primary purpose is water deflection at horizontal terminations. A stop bead has a flat or squared nose that creates a clean, straight termination without a drip feature, used at vertical abutments, render-to-cladding junctions, and soffit lines where water shedding is not the primary concern. Most rendered elevations use both profiles in combination rather than choosing one over the other.
Where to Order the Right Bellcast Profile for Your Project
Bellcast beads are among the simplest and least expensive components in any rendering system, yet they prevent some of the most persistent and costly moisture problems that UK facades face. Correct selection — 10 mm for thin-coat and EWI systems, 15 mm for monocouche and traditional sand-cement renders — accurate positioning at a minimum of 150 mm above finished ground level, continuous adhesive bedding, and disciplined drip-lip cleaning after the final coat ensure a weatherproof finish line that protects the substrate for the full lifetime of the render. Browse the full bellcast bead range at Renders World to match the profile depth to your render build-up, then measure the full horizontal run and add 10% for cuts and waste before ordering — both 10 mm and 15 mm rolls are available for next-day UK delivery alongside the matching basecoat, corner beads, and stop beads for the complete profile system.